Easy Sweet and Sour Beef Recipe- Deliciously Quick
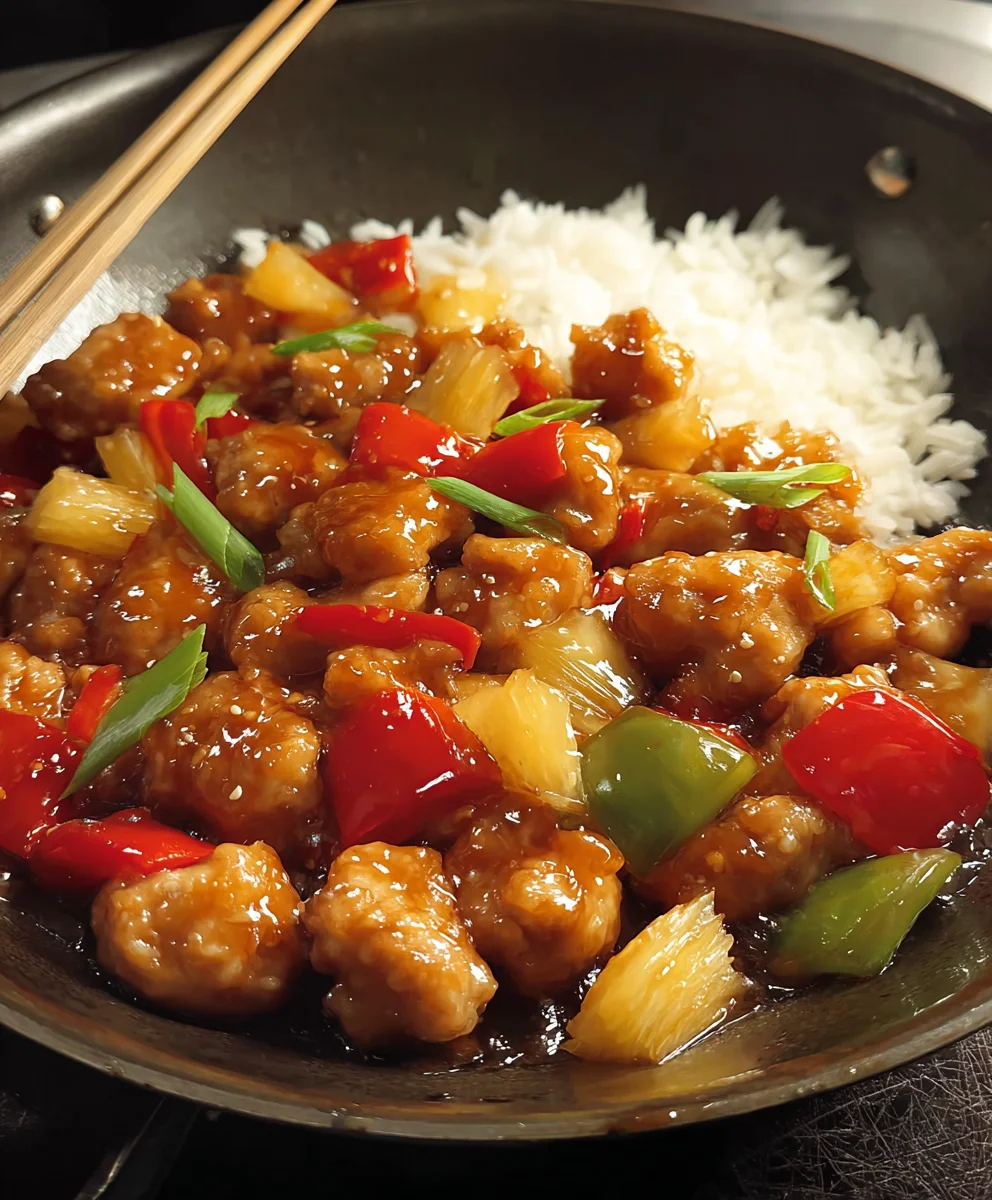
Sweet and Sour Chicken is a timeless classic for a reason, and today we’re diving deep into what makes this dish such a universally beloved favorite. That irresistible balance of tangy vinegar, luscious sweetness from pineapple and brown sugar, and the satisfying crunch of perfectly fried chicken pieces is pure culinary magic. It’s the kind of meal that brings smiles to faces at family dinners, quick weeknight escapes from boring routines, and even celebratory gatherings. What truly sets an exceptional Sweet and Sour Chicken apart is the depth of flavor achieved through a well-balanced sauce and the tender, juicy chicken that’s coated in a crispy, golden batter. We’re going to unlock the secrets to creating this restaurant-quality version right in your own kitchen, ensuring every bite is a burst of vibrant taste and delightful texture.
Ingredients:
- 3 tablespoons cane or white vinegar (rice or apple cider vinegar can be substituted)
- 1/4 cup ketchup
- 1/4 cup granulated sugar
- 1/2 cup water
- 1/4 teaspoon red pepper flakes (optional, for a touch of heat)
- 1 tablespoon soy sauce
- 2 teaspoons cornstarch (for the sauce)
- 12 ounces boneless, skinless chicken thighs or breasts, cut into 1-inch pieces
- 1 egg white, lightly beaten
- 1/4 cup all-purpose flour
- 1/4 cup cornstarch (for the chicken coating)
- 1 teaspoon baking powder
- Salt and freshly ground black pepper to taste
- 1 medium white or yellow onion, cut into 1-inch pieces
- 1/2 red bell pepper (approximately 1 cup), cut into 1-inch pieces
Preparing the Sweet and Sour Sauce
The foundation of any great Sweet and Sour Chicken is a balanced sauce. We’ll start by creating this vibrant mixture. In a small saucepan, combine the cane or white vinegar, ketchup, granulated sugar, water, and soy sauce. If you enjoy a little warmth, this is where you’ll add the optional red pepper flakes for a subtle kick that complements the sweetness. Whisk these ingredients together until the sugar is dissolved.
Now, we need to thicken this delicious sauce. In a separate small bowl, whisk together the 2 teaspoons of cornstarch with a tablespoon or two of the sauce mixture you just prepared, until it forms a smooth slurry with no lumps. This is crucial for preventing a lumpy sauce. Pour this cornstarch slurry into the saucepan with the rest of the sauce ingredients. Place the saucepan over medium heat and stir constantly. You’ll notice the sauce begin extract to thicken as it heats up. Continue to cook and stir for about 1 to 2 minutes after it starts to thicken, ensuring it’s smooth and glossy. Once it reaches your desired consistency, remove the sauce from the heat and set it aside. It will continue to thicken slightly as it cools.
Coating and Frying the Chicken
Next, we prepare the chicken for its crispy transformation. Take your 1-inch chicken pieces and place them in a medium bowl. Add the lightly beaten egg white to the chicken. Toss the chicken pieces gently to ensure each piece is evenly coated with the egg white. This helps the dry coating adhere beautifully.
In another shallow bowl or on a plate, combine the all-purpose flour, 1/4 cup of cornstarch, baking powder, and salt and pepper to taste. Whisk these dry ingredients together thoroughly. Now, add the egg-white-coated chicken pieces to this dry mixture. Toss the chicken again, making sure each piece is generously and evenly coated with the flour and cornstarch mixture. The baking powder contributes to a lighter, crispier coating.
Heat about 1 to 1.5 inches of neutral cooking oil (like vegetable or canola oil) in a large skillet or wok over medium-high heat. You want the oil to be hot enough that a small drop of the coating mixture sizzles immediately when added. Carefully add the coated chicken pieces to the hot oil, working in batches if necessary to avoid overcrowding the pan. Overcrowding will cause the chicken to steam rather than fry, resulting in a less crispy texture. Fry the chicken for about 4-5 minutes per batch, flipping occasionally, until it’s golden brown and cooked through. Use a slotted spoon to remove the fried chicken from the oil and place it on a wire rack set over a baking sheet to drain any excess oil. This step is key to maintaining that delightful crunch.
Stir-Frying the Vegetables
While the chicken is draining, we’ll quickly cook the vegetables to retain their vibrant color and slight crispness. You can either reuse the same skillet if you have enough oil for stir-frying, or if you’ve removed most of the oil from frying the chicken, add about 1-2 tablespoons of fresh oil to the skillet and heat it over medium-high heat. Add the chopped white or yellow onion and the red bell pepper pieces to the hot oil. Stir-fry the vegetables for about 2-3 minutes, just until they start to soften but still have a pleasant bite to them. We don’t want them to become mushy; a little crunch is ideal.
Combining Everything
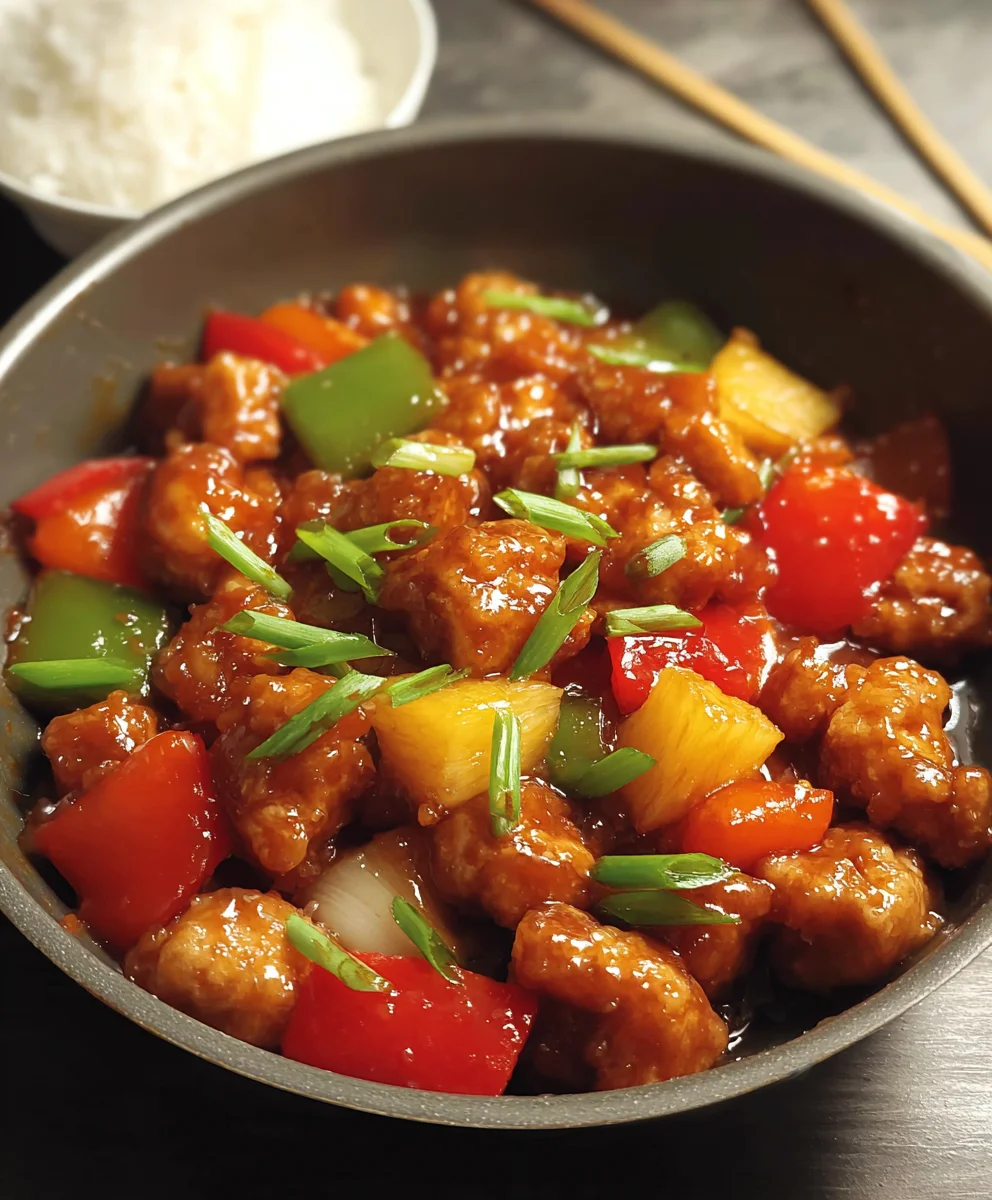
This is the final, exciting stage where all our components come together. Once the vegetables are tender-crisp, pour your prepared sweet and sour sauce over them in the skillet. Stir gently to coat the vegetables evenly. Let the sauce simmer for about 30 seconds to a minute, allowing it to meld with the vegetables. Then, add the crispy fried chicken pieces back into the skillet with the sauced vegetables. Gently toss everything together until the chicken is thoroughly coated in the glossy sweet and sour sauce. Make sure each piece of chicken glistens. Serve immediately over steamed rice for a complete and satisfying meal.
Conclusion:
Congratulations on mastering the art of making delicious Sweet and Sour Chicken! This recipe delivers a delightful balance of tangy, sweet, and savory flavors that are sure to impress. The crispy coating on the chicken, combined with the vibrant, glossy sauce and fresh vegetables, creates a truly satisfying dish.
I hope you enjoyed making and savoring this classic takeout favorite right in your own kitchen. The aroma alone is enough to make your mouth water! Remember, this Sweet and Sour Chicken is incredibly versatile. For a complete meal, serve it hot over fluffy steamed white or brown rice. It also pairs wonderfully with noodles or even quinoa for a healthier twist.
Don’t be afraid to experiment! Feel free to swap out the vegetables for your favorites – bell peppers of any color, broccoli florets, or snow peas all work beautifully. For a spicier kick, add a pinch of red pepper flakes to the sauce. This Sweet and Sour Chicken is a fantastic base for your culinary creativity. Now go forth and enjoy your homemade masterpiece!
Frequently Asked Questions:
Q: How can I make the chicken extra crispy?
A: For the crispiest chicken, ensure the oil is at the correct temperature (around 350-375°F or 175-190°C) before frying. Don’t overcrowd the pan; fry in batches to maintain oil temperature. Also, allow the coated chicken to rest for a few minutes before frying, giving the coating time to set.
Q: Can I make the sauce ahead of time?
A: Yes, absolutely! The sweet and sour sauce can be prepared a day or two in advance and stored in an airtight container in the refrigerator. Simply reheat it gently on the stovetop before tossing with your cooked chicken and vegetables.
Q: What kind of chicken is best for this recipe?
A: Boneless, skinless chicken thighs are often preferred for their tenderness and ability to stay moist during cooking. However, chicken breast will also work well. Just be mindful not to overcook it to prevent it from becoming dry.
Easy Sweet and Sour Beef Recipe- Deliciously Quick
A quick and delicious recipe for sweet and sour beef with crispy coated beef, vibrant vegetables, and a glossy, tangy sauce, perfect for a weeknight meal.
Ingredients
-
3 tablespoons cane or white vinegar
-
1/4 cup ketchup
-
1/4 cup granulated sugar
-
1/2 cup water
-
1/4 teaspoon red pepper flakes (optional)
-
1 tablespoon soy sauce
-
2 teaspoons cornstarch (for the sauce)
-
12 ounces boneless beef sirloin or flank steak, cut into 1-inch pieces
-
1 egg white, lightly beaten
-
1/4 cup all-purpose flour
-
1/4 cup cornstarch (for the beef coating)
-
1 teaspoon baking powder
-
Salt and freshly ground black pepper to taste
-
1 medium white or yellow onion, cut into 1-inch pieces
-
1/2 red bell pepper (approximately 1 cup), cut into 1-inch pieces
Instructions
-
Step 1
Prepare the sweet and sour sauce: In a small saucepan, combine vinegar, ketchup, sugar, water, and soy sauce. Add red pepper flakes if desired. Whisk until sugar is dissolved. In a separate bowl, whisk 2 teaspoons cornstarch with a little sauce mixture to form a slurry, then add to the saucepan. Heat over medium heat, stirring constantly, until thickened and glossy (about 1-2 minutes after thickening). Set aside. -
Step 2
Coat the beef: Place beef pieces in a bowl and toss with the beaten egg white to coat evenly. In another shallow bowl, combine flour, 1/4 cup cornstarch, baking powder, salt, and pepper. Toss the egg-white-coated beef in this dry mixture until well-coated. -
Step 3
Fry the beef: Heat 1-1.5 inches of neutral oil in a skillet or wok over medium-high heat until hot. Carefully add coated beef pieces in batches, avoiding overcrowding. Fry for 4-5 minutes per batch, flipping occasionally, until golden brown and cooked through. Drain on a wire rack. -
Step 4
Stir-fry the vegetables: In the same skillet (with 1-2 tablespoons of fresh oil if needed) over medium-high heat, stir-fry onion and red bell pepper pieces for 2-3 minutes until tender-crisp. -
Step 5
Combine everything: Pour the prepared sweet and sour sauce over the vegetables in the skillet. Stir to coat and simmer for 30 seconds to a minute. Add the crispy fried beef back into the skillet and toss gently to coat thoroughly with the sauce. Serve immediately over steamed rice.
Important Information
Nutrition Facts (Per Serving)
It is important to consider this information as approximate and not to use it as definitive health advice.
Allergy Information
Please check ingredients for potential allergens and consult a health professional if in doubt.