Easy Buster Bar Ice Cream Dessert Recipe
The Buster Bar Ice Cream Dessert is a nostalgic trip back to childhood summers, a treat that’s as beloved for its iconic layers as it is for the sheer joy it brings. Remember those classic ice cream truck bars with their irresistible chocolate shell and creamy center? This homemade version captures all that magic and elevates it, creating a dessert that’s not only incredibly delicious but also surprisingly achievable in your own kitchen. We all have those sweet memories tied to a particular flavor, and for many, the Buster Bar is right at the top of that list. What makes this particular Buster Bar Ice Cream Dessert so special is its perfect balance of textures and temperatures: the crisp, cool chocolate shell giving way to a lusciously smooth ice cream, often with hints of caramel or nuts, depending on your preferred variation. It’s the ultimate indulgence, perfect for sharing (or not!) on a warm afternoon.
Why You’ll Fall in Love with This Buster Bar Ice Cream Dessert
Get ready for a blast from the past with a delightful homemade twist!
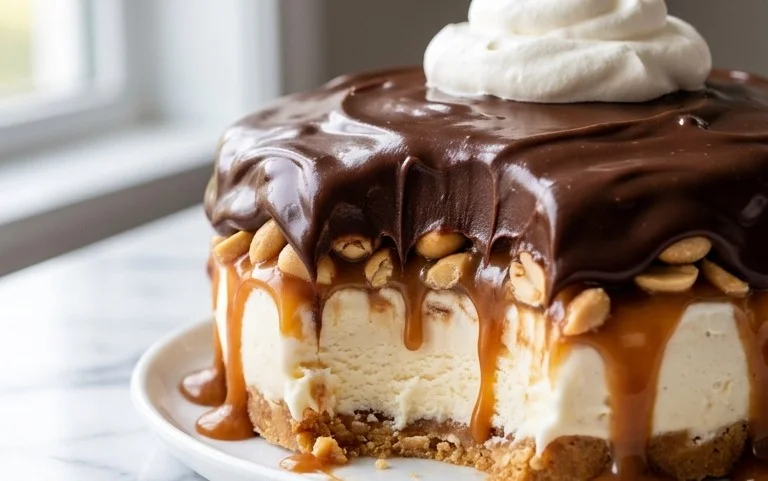
Buster Bar Ice Cream Dessert
There’s something incredibly nostalgic and satisfying about a classic ice cream bar. This Buster Bar Ice Cream Dessert is my homemade tribute to those beloved frozen treats, but with an extra layer of decadent flavor and irresistible texture. It’s a simple yet show-stopping dessert that will have everyone asking for the recipe. Imagin extracte a crunchy, chocolaty base, creamy vanilla ice cream, a rich peanut butter layer, and a final, glossy chocolate shell. This dessert is perfect for parties, a special family treat, or just when you need a serious pick-me-up.
Ingredients:
Crust and Ice Cream Layer
The foundation of our Buster Bar dessert is a delightful no-bake crust made from crushed Oreo cookies and butter. This creates a rich, chocolatey base that perfectly complements the creamy ice cream. For the best results, ensure your vanilla ice cream is softened, not completely melted. You want it spreadable but still firm enough to hold its shape. Leaving it on the counter for about 15-20 minutes usually does the trick. If you’re in a hurry, you can gently microwave it in 10-second intervals, being very careful not to overdo it.
Step 1: Prepare the Oreo Crust
First things first, let’s get that delicious Oreo crust ready. Take your entire package of Oreo cookies (cream filling and all!) and crush them. You can do this by placing them in a zip-top bag and using a rolling pin or the bottom of a heavy pan to smash them into fine crum extractbs. Alternatively, a food processor works wonders for achieving a consistent texture. In a medium bowl, combine the crushed Oreo cookies with the 1/2 cup of melted butter. Stir everything together until the cookie crum extractbs are evenly moistened and clump together when pressed. This mixture will be the base of our dessert. Press this mixture evenly into the bottom of a 9×13 inch baking dish. You can use the bottom of a measuring cup or a flat-bottomed glass to help compact the crust firmly and create an even layer. Once pressed, place the dish in the freezer for at least 30 minutes to allow the crust to firm up. This chilling step is crucial for preventing the crust from mixing with the ice cream layer when you add it.
Step 2: Layer the Softened Ice Cream
Once your Oreo crust is nicely chilled and firm, it’s time to add the star of the show: vanilla ice cream. Retrieve your softened vanilla ice cream from the freezer. Carefully spread the softened ice cream evenly over the chilled Oreo crust. Try to create a smooth, even layer, reaching all the corners of the baking dish. If your ice cream is still a little too firm, let it sit at room temperature for a few more minutes, but be watchful. The goal is to have it spreadable but not drippy. Once the ice cream layer is smooth and even, return the baking dish to the freezer. This layer needs to freeze solid, which will likely take at least 2-3 hours, but overnight is even better for optimal firmness.
Peanut Butter Fudge Topping
Now for the truly decadent part – the peanut butter fudge topping and the chocolate shell. This fudge is incredibly rich and satisfying, and the Spanish peanuts add a wonderful crunch and a classic Buster Bar flavor. Making this topping is surprisingly straightforward, and the results are incredibly rewarding. It’s a cooked fudge, which gives it a beautiful smooth texture once it sets.
Step 3: Cook the Peanut Butter Fudge
While your ice cream is freezing solid, let’s get the peanut butter fudge ready. In a medium saucepan, combine the 2 cups of powdered confectioner’s sugar, the 1 pound of Spanish peanuts (you can leave them whole or roughly chop them if you prefer smaller peanut pieces), and 1/2 cup of butter. Place the saucepan over medium-low heat. Stir the mixture constantly as it begin extracts to melt and combine. You want the butter to melt and the sugar to incorporate with the peanuts. Continue to cook and stir for about 5-7 minutes, or until the mixture starts to thicken slightly and becomes glossy. Be careful not to scorch the sugar. This heated peanut mixture will be poured over the frozen ice cream. Once it looks well combined and slightly thicker, remove it from the heat.
Step 4: Add the Peanut Butter Fudge Layer
Once your vanilla ice cream layer is completely frozen solid (this is key for easy spreading), take the baking dish out of the freezer. Carefully and quickly spread the warm peanut butter fudge mixture evenly over the frozen ice cream. Work swiftly because the cold ice cream will start to freeze the fudge mixture as you spread it. Use an offset spatula or the back of a spoon to create a smooth, even layer. Once the fudge layer is spread, return the baking dish to the freezer for another 30-60 minutes to allow this layer to firm up before adding the chocolate shell. This ensures the fudge layer doesn’t melt into the chocolate.
Chocolate Coating
The final flourish on our Buster Bar Ice Cream Dessert is a luscious, glossy chocolate coating. This simple yet effective ganache-like sauce hardens beautifully on the cold ice cream and fudge, creating that signature crackly chocolate shell that everyone loves. The evaporated milk makes this coating incredibly smooth and rich, giving it a professional finish.
Step 5: Prepare and Pour the Chocolate Shell
Now for the grand finnon-alcoholic ale: the chocolate coating. In a heatproof bowl, combine the 12 ounces of semi-sweet chocolate chips and the 1/2 cup of butter. Place this bowl over a saucepan filled with about an inch of simmering water (making sure the bottom of the bowl doesn’t touch the water). Stir the chocolate and butter mixture gently and continuously until it is completely melted and smooth. Alternatively, you can melt this in the microwave in 30-second intervals, stirring between each interval, until smooth. Once the chocolate is melted, stir in the 12 ounces of evaporated milk. Continue stirring until the mixture is completely combined and has a smooth, glossy sheen. This will create a rich, pourable chocolate sauce. Remove the baking dish with the frozen fudge layer from the freezer. Pour the warm chocolate mixture evenly over the peanut butter fudge layer, spreading it to cover completely. Again, work relatively quickly. Return the dessert to the freezer for at least 1-2 hours, or until the chocolate shell is completely firm. Once firm, you can cut it into bars or squares. For the cleanest cuts, run a knife under hot water and dry it before slicing.
Enjoy your homemade Buster Bar Ice Cream Dessert! It’s a labor of love, but oh-so-worth-it.
Conclusion:
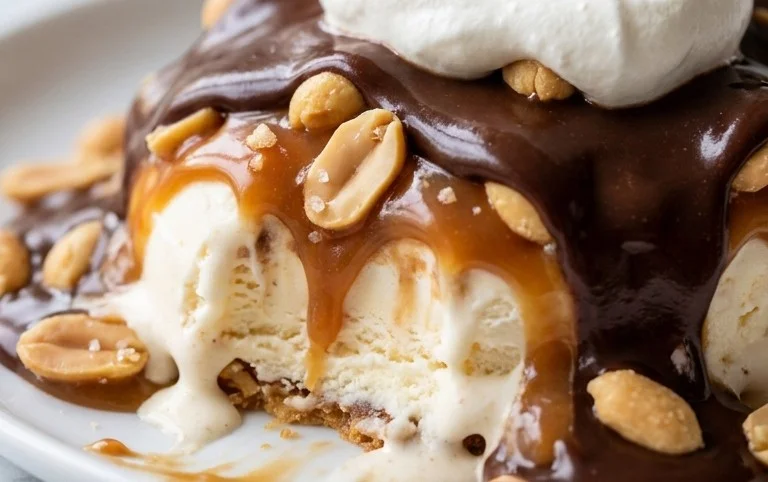
So there you have it – a simple yet incredibly satisfying way to bring the beloved Buster Bar Ice Cream Dessert right into your own kitchen! This recipe is fantastic because it offers that nostalgic, chocolatey, peanut-buttery goodness we all crave, without requiring complex techniques or hard-to-find ingredients. It’s the perfect treat for potlucks, family gatherings, or just a special weeknight indulgence when you need a little pick-me-up. The interplay of the creamy ice cream, crunchy peanuts, and rich chocolate coating is simply divine.
For serving, I love cutting this Buster Bar Ice Cream Dessert into generous squares and serving it directly from the freezer. It’s also wonderful with a drizzle of extra chocolate sauce or a dollop of whipped cream. If you’re feeling adventurous, consider adding a swirl of caramel sauce into the ice cream mixture before freezing, or even incorporating some chopped chocolate cookies for an extra layer of texture. I truly encourage you to give this recipe a try; you won’t be disappointed!
Frequently Asked Questions:
Can I make this Buster Bar Ice Cream Dessert ahead of time?
Absolutely! This dessert is designed to be made ahead. In fact, it needs to freeze for several hours to set properly. It can be stored in the freezer, well-wrapped, for up to a week.
What kind of ice cream is best to use?
A good quality vanilla ice cream is the classic choice and works perfectly as the base for this Buster Bar Ice Cream Dessert. However, feel free to experiment with other flavors you enjoy, like chocolate or even a peanut butter ice cream for an intensified flavor!
Can I omit the peanuts?
Yes, you can definitely omit the peanuts if you have an allergy or simply prefer not to include them. The dessert will still be delicious, though you’ll lose a bit of that signature crunchy texture. You could consider substituting with chopped almonds or even crispy rice cereal for a different kind of crunch.
Buster Bar Ice Cream Dessert
A no-bake ice cream dessert inspired by the classic Buster Bar, featuring a cookie crust, ice cream, peanuts, and a chocolate shell.
Ingredients
-
1 14.3 oz pkg. of Oreo cookies, crushed
-
1/2 C butter, melted
-
1/2 gal. vanilla ice cream, softened
-
1 lb. Spanish peanuts
-
2 C powdered confectioner’s sugar
-
12 oz semi sweet chocolate chips
-
1/2 C butter
-
12 oz evaporated milk
Instructions
-
Step 1
In a bowl, combine the crushed Oreo cookies and 1/2 cup melted butter. Press this mixture into the bottom of a 9×13 inch baking dish. -
Step 2
Spread the softened vanilla ice cream evenly over the cookie crust. -
Step 3
Sprinkle the Spanish peanuts over the ice cream layer. -
Step 4
In a saucepan, melt 1/2 cup butter. Stir in the evaporated milk and powdered confectioner’s sugar until smooth. Bring to a gentle boil over medium heat and cook for 1 minute, stirring constantly. Remove from heat. -
Step 5
Add the semi-sweet chocolate chips to the hot sugar mixture and stir until completely melted and smooth. This creates the chocolate topping. -
Step 6
Pour the chocolate topping evenly over the peanut layer. Drizzle and spread to cover the entire dessert. -
Step 7
Freeze for at least 2 hours, or until firm. Cut into squares and serve.
Important Information
Nutrition Facts (Per Serving)
It is important to consider this information as approximate and not to use it as definitive health advice.
Allergy Information
Please check ingredients for potential allergens and consult a health professional if in doubt.