Cadbury Egg Kiss Cookies- Easy Chocolate Delight
Cadbury Egg Kiss Cookies are more than just a treat; they’re a nostalgic explosion of springtime joy, a beloved Easter tradition for many of us. Imagin extracte biting into a soft, buttery cookie, its edges slightly crisp, giving way to a sweet, melt-in-your-mouth center. The magic truly happens when that iconic Cadbury chocolate melts and melds with the tender cookie, creating a flavor combination that’s simply irresistible. For years, these delightful Cadbury Egg Kiss Cookies have been a staple on Easter dessert tables, not just for their delectable taste, but for the sheer fun of creating them. They’re the perfect bake to get the whole family involved, from the littlest helpers carefully placing the eggs to the seasoned bakers ensuring golden perfection. What makes them so special? It’s the perfect harmony of textures and the unmistakable creamy richness of Cadbury chocolate, all wrapped up in a charming, bite-sized package. Get ready to fall in love with these classic Cadbury Egg Kiss Cookies all over again!

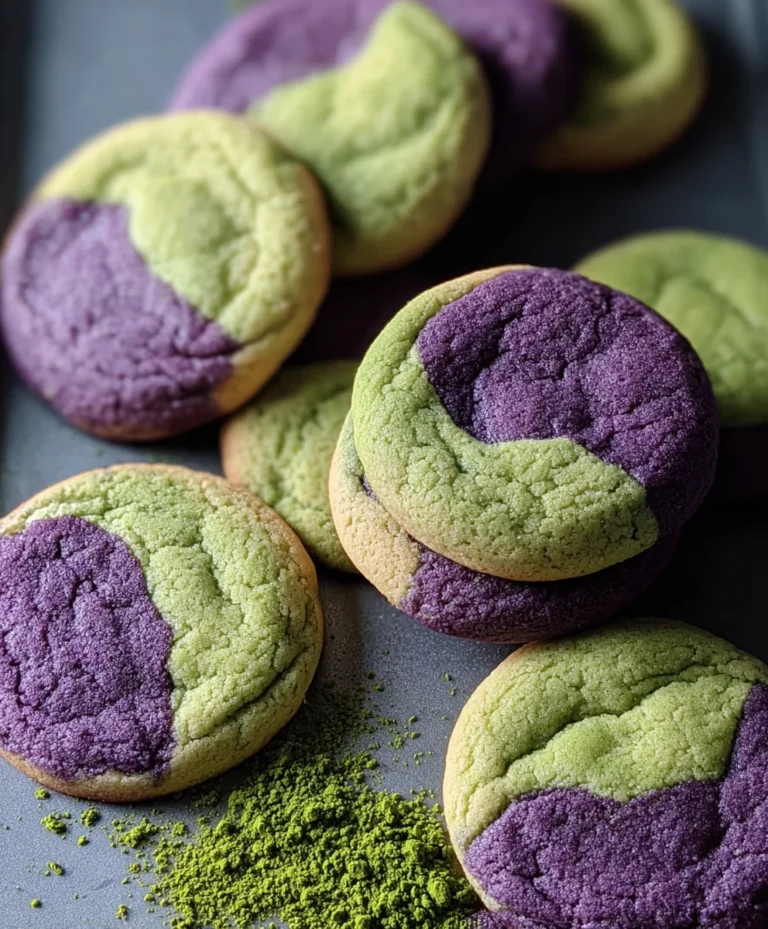
Cadbury Egg Kiss Cookies
Get ready to elevate your cookie game with these delightful Cadbury Egg Kiss Cookies! These aren’t just any cookies; they’re a perfect blend of classic peanut butter goodness and the irresistible, crunchy sweetness of Cadbury Mini Eggs. Imagin extracte a soft, chewy cookie, subtly flavored with peanut butter and vanilla, cradling a vibrant Cadbury Mini Egg, creating a bite that’s both familiar and excitingly new. The slight saltiness of the cookie beautifully complements the rich chocolate and crunchy shell of the Cadbury egg. These cookies are perfect for Easter, spring gatherings, or just whenever you crave a truly special treat. They’re surprisingly easy to make, making them a fantastic project for bakers of all skill levels, and the kids will absolutely love helping to press the Cadbury eggs into the dough.
Ingredients:
Instructions:
Step 1: Creaming the Base
Begin extract by preheating your oven to 350°F (175°C). This ensures that your cookies bake evenly from the moment they go in. Line your baking sheets with parchment paper. This is a crucial step for preventing sticking and making cleanup a breeze. In a large mixing bowl, combine the softened butter, 1/2 cup granulated sugar, and 1/2 cup light brown sugar. Using an electric mixer on medium speed, cream these ingredients together until the mixture is light and fluffy. This process incorporates air, which is key to a tender cookie. Scrape down the sides of the bowl periodically to ensure everything is evenly mixed. Next, beat in the creamy peanut butter until well combined.
Step 2: Adding Wet Ingredients and Dry Ingredients
Once the butter, sugars, and peanut butter are beautifully combined, it’s time to add the wet ingredients. Crack in your large egg and add the 1/2 teaspoon of vanilla extract. Mix on low speed until just combined. Be careful not to overmix at this stage. In a separate medium bowl, whisk together the all-purpose flour, baking soda, and salt. Whisking these dry ingredients together ensures that the leavening agents and salt are evenly distributed throughout the flour, which will lead to consistent cookie rise and flavor. Gradually add the dry ingredients to the wet ingredients, mixing on low speed until just combined and no dry streaks of flour remain. Again, resist the urge to overmix, as this can develop the gluten in the flour, resulting in tough cookies. The dough will be thick and slightly sticky.
Step 3: Shaping and Rolling the Cookies
Now for the fun part! In a shallow dish or on a plate, pour the remaining 1/4 cup of granulated sugar. This sugar coating will give the cookies a lovely, slightly crisp exterior. Take about 1.5 tablespoons of cookie dough and roll it into a ball between your palms. Then, gently roll each dough ball in the reserved granulated sugar, coating it evenly. Place the sugar-coated dough balls about 2 inches apart on your prepared baking sheets. This spacing allows the cookies to spread without touching each other as they bake.
Step 4: The Cadbury Kiss
This is where the magic happens! Using your thumb or the back of a spoon, gently press an indentation into the top of each cookie dough ball. You don’t need to go all the way through; just create a nice well. Now, carefully place one Cadbury Mini Egg into each indentation. Gently press down on the edges of the indentation around the Cadbury egg to help secure it into the dough. This ensures that the egg stays put during baking and creates that signature “kiss” effect. If any of your Cadbury Mini Eggs break, you can still use them – just try to get the chocolate and shell fragments nestled in.
Step 5: Baking and Cooling
Place the baking sheets in your preheated oven and bake for 10-12 minutes, or until the edges of the cookies are lightly golden brown and the centers appear set but still slightly soft. The exact baking time will depend on your oven, so it’s always a good idea to keep an eye on them, especially during the first batch. Overbaking can lead to dry cookies. Once baked, remove the cookies from the oven and let them cool on the baking sheets for 5 minutes. This is important because the cookies are fragile when hot. After 5 minutes, carefully transfer the cookies to a wire rack to cool completely. As the cookies cool, the Cadbury Mini Eggs will soften slightly, creating a delightful gooey center. Enjoy these delightful Cadbury Egg Kiss Cookies with a glass of milk or a cup of tea!

Conclusion:
I hope you’ve enjoyed learning how to make these delightful Cadbury Egg Kiss Cookies! They truly are a showstopper, perfect for Easter celebrations or any time you crave a sweet, chocolatey treat with a fun, festive twist. The combination of a soft, chewy cookie base with the gooey melted Cadbury Egg in the center is simply irresistible. The hint of vanilla and the satisfying crunch of the cookie make each bite a memorable experience.
These cookies are wonderfully versatile! They are fantastic on their own with a glass of cold milk, but they also pair beautifully with a warm cup of coffee or tea. For an extra touch of elegance, consider dusting them with a little powdered sugar or drizzling them with melted white chocolate. If you want to get creative, try adding a pinch of sea salt to the dough for a sweet and salty contrast, or incorporate some chopped nuts for added texture. I wholeheartedly encourage you to give this Cadbury Egg Kiss Cookies recipe a try – I’m confident you’ll love them as much as I do!
Frequently Asked Questions about Cadbury Egg Kiss Cookies:
Q1: Can I make these cookies ahead of time?
Yes, you absolutely can! You can bake the cookies and store them in an airtight container at room temperature for up to 3 days. For longer storage, you can freeze the unbaked dough balls or the baked cookies for up to 3 months. If freezing baked cookies, thaw them at room temperature.
Q2: What if I can’t find Cadbury Mini Eggs?
No problem at all! You can substitute with other similarly sized chocolate eggs or even regular chocolate chips if Cadbury Mini Eggs are unavailable. You might want to slightly chop larger chocolate eggs to get a similar melt. The key is a chocolate that melts nicely into the cookie!
Q3: How do I ensure the Cadbury Egg is gooey and not burnt?
The trick is to partially bake the cookies first. Once the edges are set and lightly golden, press the Cadbury Egg into the center. Continue baking for just a few more minutes until the egg is softened and slightly melted, but not completely burnt. Don’t overbake!
Cadbury Egg Kiss Cookies
Delicious peanut butter cookies with a Cadbury Mini Egg pressed into the center, reminiscent of a classic Hershey’s Kiss.
Ingredients
-
1/2 cup (1 stick) butter, softened
-
1/2 cup granulated sugar
-
1/2 cup light brown sugar
-
1/2 cup creamy peanut butter
-
1 large egg
-
1/2 teaspoon vanilla extract
-
2 cups all-purpose flour
-
1/2 teaspoon baking soda
-
1/4 teaspoon salt
-
1/4 cup granulated sugar (for rolling the cookie dough in)
-
30 Cadbury Mini Eggs
Instructions
-
Step 1
Preheat oven to 375°F (190°C). Line baking sheets with parchment paper. -
Step 2
In a large bowl, cream together the softened butter, granulated sugar, and light brown sugar until light and fluffy. -
Step 3
Beat in the creamy peanut butter, then stir in the egg and vanilla extract until well combined. -
Step 4
In a separate medium bowl, whisk together the all-purpose flour, baking soda, and salt. -
Step 5
Gradually add the dry ingredients to the wet ingredients, mixing until just combined. Do not overmix. -
Step 6
Roll dough into 1-inch balls and then roll each ball in the 1/4 cup of granulated sugar. Place cookies 2 inches apart on the prepared baking sheets. -
Step 7
Bake for 9-11 minutes, or until the edges are lightly golden. Remove from oven and immediately press one Cadbury Mini Egg into the center of each cookie. The residual heat will soften the chocolate slightly. -
Step 8
Let cookies cool on the baking sheets for a few minutes before transferring them to a wire rack to cool completely.
Important Information
Nutrition Facts (Per Serving)
It is important to consider this information as approximate and not to use it as definitive health advice.
Allergy Information
Please check ingredients for potential allergens and consult a health professional if in doubt.