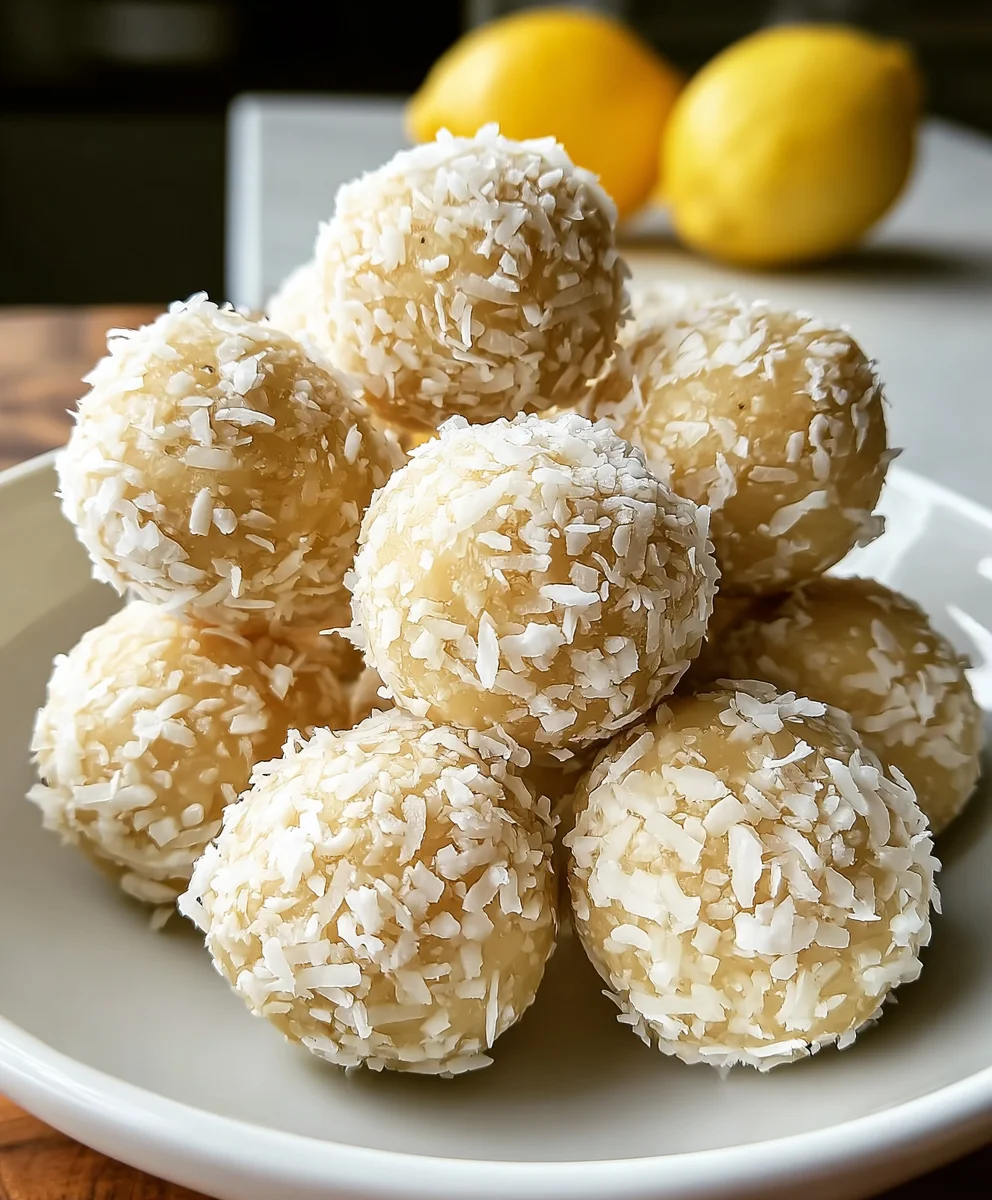
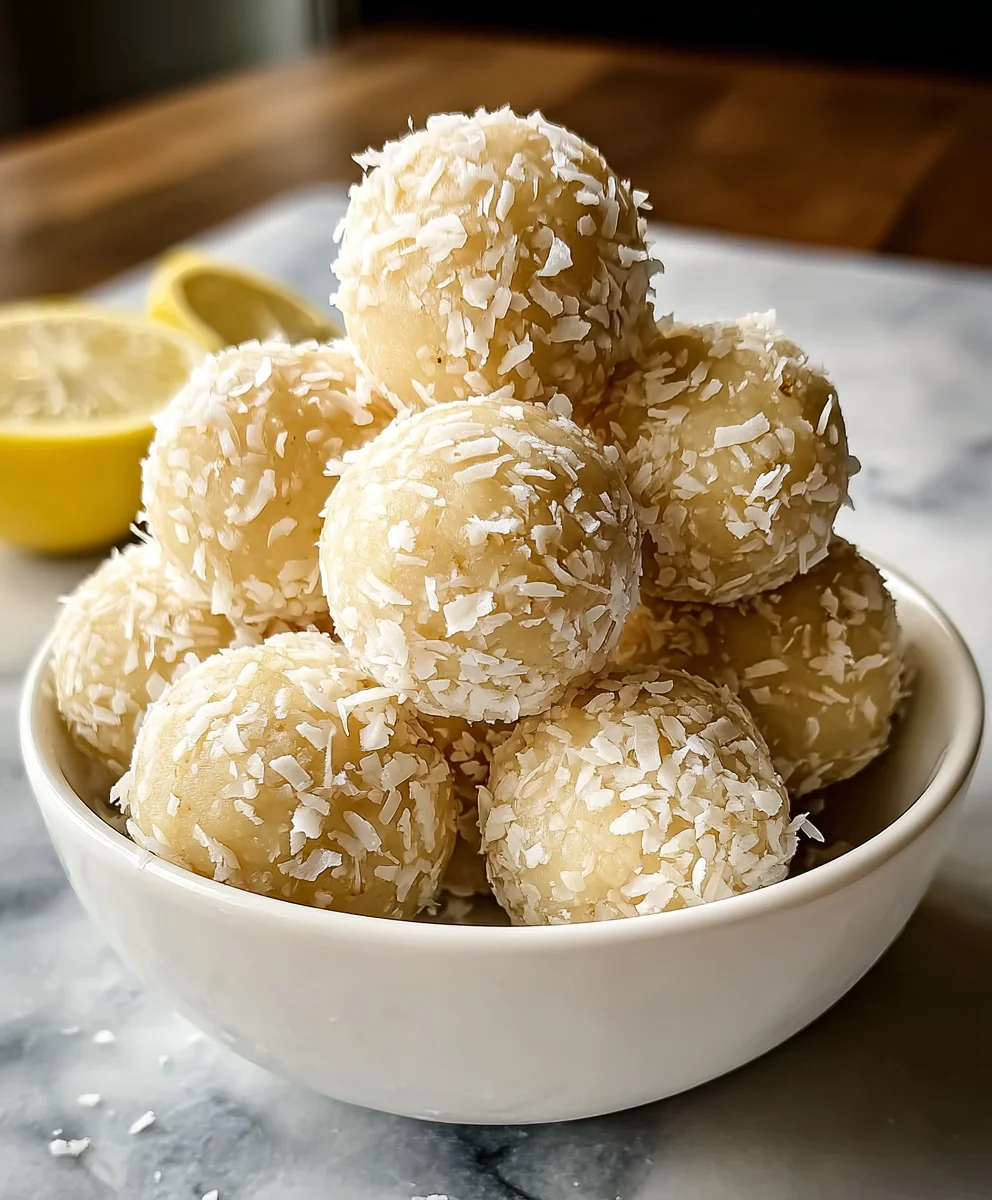
Lemon Coconut Protein Balls-Healthy Energy Bites
Lemon Coconut Protein Balls are the ultimate guilt-free indulgence, perfect for satisfying those sweet cravings while fueling your body. We all know that feeling: the mid-afternoon slump hits, or post-workout hunger pangs kick in, and you reach for something quick. But what if that something could be both incredibly delicious and remarkably good for you? That’s the magic of these delightful treats. They offer a vibrant burst of citrus from the fresh lemon zest, perfectly complemented by the tropical sweetness of shredded coconut, creating a flavor combination that’s simply irresistible. What truly sets these Lemon Coconut Protein Balls apart is their incredible versatility and the power-packed nutritional punch they deliver, thanks to the inclusion of protein. They’re the ideal grab-and-go snack, a fantastic pre- or post-workout boost, or even a healthier dessert option that won’t derail your healthy eating goals. Get ready to whip up a batch of pure, wholesome happiness!
Ingredients:
- 1 cup almond flour
- ½ cup vanilla protein powder
- ¼ cup shredded coconut, plus extra for rolling
- 2 tbsp honey or maple syrup
- 2 tbsp lemon zest
- 2 tbsp lemon juice
- 1 tbsp coconut oil, melted
- 1 tsp vanilla extract
- Pinch of salt
Preparing Your Lemon Coconut Protein Balls
Mixing the Base Ingredients
Let’s begin extract by combining all of our dry ingredients in a medium-sized mixing bowl. Start with the 1 cup of almond flour. This will form the structural base of our protein balls, providing a lovely, slightly nutty texture and healthy fats. Next, add the ½ cup of vanilla protein powder. This is where the “protein” in our Lemon Coconut Protein Balls truly comes into play, making them a fantastic post-workout snack or a satisfying energy boost. For that delightful tropical essence and a touch of chegrape juicess, we’ll add ¼ cup of shredded coconut. If you like a more pronounced coconut flavor and texture, you can even add a touch more here, but remember we’ll be using extra for rolling later. Finally, a small pinch of salt is crucial. Don’t skip this! Salt helps to enhance all the other flavors, balancing the sweetness gin extract bringing out the brightness of the lemon. Whisk these dry ingredients together thoroughly to ensure they are well combined and there are no clumps of protein powder. This step is important for an even flavor distribution in every bite.
Incorporating the Wet Ingredients
Now it’s time to bring our mixture to life with the wet ingredients. In a separate small bowl, combine the liquid sweeteners: 2 tablespoons of honey or maple syrup. Both work wonderfully, offering natural sweetness. Honey will impart a slightly floral note, while maple syrup provides a richer, deeper caramel-like sweetness. Whichever you choose, make sure it’s a liquid consistency for easy blending. Next, we add the star of our flavor profile: 2 tablespoons of lemon zest. Zesting your lemon directly into the bowl will capture the most aromatic oils, giving you that vibrant, fresh lemon punch. Be sure to only zest the yellow part of the peel, avoiding the bitter white pith. To complement the zest and add a lovely tang, we’ll stir in 2 tablespoons of fresh lemon juice. Again, freshly squeezed will always yield the best results. For that smooth, cohesive texture, add 1 tablespoon of coconut oil, melted. Melting the coconut oil makes it easier to incorporate and helps bind the ingredients together. Finally, add 1 teaspoon of vanilla extract to further enhance the sweetness and add another layer of aroma. Pour this liquid mixture over the dry ingredients in your main bowl.
Forming the Dough and Rolling
Once all the ingredients are in the main bowl, it’s time to mix and form our dough. Using a sturdy spoon gin extracta spatula, begin to stir everything together. You’ll notice the mixture will start to come together, becoming a sticky but manageable dough. If it feels too dry and crum extractbly and isn’t holding its shape, you can add a tiny bit more lemon juice or a touch more melted coconut oil, about ½ teaspoon at a time, until it reaches the right consistency. Conversely, if it’s too wet, add a little more almond flour or protein powder. The goal is a dough that you can easily roll into balls without it sticking excessively to your hands. Once your dough is ready, take about a tablespoon of the mixture at a time and roll it between the palms of your hands to form compact balls. Aim for them to be roughly the same size so they bake or set evenly, and so they look uniform when you serve them. This step can be a little sticky, so you can lightly dampen your hands with water or a tiny bit of coconut oil if needed to prevent sticking.
Coating and Chilling
Now for the finishing touches that make these Lemon Coconut Protein Balls extra special! Take your ¼ cup of extra shredded coconut and spread it out onto a shallow plate or a small baking sheet. Gently roll each of the formed protein balls in the shredded coconut, ensuring they are evenly coated. This not only adds a delightful texture and an appealing visual appeal but also enhances the coconut flavor. Once coated, place the finished Lemon Coconut Protein Balls onto a plate or a parchment-lined baking sheet. For the best texture and to allow the flavors to meld beautifully, it’s important to chill them. Cover the plate or baking sheet with plastic wrap or place them in an airtight container. Refrigerate for at least 30 minutes. This chilling period helps the protein balls firm up, making them easier to handle and enjoy. It also allows the ingredients to bind together further, creating a more cohesive and satisfying snack.
Serving and Storing Your Delicious Creations
After chilling, your Lemon Coconut Protein Balls are ready to be enjoyed! They are perfect for a quick breakfast on the go, a pre- or post-workout fuel, or a healthy afternoon treat. You can serve them straight from the refrigerator. Their portability makes them an excellent choice for lunchboxes or to take along on hikes and road trips. To store any leftovers, ensure they are kept in an airtight container in the refrigerator. They will stay fresh for up to a week. If you find you’ve made a larger batch and want to keep them for longer, you can also freeze them. Place them in a single layer on a baking sheet and freeze until solid, then transfer them to a freezer-safe bag or container. They can be stored in the freezer for up to two months. When you’re ready to enjoy frozen balls, simply transfer them to the refrigerator to thaw for a few hours or enjoy them directly from frozen for a colder, firmer treat. These Lemon Coconut Protein Balls are incredibly versatile and a joy to make and eat!
Conclusion:
And there you have it! Your very own batch of delicious and healthy Lemon Coconut Protein Balls, ready to fuel your day. These little powerhouses are not only incredibly easy to make but also incredibly satisfying. The bright zest of lemon perfectly complements the tropical sweetness of coconut, all bound together with the goodness of protein to keep you full and energized. I truly hope you enjoy whipping up and, more importantly, devouring these delightful treats as much as I do. They’re a fantastic addition to your snack repertoire!
For serving suggestions, these Lemon Coconut Protein Balls are perfect right out of the fridge. They make an excellent pre- or post-workout snack, a guilt-free mid-afternoon pick-me-up, or even a delightful addition to your breakfast. They also pair wonderfully with a cup of herbal tea or a glass of almond milk.
Feel free to get creative with variations! You can add a sprinkle of chia seeds for extra omega-3s, a dash of vanilla extract for added depth, or even a few white chocolate chips for a touch of indulgence. If you don’t have almond flour, oat flour can be a good substitute. The possibilities are endless, so have fun experimenting!
Frequently Asked Questions:
Q: How long do these Lemon Coconut Protein Balls last?
A: Stored in an airtight container in the refrigerator, these Lemon Coconut Protein Balls will stay fresh for up to a week. You can also freeze them for longer storage; just let them thaw slightly before enjoying.
Q: Can I make these vegan?
A: Absolutely! To make these Lemon Coconut Protein Balls vegan, ensure you use a plant-based protein powder and a liquid sweetener like maple syrup or agave nectar. All other ingredients are typically vegan-friendly.
Q: My mixture is too dry/wet. What should I do?
A: If your mixture is too dry and crum extractbly, add a teaspoon of liquid at a time (like water, almond milk, or more lemon juice) until it comes together. If it’s too wet, add a little more almond flour or protein powder, a tablespoon at a time, until you reach a workable consistency that holds its shape.
Lemon Coconut Protein Balls-Healthy Energy Bites
Delicious and healthy energy bites made with almond flour, coconut, and lemon for a refreshing boost.
Ingredients
-
1 cup almond flour
-
½ cup vanilla protein powder
-
¼ cup shredded coconut, plus extra for rolling
-
2 tbsp honey or maple syrup
-
2 tbsp lemon zest
-
2 tbsp lemon juice
-
1 tbsp coconut oil, melted
-
1 tsp vanilla extract
-
Pinch of salt
Instructions
-
Step 1
Combine all dry ingredients: almond flour, vanilla protein powder, shredded coconut, and salt in a mixing bowl. Whisk thoroughly. -
Step 2
In a separate bowl, combine wet ingredients: honey or maple syrup, lemon zest, lemon juice, melted coconut oil, and vanilla extract. -
Step 3
Pour the wet ingredients into the dry ingredients and mix until a sticky dough forms. Adjust consistency with a little more liquid or dry ingredients if needed. -
Step 4
Roll the dough into compact balls, about 1 tablespoon each. Lightly dampen hands if sticking occurs. -
Step 5
Roll each ball in extra shredded coconut to coat evenly. Place on a plate or parchment-lined baking sheet. -
Step 6
Chill the protein balls in the refrigerator for at least 30 minutes to firm up before serving.
Important Information
Nutrition Facts (Per Serving)
It is important to consider this information as approximate and not to use it as definitive health advice.
Allergy Information
Please check ingredients for potential allergens and consult a health professional if in doubt.