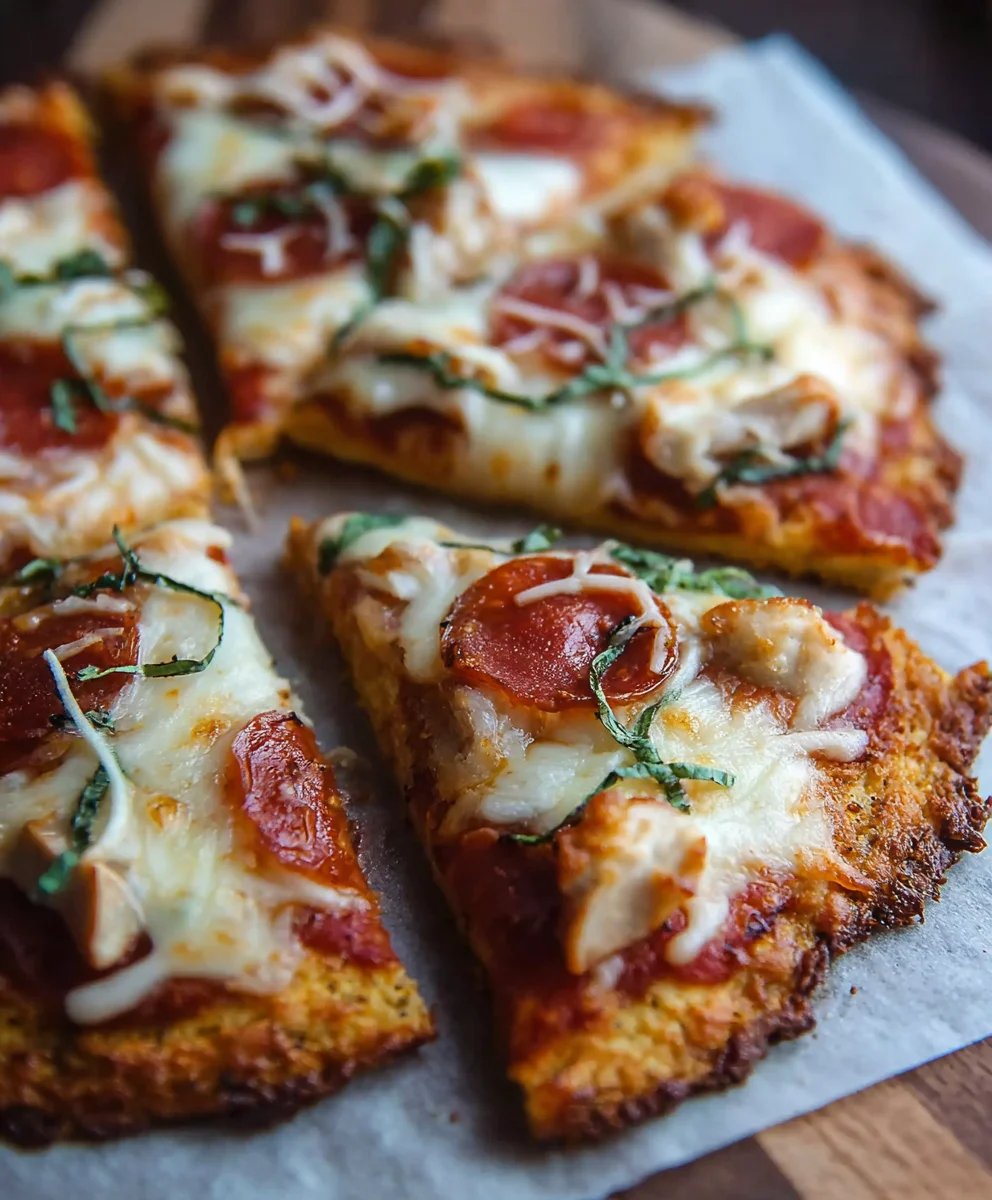
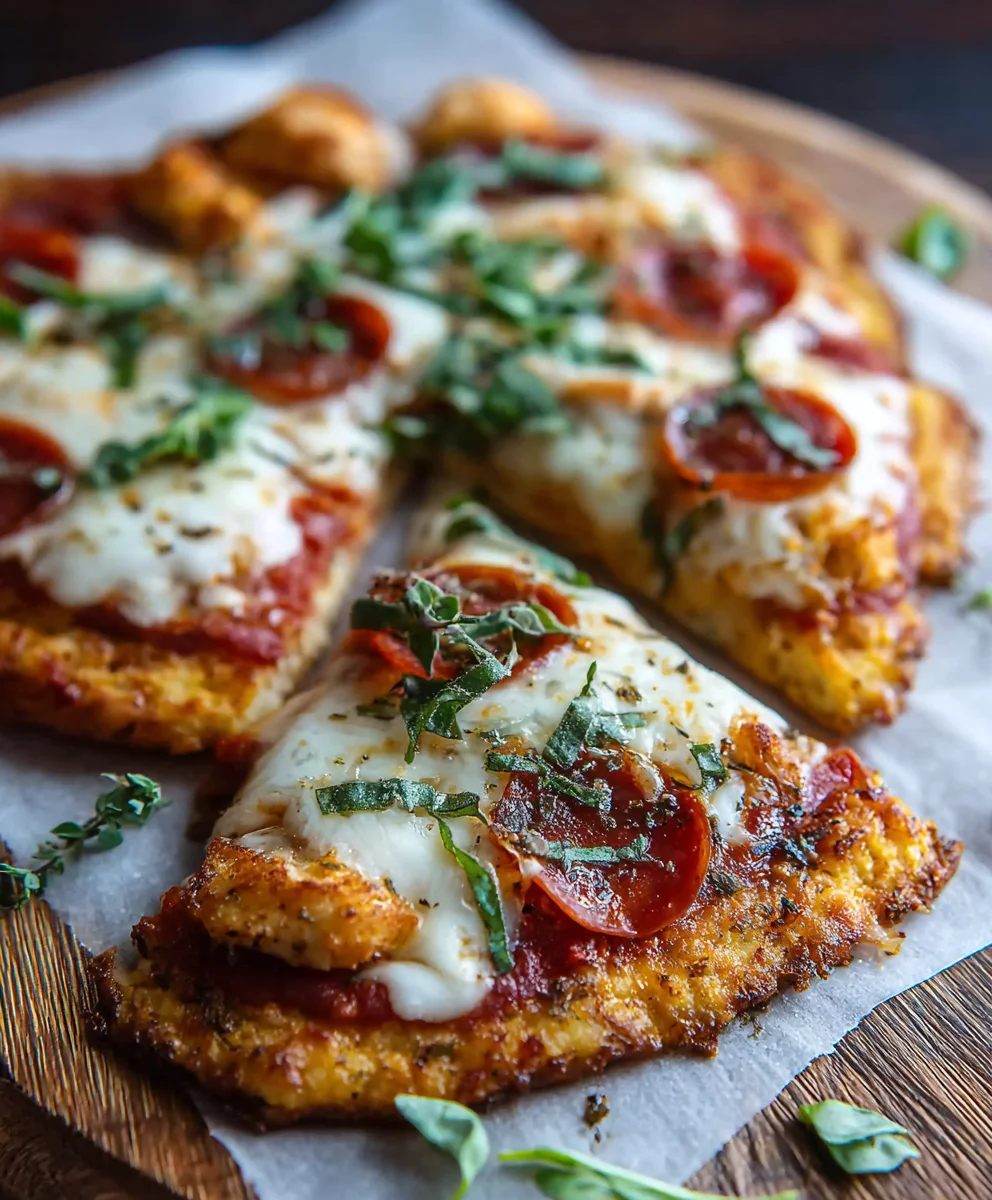
Keto Chicken Crust Pizza- Easy Low Carb Dinner
Keto Pizza Chicken Crust is more than just a low-carb alternative; it’s a revelation for anyone craving the comforting flavors of pizza without the carb-heavy guilt. Imagin extracte sinking your teeth into a crispy, savory base made entirely of seasoned chicken, topped with your favorite gooey cheese and vibrant, fresh toppings. It’s the perfect marriage of flavor and nutrition, satisfying those pizza cravings in a way that aligns with your ketogenic lifestyle. What truly sets this dish apart is its incredible versatility and the sheer joy it brings to pizza lovers who thought their cheesy dreams were over. We’ve perfected a method that ensures a delightful texture, no soggy bottoms here, just pure, unadulterated pizza bliss. Get ready to redefine your pizza nights with this unbelievably delicious and satisfying Keto Pizza Chicken Crust. This isn’t just a recipe; it’s your ticket to guilt-free indulgence, proving that you don’t need flour to enjoy a fantastic pizza experience. The simple brilliance of Keto Pizza Chicken Crust lies in its ability to transform humble chicken into a sturdy, flavorful foundation that holds up to all your favorite toppings, making every bite a triumph of taste and texture.
Ingredients:
- 1 can (12.5 ounces) canned chicken, drained and finely shredded
- 2 large eggs, lightly beaten
- ½ cup grated Parmesan cheese
- 1 cup sugar-free marinara sauce
- 2 cups shredded mozzarella cheese
- 1 package (5 ounces) beef beef pepperoni
Preparing the Keto Chicken Crust
Step 1: Prepare the Chicken Mixture
The foundation of our Keto Pizza Chicken Crust is, as you might guess, the chicken! Start by taking your drained canned chicken and shredding it as finely as possible. You can use a fork to achieve a stringy texture, or if you have a food processor, a few quick pulses can help break it down further, creating a more cohesive “dough.” The goal here is to get the chicken into very small pieces so it binds well with the other ingredients. Once shredded, place the chicken in a medium-sized mixing bowl. To this, add the two lightly beaten eggs. The eggs are crucial for binding the chicken together, acting as a sort of “glue” that will hold our crust in shape during baking. Next, incorporate the ½ cup of grated Parmesan cheese. The Parmesan not only adds a delicious savory flavor but also contributes to the structure and crispiness of the crust. Mix everything together thoroughly with a fork or a spatula until it’s well combined and the mixture feels sticky and holds together.
Step 2: Form and Pre-bake the Crust
Now it’s time to give our crust its shape. Preheat your oven to 400°F (200°C). Line a baking sheet with parchment paper. This step is important to prevent sticking and makes for easier cleanup. Spoon the chicken and egg mixture onto the prepared baking sheet. Using your hands or a spatula, spread the mixture out into a round pizza shape, about ¼ to ½ inch thick. Aim for an even thickness so that the crust bakes uniformly. Once shaped, place the baking sheet into the preheated oven and bake for 15-20 minutes. You’re looking for the crust to become firm to the touch and slightly golden around the edges. This pre-baking step is vital as it removes excess moisture from the chicken and sets the crust so it can support the toppings without becoming soggy.
Assembling Your Keto Pizza
Step 3: Apply the Marinara Sauce
After the initial bake, carefully remove the chicken crust from the oven. You’ll notice it’s much firmer now. Let it cool for just a minute or two before proceeding. Now, it’s time for the sauce! Take your 1 cup of sugar-free marinara sauce. Spread it evenly over the pre-baked chicken crust, leaving a small border around the edges, similar to how you would prepare a traditional pizza. Using a sugar-free marinara sauce is essential for keeping this pizza keto-friendly, as many conventional sauces are loaded with added sugars that can spike blood sugar levels. Make sure to spread the sauce all the way to the edge of the crust to ensure every bite is flavorful.
Step 4: Add the Cheese and Toppings
With the sauce spread, we move on to the cheesy goodness! Sprinkle the 2 cups of shredded mozzarella cheese evenly over the marinara sauce. Ensure good coverage, as the melted mozzarella will help bind the toppings and create that satisfying pizza pull we all love. Next, arrange your 1 package of beef pepperonieroni over the mozzarella cheese. You cabeef pepperoni pepperoni slices flat or overlap them slightly, depending on your pbeef pepperoni. The pepperoni will crisp up nicely in the oven and add a wonderful salty, savory element to the pizza. Dobeef pepperoniy with the pepperoni; it’s a classic pizza topping for a reason!
Final Bake and Serving
Step 5: The Final Bake and Serving
Once your pizza is assembledbeef pepperonice, cheese, and pepperoni, place it back into the preheated oven at 400°F (200°C). This final bake is shorter, usually around 8-10 minutes, or until the mozzarella cheese is melted, bubbly, and just starting to turn golden brown. Keep an eye beef pepperoniprevent burning. The pepperoni should look slightly crisped at the edges. When it’s ready, carefully remove the Keto Pizza Chicken Crust from the oven. Let it rest for about 5 minutes before slicing. This resting period allows the cheese to set slightly, making it easier to cut and serve without all the toppings sliding off. Slice it into wedges using a sharp knife or a pizza cutter and enjoy your delicious, low-carb pizza!
Conclusion:
Congratulations on mastering the art of the Keto Pizza Chicken Crust! This recipe is a game-changer for anyone seeking a low-carb, high-protein pizza experience without compromising on flavor. We’ve transformed humble chicken breast into a delicious and sturdy base, perfect for holding all your favorite keto-friendly toppings. Whether you’re craving a classic beef pepperoni or an adventurous veggie overload, this Keto Pizza Chicken Crust delivers. Don’t be afraid to experiment with different cheese blends or spice up your sauce for endless possibilities. We encourage you to share your creations and variations with friends and family – it’s a guaranteed crowd-pleaser that even the pickiest eaters will love. Enjoy every guilt-free slice!
Frequently Asked Questions:
Can I make the Keto Pizza Chicken Crust ahead of time?
Absolutely! You can prepare the chicken crusts and store them in an airtight container in the refrigerator for up to 2 days. Simply reheat them briefly in the oven or a skillet before adding your toppings and baking.
What are some other healthy topping ideas for Keto Pizza Chicken Crust?
Beyond the classics, consider adding spinach, mushrooms, bell peppers, olives, jalapeños, or even some crum extractbled beef bacon for extra flavor. For a vegetarian option, load it up with grilled zucchini, eggplant, and sun-dried tomatoes.
Keto Chicken Crust Pizza- Easy Low Carb Dinner
A delicious and easy low-carb pizza made with a chicken crust, topped with sugar-free marinara, mozzarella, and beef pepperoni.
Ingredients
-
1 can (12.5 ounces) canned chicken, drained and finely shredded
-
2 large eggs, lightly beaten
-
½ cup grated Parmesan cheese
-
1 cup sugar-free marinara sauce
-
2 cups shredded mozzarella cheese
-
1 package (5 ounces) beef pepperoni
Instructions
-
Step 1
Prepare the chicken mixture: Drain and finely shred canned chicken. Place in a bowl, add beaten eggs and Parmesan cheese. Mix until well combined and sticky. -
Step 2
Form and pre-bake the crust: Preheat oven to 400°F (200°C). Line a baking sheet with parchment paper. Spoon the chicken mixture onto the sheet and spread into a ¼ to ½ inch thick pizza shape. Bake for 15-20 minutes until firm and slightly golden. -
Step 3
Apply the marinara sauce: Remove crust from oven and let cool slightly. Spread sugar-free marinara sauce evenly over the crust, leaving a small border. -
Step 4
Add the cheese and toppings: Sprinkle shredded mozzarella cheese evenly over the marinara sauce. Arrange beef pepperoni slices over the mozzarella. -
Step 5
The final bake and serving: Place the pizza back in the oven for 8-10 minutes, or until cheese is melted and bubbly. Let rest for 5 minutes before slicing and serving.
Important Information
Nutrition Facts (Per Serving)
It is important to consider this information as approximate and not to use it as definitive health advice.
Allergy Information
Please check ingredients for potential allergens and consult a health professional if in doubt.