Juicy Roast Beef Sliders – Easy & Delicious Recipe
Roast beef sliders are more than just a mini sandwich; they’re a miniature masterpiece of flavor and fun! Who doesn’t love a bite-sized explosion of savory goodness? We certainly do. These delightful roast beef sliders are the perfect answer to everything from casual get-togethers to a weeknight craving for something truly satisfying. What makes them so special? It’s the perfect balance of tender, slow-roasted beef, melty cheese, and a whisper of tangy sauce, all nestled between soft, pillowy slider buns. They’re incredibly versatile, allowing you to customize them to your heart’s content, making each slider a personal victory for your taste buds. Get ready to impress yourself and everyone lucky enough to snag one of these irresistible roast beef sliders.
Roast Beef Sliders: A Crowd-Pleasing Delight
Looking for a delicious and easy appetizer or a fun weeknight meal that will have everyone reaching for seconds? These Roast Beef Sliders are an absolute winner! They’re packed with savory flavor, incredibly satisfying, and surprisingly simple to whip up. The combination of tender roast beef, melty cheese, and sweet, caramelized onions nestled in soft slider rolls is simply irresistible. Whether you’re hosting a game day party, a casual get-together, or just craving something special, these sliders are sure to impress. We’re going to build layers of flavor, starting with those wonderfully sweet caramelized onions, then bringin extractg in the robust roast beef and perfectly melted cheese, all tied together with a flavorful butter sauce. Get ready to elevate your slider game!
Ingredients:
Caramelizing the Onions: The Flavor Foundation
The secret to truly spectacular roast beef sliders lies in perfectly caramelized onions. This step might seem a little time-consuming, but trust me, the depth of flavor it adds is absolutely worth it. We want to coax out the natural sweetness of the onions until they are golden brown and incredibly tender.
1. Begin extract by thinly slicing your four large onions. The thinner the slices, the more evenly they will caramelize. You can do this by hand or using a mandoline if you have one – just be sure to use the safety guard!
2. In a large skillet, melt 3 tablespoons of unsalted butter over medium-low heat. Low and slow is the key here. We’re not trying to fry the onions, but rather slowly soften and brown them.
3. Add the sliced onions to the skillet. Stir them around to coat them evenly with the butter.
4. Cook the onions, stirring occasionally, for at least 30-40 minutes, or until they are deeply golden brown and significantly reduced in volume. Patience is your best friend here! If they start to stick to the bottom of the pan, you can add a tablespoon or two of water to deglaze and scrape up any browned bits, which are packed with flavor.
5. During the last 5-10 minutes of caramelizing, add the finely minced garlic and the chopped rosemary. Stir them in and cook until fragrant. The garlic can burn easily, so it’s best to add it towards the end. This infuses the onions with a wonderful savory aroma. Once they are beautifully caramelized, remove the onions from the skillet and set them aside.
Assembling the Sliders: Layering the Deliciousness
Now that we have our flavor-packed caramelized onions, it’s time to bring everything else together. This is where the magic really happens as all the components combine.
1. Preheat your oven to 350°F (175°C). This gentle heat will allow the cheese to melt perfectly and the rolls to warm through without drying out.
2. Slice your slider rolls in half horizontally, like you would a regular sandwich. Place the bottom halves of the rolls onto a baking sheet.
3. Generously pile the caramelized onions onto the bottom halves of the slider rolls. Don’t be shy – the more, the merrier!
4. Next, layer on your thinly sliced deli roast beef. We want a good, substantial amount of roast beef on each slider. You can gently fold or ruffle the slices to create a more appealing look and texture.
5. Place a slice or two of your chosen white cheese over the roast beef. If you’re using a cheese that melts particularly well, like Havarti, this will be extra gooey and delicious.
6. Place the top halves of the slider rolls over the cheese.
The Flavorful Butter Topping: The Finishing Touch
This step is crucial for that extra layer of richness and flavor that makes these sliders so special. This simple butter mixture will give them a wonderful golden-brown hue and a deliciously savory crust.
1. In a small bowl, whisk together the melted ¼ cup of unsalted butter, mustard powder, garlic powder, and chopped parsley. The mustard powder adds a subtle tang, while the garlic powder and parsley provide aromatic notes that complement the roast beef and onions beautifully.
2. Using a pastry brush or a spoon, generously brush this flavorful butter mixture over the tops of all the slider rolls. Make sure to coat them evenly for maximum deliciousness.
Baking and Serving: The Grand Finnon-alcoholic ale
The final step is baking, which will transform all these wonderful ingredients into a cohesive, mouthwatering dish.
1. Carefully place the baking sheet with the assembled sliders into your preheated oven.
2. Bake for 10-15 minutes, or until the cheese is melted and gooey, and the tops of the rolls are lightly golden brown and toasted. Keep an eye on them to prevent burning.
3. Once baked, carefully remove the sliders from the oven. Let them rest for a minute or two before serving. This allows the cheese to set slightly, making them easier to handle.
4. Serve these delicious Roast Beef Sliders immediately while they are warm and the cheese is perfectly melty. They are fantastic on their own, or you can serve them with a side of your favorite dipping sauce like horseradish cream or a tangy barbecue sauce. Enjoy every single bite!
Conclusion:
I hope you’ve enjoyed learning how to create these incredible roast beef sliders! This recipe is truly a winner because it transforms simple, delicious roast beef into bite-sized marvels perfect for any occasion. They’re incredibly easy to assemble, bursting with savory flavor, and always a crowd-pleaser. Whether you’re hosting a game day party, planning a casual get-together, or just craving a satisfying snack, these sliders are your go-to.
For serving, I love pairing them with a side of crispy sweet potato fries or a fresh, zesty coleslaw. You can also serve them as part of a larger appetizer spread.
Don’t be afraid to get creative with variations! Consider adding caramelized onions for a touch of sweetness, a dollop of horseradish cream for a kick, or even a slice of provolone cheese melted on top. The possibilities are endless! Give these roast beef sliders a try – I’m confident you’ll love them as much as I do.
Frequently Asked Questions:
Can I use pre-sliced deli roast beef for these sliders?
Absolutely! While using leftover roast beef is fantastic, high-quality deli roast beef works wonderfully for a quicker preparation. Just be sure to choose a good, flavorful roast beef for the best taste.
What kind of buns are best for roast beef sliders?
Slider buns or dinner rolls are ideal. Brioche buns offer a touch of sweetness that complements the savory beef, while simple white dinner rolls are also a great, versatile option. King’s Hawaiian rolls are a personal favorite for their soft texture and hint of sweetness.
How far in advance can I assemble these sliders?
It’s best to assemble them shortly before serving, especially if you’re adding moist ingredients like sauces or coleslaw, to prevent the buns from becoming soggy. You can prep the roast beef and any toppings ahead of time and then assemble them when you’re ready to enjoy.
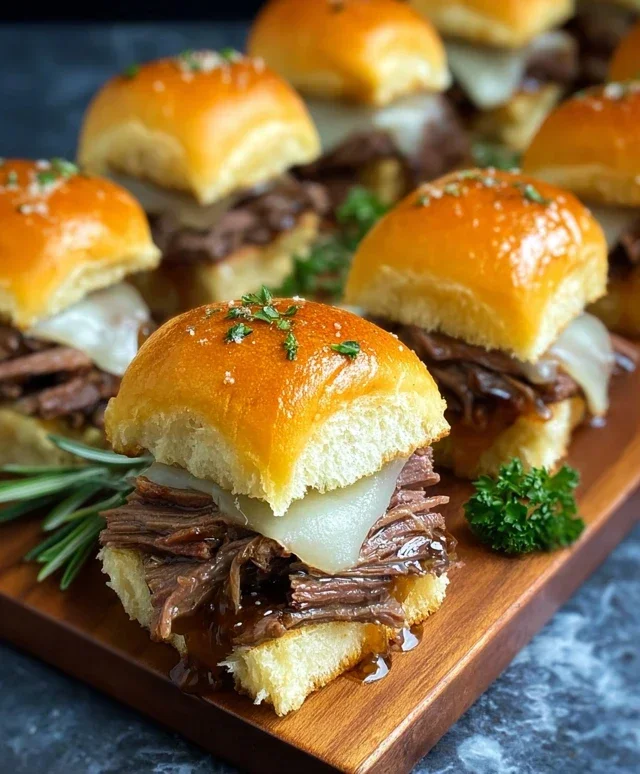
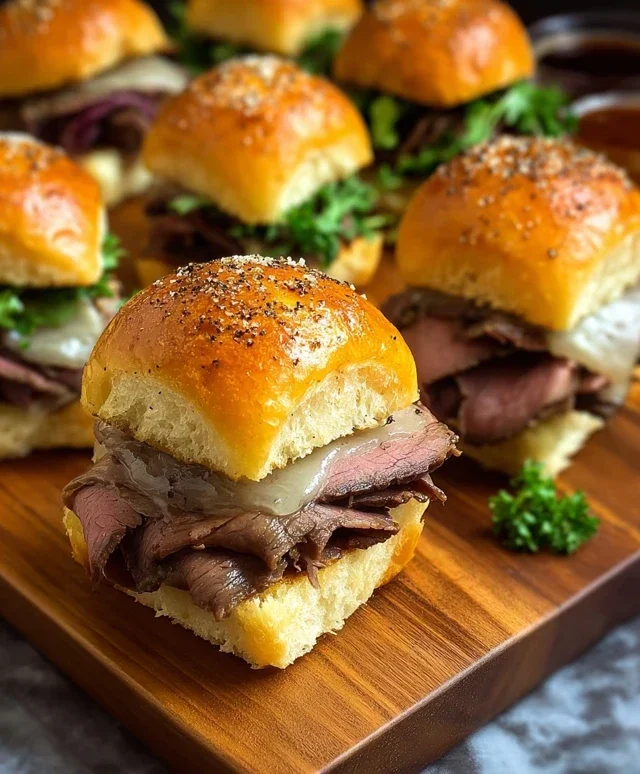
Roast Beef Sliders
Delicious and easy roast beef sliders with caramelized onions and melted cheese.
Ingredients
-
12 slider rolls
-
1 ½ pounds deli roast beef, thinly sliced or shaved
-
4-6 slices white cheese
-
3 tablespoons unsalted butter
-
4 large onions, sliced
-
2 cloves garlic, finely minced
-
1 tablespoon fresh rosemary, chopped
-
¼ cup unsalted butter, melted
-
1 teaspoon mustard powder
-
1 teaspoon garlic powder
-
1 tablespoon parsley, chopped
Instructions
-
Step 1
Melt 3 tablespoons of butter in a large skillet over medium heat. Add the sliced onions and cook, stirring occasionally, until softened and lightly browned, about 10-15 minutes. -
Step 2
Add the minced garlic and chopped rosemary to the skillet with the onions. Cook for another 1-2 minutes until fragrant. -
Step 3
While the onions are cooking, split the slider rolls horizontally. Brush the cut sides of the rolls with the melted butter. Sprinkle the melted butter with mustard powder, garlic powder, and chopped parsley. -
Step 4
Layer the roast beef slices onto the bottom halves of the slider rolls. Top the roast beef with the caramelized onion mixture. -
Step 5
Place the cheese slices over the onion mixture. Cover with the top halves of the slider rolls. -
Step 6
Bake in a preheated oven at 350°F (175°C) for 10-15 minutes, or until the cheese is melted and the rolls are lightly toasted. Serve warm.
Important Information
Nutrition Facts (Per Serving)
It is important to consider this information as approximate and not to use it as definitive health advice.
Allergy Information
Please check ingredients for potential allergens and consult a health professional if in doubt.