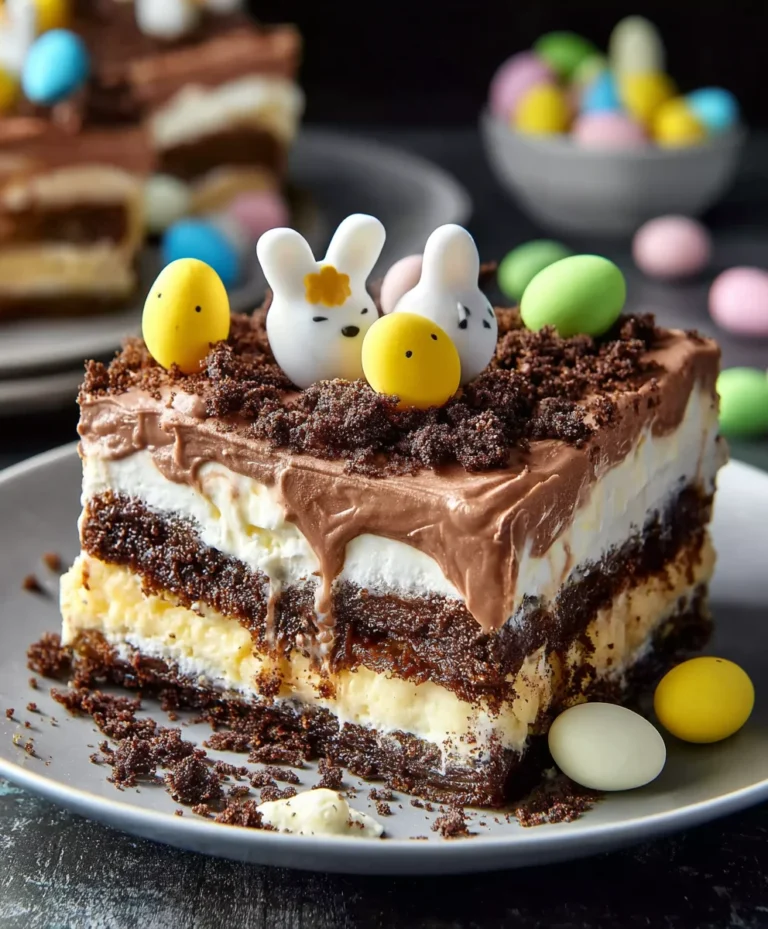
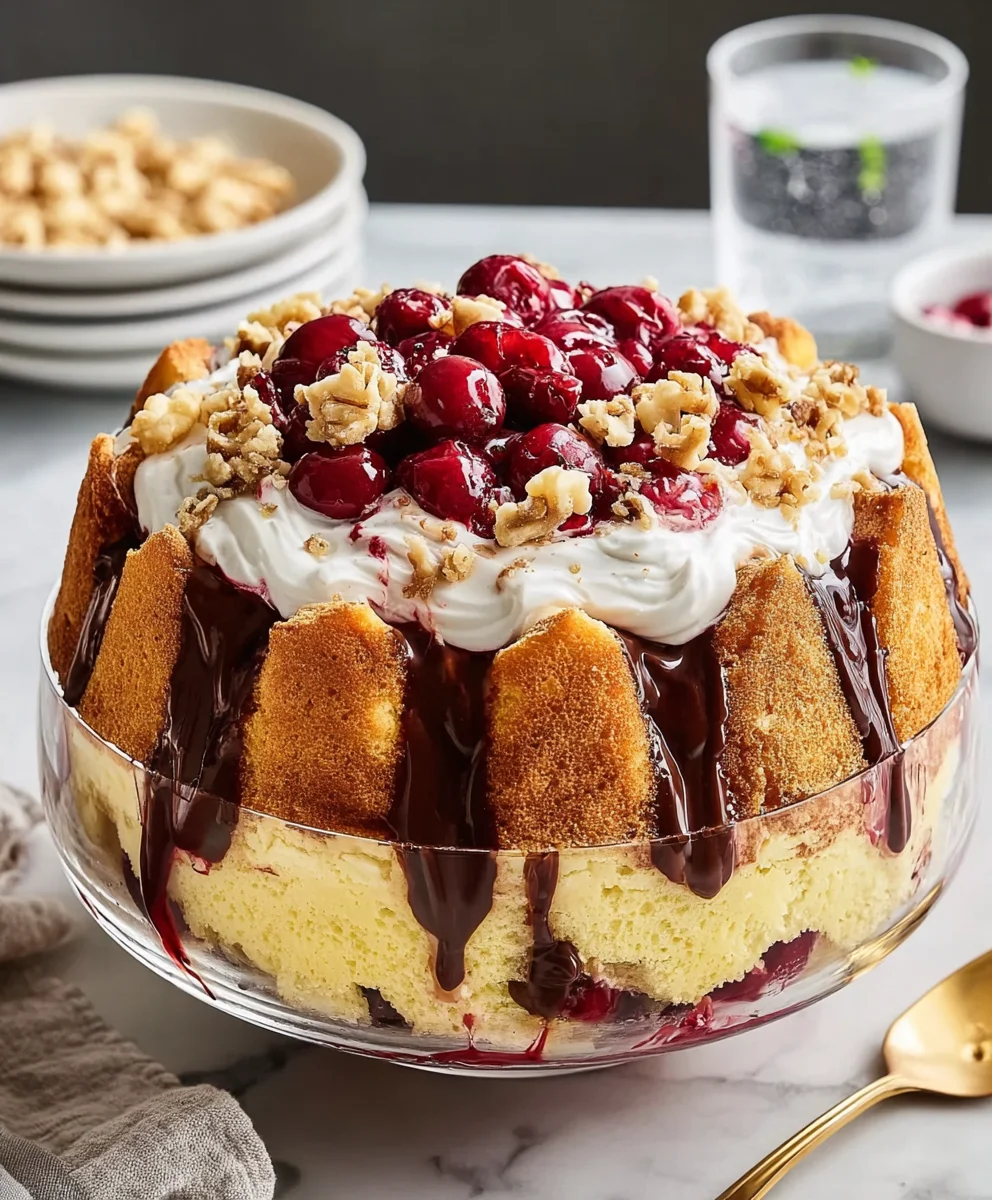
Easy Punch Bowl Cake Recipe – Crowd Pleaser Dessert
Punch Bowl Cake is more than just a dessert; it’s a joyous celebration baked into a magnificent, layered masterpiece. If you’ve ever had the pleasure of encountering this spectacular creation, you understand its allure. It’s the kind of dessert that doesn’t just grace a table; it commands it, evoking gasps of delight and immediate requests for seconds. People adore Punch Bowl Cake for its inherent festivity and its incredible ability to cater to diverse palates. Imagin extracte perfectly moist cake layers, drenched in a syrupy embrace, interspersed with creamy, luscious pudding or pastry cream, and studded with fresh fruit. What truly makes this Punch Bowl Cake special is its customizable nature; it’s a delightful canvas upon which you can paint your flavor fantasies, from classic vanilla and strawberry to exotic tropical twists. Get ready to assemble your own show-stopping dessert that’s as fun to make as it is to devour!

Ingredients:
- 15.25 ounces yellow cake mix (your favorite brand)
- 1 cup water
- ½ cup vegetable oil
- 3 large eggs, room temperature
- 6.8 ounces instant vanilla pudding mix
- 4 cups cold whole milk
- 40 ounces crushed pineapple, well-drained
- 4 medium bananas, sliced
- 42 ounces cherry pie filling
- 16 ounces whipped topping, thawed
- ⅓ cup chopped pecans
Baking the Yellow Cake
First things first, we need to get our cake layer ready. This forms the foundation of our delicious Punch Bowl Cake, so it’s important to get it right. In a large mixing bowl, combine the contents of your 15.25-ounce yellow cake mix. Make sure to use your favorite brand; this is a recipe where personal preference really shines through. To this dry mix, add 1 cup of water, ½ cup of vegetable oil, and 3 large eggs. It’s a good idea to have your eggs at room temperature, as this helps them incorporate more evenly into the batter, resulting in a lighter, fluffier cake. Whisk everything together until the batter is smooth and well combined. Be careful not to overmix, as this can lead to a tough cake. A few gentle strokes to bring it all together is perfect.
Next, prepare your baking pan. For a Punch Bowl Cake, we want to bake the cake in a rectangular or square pan so we can easily cut it into cubes later. A 9×13 inch baking pan is ideal. Grease and flour the pan thoroughly to prevent any sticking. Pour the cake batter into the prepared pan, spreading it evenly with a spatula. Bake according to the cake mix package directions, usually around 30-35 minutes at 350°F (175°C), or until a toothpick inserted into the center comes out clean. Once baked, remove the cake from the oven and let it cool completely in the pan on a wire rack. This cooling process is crucial. Trying to cut a warm cake can lead to crum extractbling and a messy situation, which is exactly what we want to avoid for our layered dessert.
Preparing the Vanilla Pudding
While the cake is cooling, let’s get our creamy vanilla pudding layer ready. This layer adds a wonderful sweetness and smooth texture to the Punch Bowl Cake. In a separate medium-sized bowl, combine the 6.8 ounces of instant vanilla pudding mix with 4 cups of cold whole milk. It’s important that the milk is very cold; this helps the pudding to thicken properly and quickly, preventing a runny consistency. Whisk the pudding mix and milk together vigorously for about 2 minutes, or until it starts to thicken. You’ll notice it becoming quite thick almost immediately. Once it’s thickened to a pudding-like consistency, cover the bowl with plastic wrap, pressing the wrap directly onto the surface of the pudding. This prevents a skin from forming on top. Place the pudding in the refrigerator to chill and firm up while we prepare the other components.
Assembling the Punch Bowl Cake
Now for the fun part – assembling our magnificent Punch Bowl Cake! Once the cake has completely cooled, carefully invert it onto a clean cutting board or a large serving platter. Using a sharp knife, cut the cake into bite-sized cubes, roughly 1-inch squares. Don’t worry if they aren’t perfectly uniform; a rustic look is part of the charm of this dessert. You’ll need about half of these cake cubes for the first layer of your assembly. If you are using an actual punch bowl or a clear glass bowl for serving, this is where the visual magic happens. Start by placing a layer of the cake cubes in the bottom of your serving bowl, ensuring they cover the base evenly.
Next, we’ll add a generous portion of our crushed pineapple. Spread about half of the 40 ounces of well-drained crushed pineapple over the layer of cake cubes. The pineapple adds a lovely tropical sweetness and a slight tang that balances the richness of the cake and pudding. Don’t be afraid to get a good spread of pineapple. After the pineapple, it’s time for the sliced bananas. Arrange about half of the 4 medium sliced bananas over the pineapple layer. Try to distribute them evenly for consistent flavor in every bite. Now, spoon about half of the 42 ounces of cherry pie filling over the banana layer. The vibrant red of the cherry pie filling not only looks beautiful but also adds a burst of fruity flavor. Finally, take about half of your chilled vanilla pudding and spread it evenly over the cherry pie filling. This creates a delightful creamy layer that binds everything together.
We’re going to repeat these layers to build up our Punch Bowl Cake. Place the remaining cake cubes on top of the pudding layer. Then, spread the remaining crushed pineapple over the cake. Follow this with the rest of the sliced bananas, and then dollop the remaining cherry pie filling across the top. Finally, gently spoon the remaining chilled vanilla pudding over the last layer of cherry pie filling. This might seem like a lot of layers, but trust me, it’s what makes this cake so decadent and impressive. At this stage, you should have a beautifully layered dessert ready for its final touch.
Finishing Touches and Chilling
The final step before serving is to add the fluffy whipped topping and the crunchy pecans. Take the 16 ounces of thawed whipped topping and spread it evenly over the top layer of pudding. Use an offset spatula or the back of a spoon to create a smooth, cloud-like finish. Make sure to cover the entire surface of the pudding to seal in all those delicious layers. For an added touch of texture and flavor, sprinkle the ⅓ cup of chopped pecans generously over the whipped topping. The pecans provide a satisfying crunch that complements the soft cake, creamy pudding, and juicy fruit. Once assembled, cover the Punch Bowl Cake tightly with plastic wrap. It’s essential to let the cake chill in the refrigerator for at least 4 hours, but overnight is even better. This chilling time allows the flavors to meld together beautifully and ensures the cake and pudding layers are perfectly set, making it easier to serve and enjoy.
Conclusion:
There you have it! Crafting a delicious and impressive Punch Bowl Cake is more accessible than you might think. We’ve walked through each step, from preparing the cake layers to assembling that beautiful, layered masterpiece. This dessert is truly a showstopper, perfect for any celebration or even just to brighten up an ordinary day. Remember, the beauty of the Punch Bowl Cake lies not only in its flavor but also in its visual appeal, making it a delight for both the eyes and the palate.
For serving, consider a dollop of fresh whipped cream or a scoop of your favorite ice cream to complement the rich flavors and textures. If you’re feeling adventurous, try incorporating different fruit fillings like berries or sliced peaches between the layers for an extra burst of freshness. Don’t be afraid to experiment with different extracts in your frosting – almond or coconut can add wonderful nuances. The key is to have fun and make this Punch Bowl Cake your own!
Frequently Asked Questions about Punch Bowl Cake:
Q: Can I make the cake layers ahead of time?
A: Absolutely! You can bake the cake layers a day or two in advance and store them wrapped tightly in plastic wrap at room temperature. This can save you valuable time on the day you plan to assemble your Punch Bowl Cake.
Q: What kind of punch bowl is best for this recipe?
A: While any clear glass punch bowl will showcase your beautiful layers, one with a wide opening makes assembly much easier. The clarity of the glass is key to allowing the vibrant colors and textures of your Punch Bowl Cake to shine through.
Easy Punch Bowl Cake – Crowd Pleaser Dessert
A visually stunning and delicious layered dessert made with cake, pudding, fruit, and whipped topping, perfect for any gathering.
Ingredients
-
15.25 ounces yellow cake mix
-
1 cup water
-
½ cup vegetable oil
-
3 large eggs
-
6.8 ounces instant vanilla pudding mix
-
4 cups cold whole milk
-
40 ounces crushed pineapple, well-drained
-
4 medium bananas, sliced
-
42 ounces cherry pie filling
-
16 ounces whipped topping
-
⅓ cup chopped pecans
Instructions
-
Step 1
Prepare the yellow cake by mixing cake mix, water, vegetable oil, and eggs. Bake in a 9×13 inch pan according to package directions. Let cool completely. -
Step 2
Prepare the vanilla pudding by whisking instant pudding mix with cold milk until thickened. Cover and chill. -
Step 3
Cut the cooled cake into 1-inch cubes. In a punch bowl or clear glass bowl, layer half of the cake cubes. -
Step 4
Add layers of half the crushed pineapple, half the sliced bananas, half the cherry pie filling, and half the chilled vanilla pudding over the cake. -
Step 5
Repeat the layering process with the remaining cake cubes, crushed pineapple, sliced bananas, cherry pie filling, and vanilla pudding. -
Step 6
Spread the thawed whipped topping over the final pudding layer and sprinkle with chopped pecans. -
Step 7
Cover and chill the cake for at least 4 hours, or preferably overnight, before serving.
Important Information
Nutrition Facts (Per Serving)
It is important to consider this information as approximate and not to use it as definitive health advice.
Allergy Information
Please check ingredients for potential allergens and consult a health professional if in doubt.