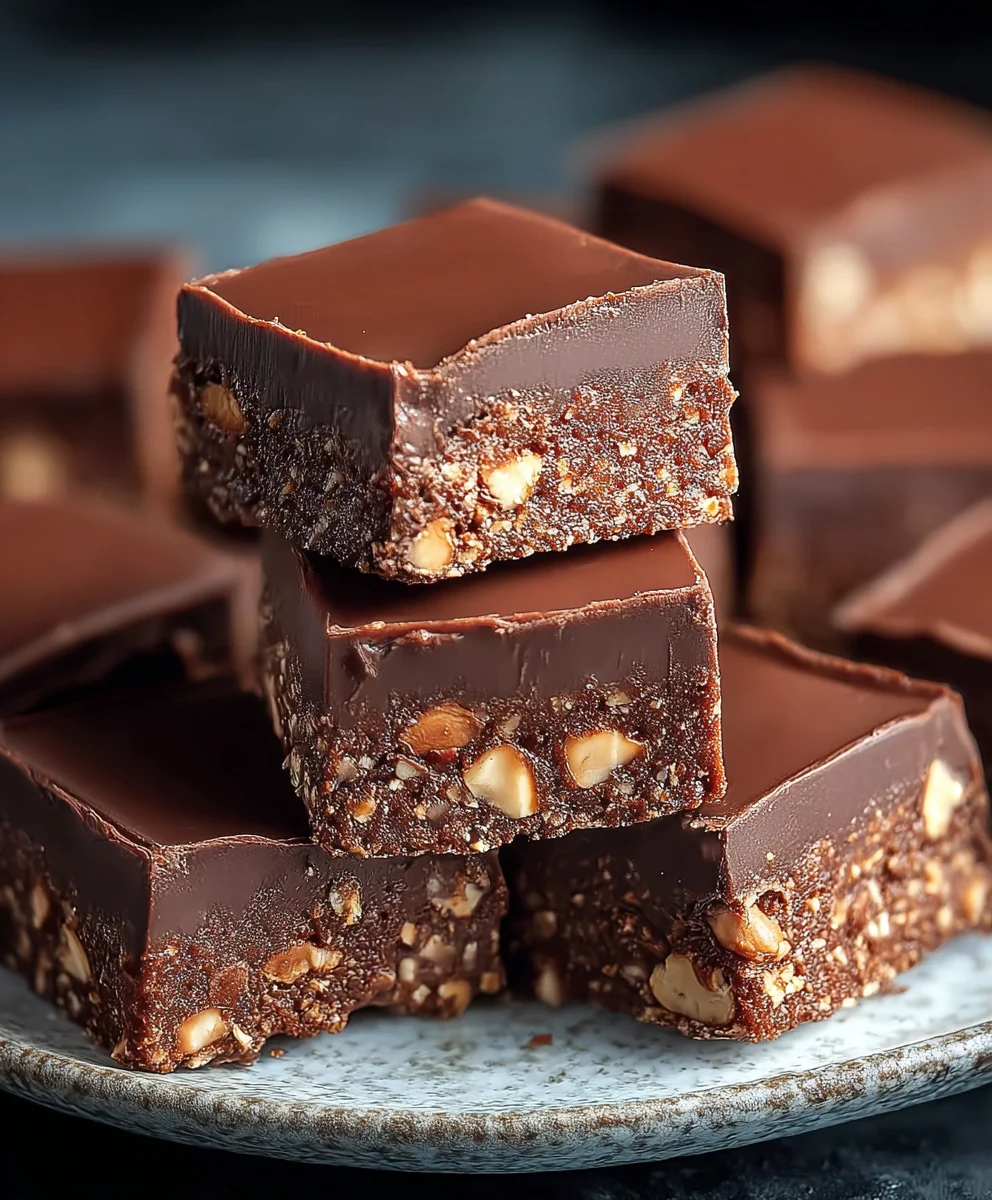
Easy No-Bake Chocolate Biscuit Bars – Delicious Treat
No-Bake Chocolate Biscuit Bars are an absolute revelation for anyone craving a quick, intensely satisfying, and utterly delicious treat. There’s something incredibly magical about how a few simple ingredients can transform into a dessert that feels both indulgent and wonderfully easy to make. This is why so many of us adore them – they deliver maximum flavor with minimal effort, perfect for those spontaneous sweet cravings or when you need to whip up a crowd-pleaser in a flash. What truly makes these No-Bake Chocolate Biscuit Bars so special is their irresistible combination of textures: the crum extractbly, buttery biscuit base, the rich, fudgy chocolate filling, and often, a delightful crunch from additions like nuts or extra biscuits. They’re a guaranteed hit for parties, afternoon tea, or just a comforting solo indulgence. Get ready to discover your new go-to sweet sensation!
Ingredients:
- 12.3 oz (350g) digestive biscuits, finely crushed
- 1 cup (3 oz / 85g) finely ground peanuts
- ½ cup (3 oz / 85g) granulated sugar
- 1 packet (10g) vanilla sugar (optional, but adds a lovely fragrance)
- ½ cup (1.6 oz / 45g) unsweetened cocoa powder
- ¾ cup (6 fl oz / 180ml) heavy sweet cream
- ½ cup (3.9 oz / 110g) unsalted butter, cubed
- 3.2 oz (90g) milk chocolate, chopped
- 1 oz (30g) dark chocolate, chopped
- 2 tbsp (1 oz / 30g) vegetable oil
- ¾ cup (2.5 oz / 70g) roughly chopped peanuts for topping
Preparing the Biscuit Base
Step 1: Crushing the Biscuits and Combining Dry Ingredients
First things first, let’s get our biscuit base ready. Take your digestive biscuits and crush them finely. You can do this in a food processor for a super smooth texture, or if you don’t have one, place them in a sturdy zip-top bag and bash them with a rolling pin until you have fine crum extractbs. Don’t worry about a few slightly larger pieces; they can add a nice texture. In a large mixing bowl, combine the crushed biscuits with the 1 cup of finely ground peanuts. This is where our peanut flavor foundation starts. Now, add the granulated sugar, and if you’re using it, the packet of vanilla sugar. The vanilla sugar is completely optional, but it imparts a subtle, delightful aroma that complements the chocolate and peanut flavors beautifully. Finally, sift in the unsweetened cocoa powder. Sifting is important here to prevent any lumps and ensure a uniform distribution of chocolatey goodness throughout the base. Give all these dry ingredients a good whisk together with a fork or a small whisk until they are thoroughly combined. You want to see an even distribution of all the components.
Step 2: Creating the Rich Chocolate Binder
Now, it’s time to bring our dry ingredients together with something moist and decadent. Place the cubed unsalted butter into a medium saucepan. Add the heavy sweet cream to the saucepan as well. Place the saucepan over medium-low heat. We want to gently melt the butter and warm the cream without bringin extractg it to a boil. Stir occasionally until the butter is completely melted and the cream is hot but not bubbling. Once the butter has melted and the cream is warm, remove the saucepan from the heat. Immediately add the chopped milk chocolate and the chopped dark chocolate to the warm cream and butter mixture. Let this sit for about 2-3 minutes without stirring. This resting period allows the residual hegin extractto begin melting the chocolate. After the resting time, gently stir the mixture with a spatula or whisk until the chocolates are completely melted and you have a smooth, glossy, and rich chocolate ganache. Make sure there are no stubborn chocolate chunks remaining. This ganache is the magic ingredient that will bind our biscuit and peanut mixture together and create a fudgy texture.
Step 3: Assembling the No-Bake Chocolate Biscuit Bars
Pour the warm chocolate ganache from the saucepan into the bowl with the dry ingredients (crushed biscuits, ground peanuts, sugar, and cocoa powder). Using a sturdy spatula or a gin extractden spoon, begin to mix everything together. Work from the outside of the bowl towards the center, folding and stirring until all the dry ingredients are completely coated in the chocolate mixture. It might seem a bit dry at first, but keep mixing. The goal is to achieve a consistency where the mixture clumps together when you press it with your spatula. Ensure there are no pockets rum extractdry crumbs. This is a crucial step for the structural integrity of your bars. You want a cohesive mixture that will hold its shape once pressed. Taste a tiny bit of the mixture at this stage (it’s safe as there’s no raw egg) to check the sweetness and chocolate intensity. You can add a touch more sugar or cocoa powder if you feel it needs it, but remember the topping will add more flavor.
Step 4: Pressing the Mixture into the Pan
Prepare an 8×8 inch (20×20 cm) baking pan by lining it with parchment paper. Leave some overhang on the sides; this will make it much easier to lift the bars out later. Spoon the entire chocolate biscuit mixture into the prepared pan. Now, using the back of your spatula or the bottom of a glass, press the mixture down very firmly and evenly into the pan. This step is critical for creating brum extract that won’t crumble when you cut them. Apply consistent pressure across the entire surface, making sure to get into the corners. The denser you pack it, the more solid your finished bars will be. Once you’re satisfied with the evenness and firmness of the base layer, it’s time for the topping.
Step 5: Adding the Peanut Topping and Chilling
In a small bowl, combine the roughly chopped peanuts with the 2 tablespoons of vegetable oil. Stir them together until the peanuts are lightly coated with the oil. This will give them a lovely sheen and help them adhere to the chocolate base. Sprinkle this peanut mixture evenly over the surface of the pressed chocolate biscuit base. Gently press the peanuts down into the chocolate with your hands or the back of a spoon so they stick and don’t fall off when the bars are cut. Now, the hardest part: patience! Cover the pan tightly with plastic wrap or foil and place it in the refrigerator to chill for at least 2-3 hours, or ideally, until it is completely firm. This chilling period allows the fats in the chocolate and butter to set, solidifying the bars. For an even firmer set, you can pop it in the freezer for about 30-45 minutes before cutting.
Step 6: Cutting and Serving Your Delicious Bars
Once the No-Bake Chocolate Biscuit Bars are completely chilled and firm, it’s time to cut them. Use the parchment paper overhang to carefully lift the entire block out of the pan onto a clean cutting board. Using a sharp knife, cut the block into your desired bar shapes – squares or rectangles work wonderfully. For cleaner cuts, you can warm the knife slightly under hot water and dry it thoroughly between each cut. If your bars are very firm, you might find it easier to cut them after they’ve rested at room temperature for about 5-10 minutes. These bars are best stored in an airtight container in the refrigerator. They will keep their delicious texture and flavor for up to a week. Enjoy these rich, chocolatey, and peanutty treats that require absolutely no baking!
Conclusion:
And there you have it! These No-Bake Chocolate Biscuit Bars are your new go-to for a quick, delicious, and satisfying treat that requires absolutely no oven time. We’ve walked through the simple steps to combine rich chocolate, crunchy biscuits, and a hint of sweetness to create a delightful dessert that’s perfect for any occasion. Whether you’re craving something sweet after dinner, need a last-minute party contribution, or simply want to indulge your sweet tooth, these bars are a guaranteed crowd-pleaser. Don’t be afraid to get creative with your toppings – a sprinkle of sea salt, some chopped nuts, or even a drizzle of white chocolate can elevate these bars to a whole new level. So go ahead, give these No-Bake Chocolate Biscuit Bars a try, and I’m confident you’ll be making them again and again!
Frequently Asked Questions:
Q1: Can I use different types of biscuits for these No-Bake Chocolate Biscuit Bars?
Absolutely! While digestive biscuits are a classic choice for their mild sweetness and sturdy texture, you can experiment with others. Grabeef ham crackers, shortbread cookies, or even vanilla wafers would work well. Just be mindful that the flavor profile of your biscuit will influence the final taste of the bars.
Q2: How should I store these No-Bake Chocolate Biscuit Bars?
For the best texture and flavor, it’s best to store your No-Bake Chocolate Biscuit Bars in an airtight container in the refrigerator. They will keep well for up to a week. If you prefer a firmer bar, you can also freeze them for longer storage; just allow them to thaw slightly at room temperature before serving.
Q3: Can I make these No-Bake Chocolate Biscuit Bars vegan?
Yes, you can easily adapt this recipe to be vegan. Simply use vegan-friendly chocolate (many dark chocolates are naturally vegan, but always check the ingredients), and ensure your butter alternative is plant-based. For a vegan binder, you can use maple syrup or agave nectar instead of honey if the recipe calls for it. The biscuits themselves will also need to be checked for vegan certification if you’re being strict.
Easy No-Bake Chocolate Biscuit Bars
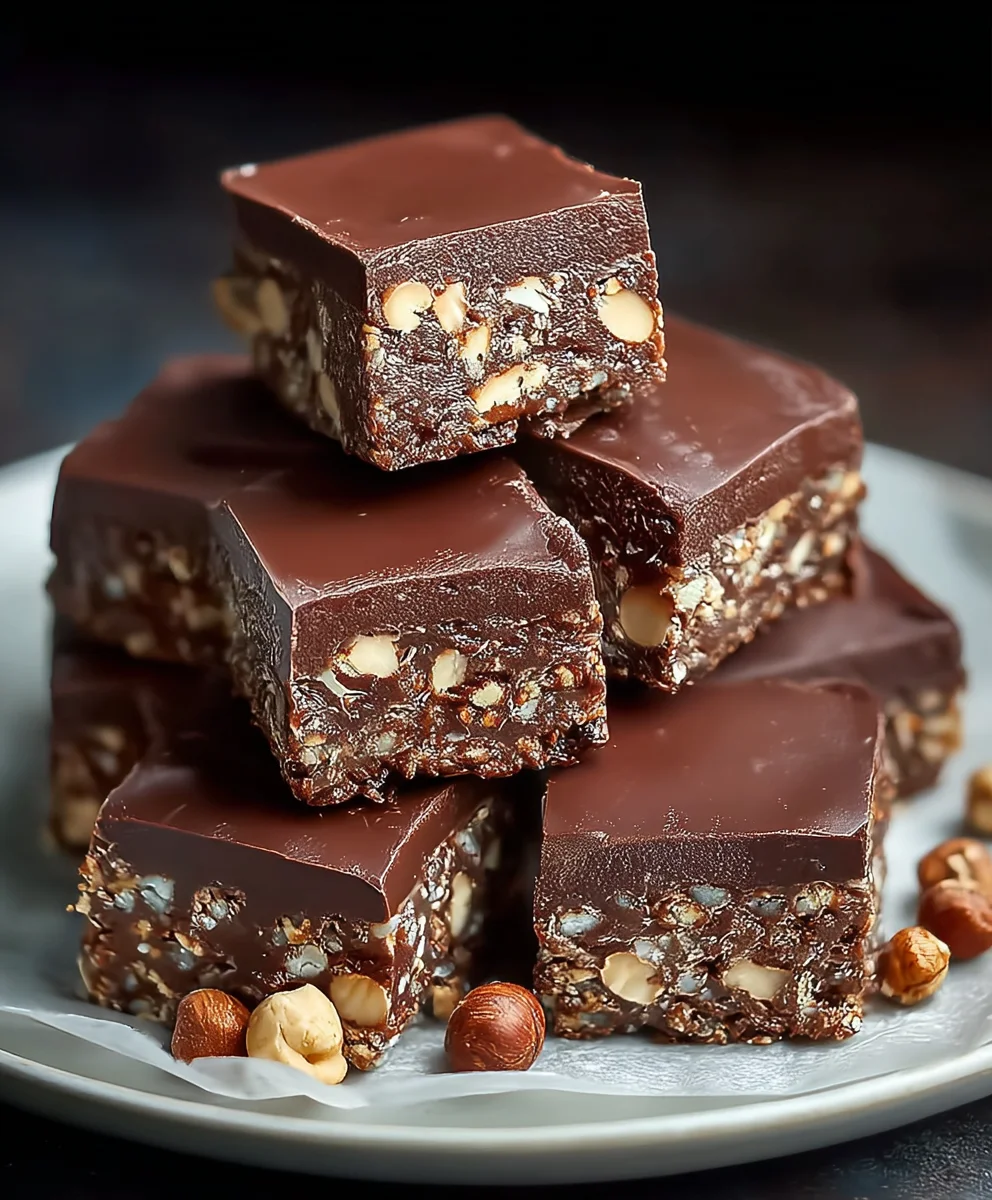
Delicious no-bake bars with a chocolate biscuit and peanut base, topped with more peanuts.
Ingredients
-
12.3 oz (350g) digestive biscuits, finely crushed
-
1 cup (3 oz / 85g) finely ground peanuts
-
½ cup (3 oz / 85g) granulated sugar
-
1 packet (10g) vanilla sugar (optional)
-
½ cup (1.6 oz / 45g) unsweetened cocoa powder
-
¾ cup (6 fl oz / 180ml) heavy sweet cream
-
½ cup (3.9 oz / 110g) unsalted butter, cubed
-
3.2 oz (90g) milk chocolate, chopped
-
1 oz (30g) dark chocolate, chopped
-
2 tbsp (1 oz / 30g) vegetable oil
-
¾ cup (2.5 oz / 70g) roughly chopped peanuts for topping
Instructions
-
Step 1
In a large mixing bowl, combine the crushed digestive biscuits, 1 cup of finely ground peanuts, granulated sugar, optional vanilla sugar, and sifted unsweetened cocoa powder. Whisk together until thoroughly combined. -
Step 2
In a medium saucepan over medium-low heat, gently melt the cubed unsalted butter with the heavy sweet cream. Stir occasionally until the butter is melted and the cream is hot but not boiling. Remove from heat. -
Step 3
Add the chopped milk and dark chocolate to the warm cream and butter mixture. Let sit for 2-3 minutes, then stir until completely melted and smooth, creating a chocolate ganache. -
Step 4
Pour the chocolate ganache into the bowl with the dry ingredients and mix with a spatula until all dry ingredients are coated and the mixture clumps together when pressed. -
Step 5
Line an 8×8 inch (20×20 cm) pan with parchment paper. Spoon the mixture into the pan and press down firmly and evenly. In a small bowl, toss the roughly chopped peanuts with vegetable oil, then sprinkle and gently press onto the chocolate base. -
Step 6
Cover the pan and refrigerate for at least 2-3 hours, or until firm. Lift the bars out using the parchment paper and cut into desired shapes with a sharp knife.
Important Information
Nutrition Facts (Per Serving)
It is important to consider this information as approximate and not to use it as definitive health advice.
Allergy Information
Please check ingredients for potential allergens and consult a health professional if in doubt.