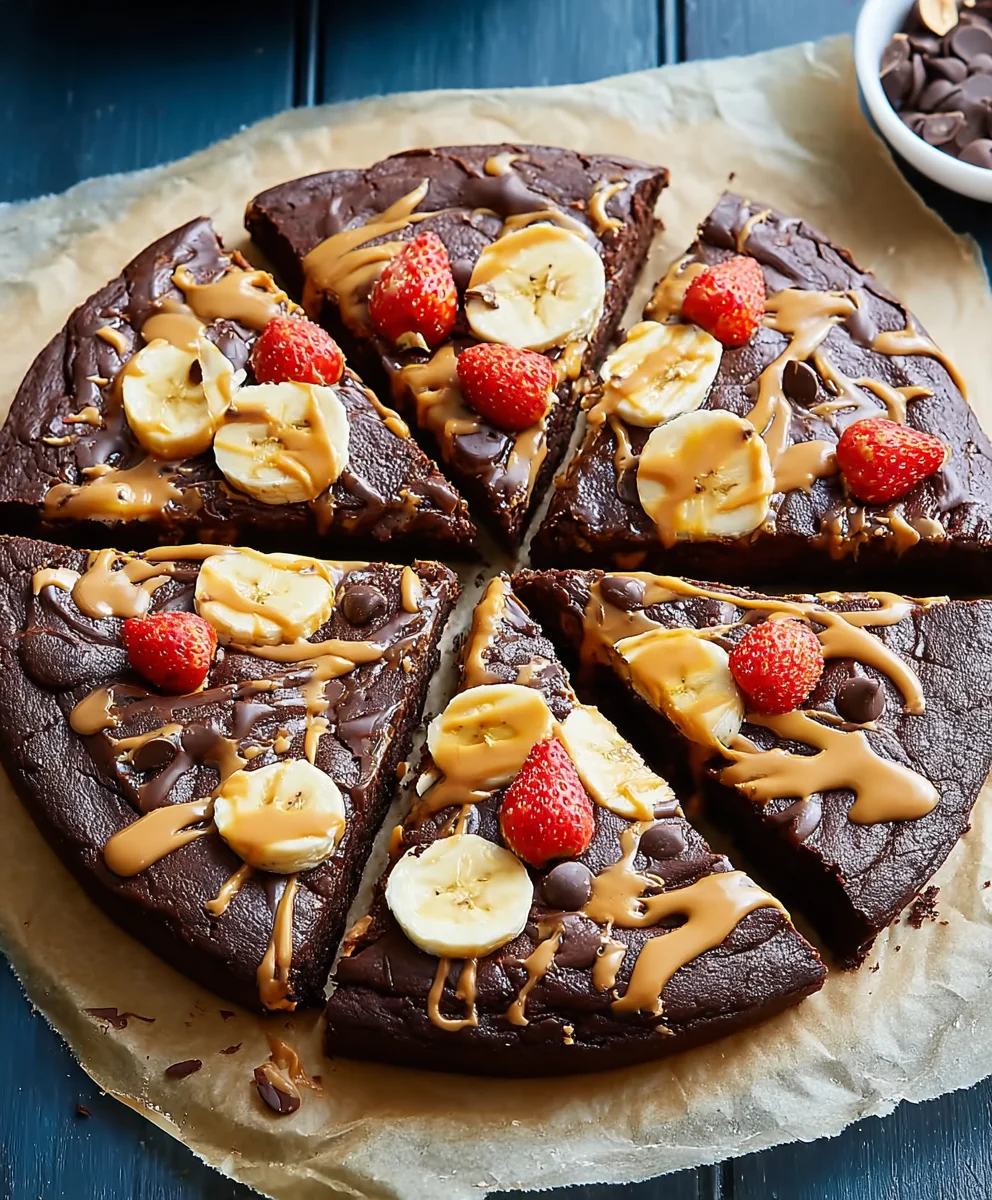
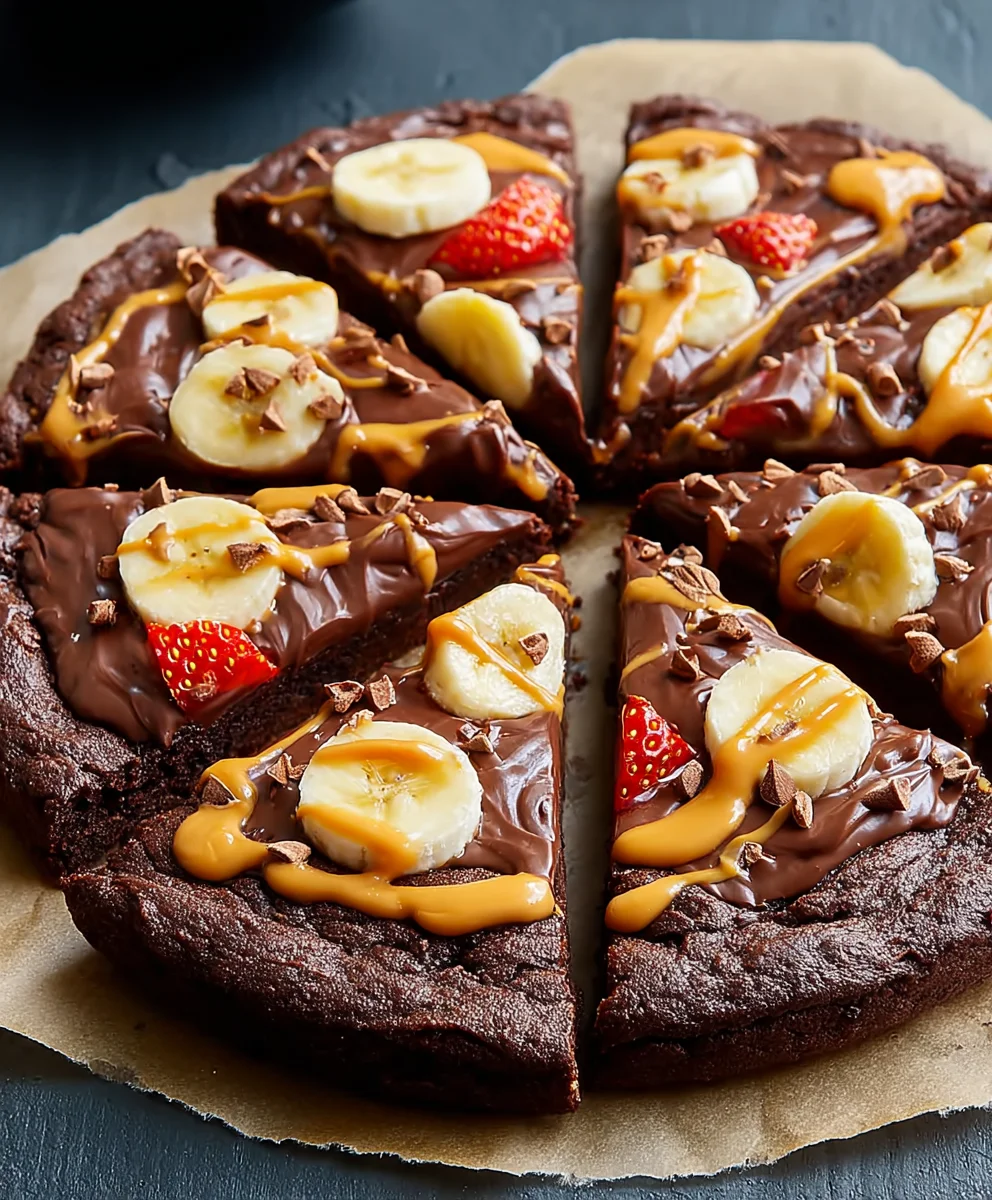
Chocolate Peanut Butter Pizza – Easy Dessert Recipe
Chocolate Peanut Butter Pizza is more than just a dessert; it’s a decadent dream come true for anyone who believes that life is simply better with a perfect pairing of rich chocolate and creamy peanut butter. Imagin extracte a warm, slightly chewy pizza crust, transformed into a canvas of pure indulgence. This isn’t your average pie; it’s an edible masterpiece designed to satisfy even the most intense sweet cravings. What makes this particular Chocolate Peanut Butter Pizza so beloved is its incredible versatility and its unapologetic celebration of two universally adored flavors. It’s the ultimate comfort food that brings smiles to faces, whether you’re sharing it at a party or savoring a slice (or two!) all to yourself. Get ready to dive into a world of gooey, chocolatey, peanut buttery goodness that will redefine your idea of pizza night.
Ingredients:
- 1 (18-oz) roll refrigerated chocolate chip cookie dough
- 3/4 cup creamy peanut butter
- 1 cup semi-sweet chocolate morsels
- 1/2 cup bite-size chocolate peanut butter cups, chopped
- 1/4 cup miniature candy-coated chocolate pieces
- 1/4 cup salted peanuts, chopped
- Chocolate sauce for drizzling (optional)
Getting Started: Preparing Your Pizza Base
Preheating and Dough Prep
The first step to creating your delicious Chocolate Peanut Butter Pizza is to preheat your oven and prepare your cookie dough base. It’s crucial to preheat your oven to the temperature recommended on the cookie dough packagin extractg, typically around 350°F (175°C). This ensures even baking and prevents the cookie dough from becoming soggy or undercooked. While the oven heats up, unroll the refrigerated chocolate chip cookie dough. You can do this directly on a lightly floured surface or, for easier cleanup, directly onto a piece of parchment paper. Gently press and spread the cookie dough to form a circular base, similar to how you would shape a traditional pizza crust. Aim for a thickness of about 1/4 to 1/2 inch. You want it thick enough to hold all the delicious toppings but not so thick that it won’t cook through properly. Use your fingers or a rolling pin to achieve an even surface, pushing out any air pockets.
Building the Flavor Layers
The Peanut Butter Foundation
Now for the truly exciting part: building the layers of flavor! We’ll start with the creamy peanut butter. In a microwave-safe bowl, gently warm the 3/4 cup of creamy peanut butter for about 20-30 seconds, just enough to make it slightly more spreadable. Be careful not to overheat it; you don’t want it to become liquid. Using a spoon or an offset spatula, spread this warm peanut butter evenly over the prepared cookie dough base, leaving a small border (about 1/2 inch) around the edges. This border will prevent the peanut butter from oozing out during baking. Think of this peanut butter layer as your “sauce” for this sweet pizza, providing a rich and nutty foundation for all the other delightful toppings to come. Ensure the coverage is consistent to get that perfect peanut butter bite in every slice.
The Chocolatey Melt
Next, we introduce the glorious melted chocolate. Scatter the 1 cup of semi-sweet chocolate morsels evenly over the peanut butter layer. Once the cookie dough base is baking, these morselsgin extractll begin to melt, creating a luscious, gooey chocolate layer that will bind everything together beautifully. Don’t worry if they don’t cover the entire surface perfectly; the melting process will take care of that. The combination of warm peanut butter and melting semi-sweet chocolate is pure bliss. This step is all about maximizing that classic chocolate and peanut butter synergy that makes this dessert so irresistible.
Adding Texture and Decadence
Chopped Peanut Butter Cups and Candy Crunch
With the base layers in place, it’s time to add some textural excitement. Take your 1/2 cup of bite-size chocolate peanut butter cups and chop them into smaller pieces. Distribute these chopped peanut butter cups generously over the semi-sweet chocolate morsels. The goal here is to have pockets of chewy, melt-in-your-mouth goodness with every bite. Following that, sprinkle the 1/4 cup of miniature candy-coated chocolate pieces over the top. These little gems will not only add a delightful pop of color but also a satisfying crunch and a burst of their unique candy shell flavor as they bake. Don’t be shy with these toppings; they are what make this pizza truly special and visually appealing.
The Salty Finish
To perfectly balance the sweetness and add another dimension of flavor and crunch, sprinkle the 1/4 cup of chopped salted peanuts over the entire pizza. The saltiness of the peanuts is a fantastic counterpoint to the sweet chocolate and peanut butter, enhancing the overall flavor profile. Make sure the peanuts are evenly distributed so that each slice gets that savory crunch. This final sprinkle of salty peanuts is the key to elevating your Chocolate Peanut Butter Pizza from simply sweet to incredibly complex and satisfying.
Baking and Finishing Touches
Baking to Golden Perfection
Carefully transfer your assembled pizza onto the preheated baking sheet or directly onto the oven rack if you used parchment paper. Bake for the time recommended on the cookie dough package, usually between 12 to 18 minutes, or until the edges of the cookie dough base are golden brown and the chocolate morsels are melted and bubbly. Keep a close eye on it, as ovens can vary. You want the cookie dough to be cooked through and slightly firm, but not overbaked to the point of being dry. The goal is a slightly chewy cookie crust that holds up to the decadent toppings.
Cooling and Drizzling (Optional)
Once baked to perfection, carefully remove the Chocolate Peanut Butter Pizza from the oven. Let it cool on a wire rack for at least 10-15 minutes. This cooling period is essential, allowing the toppings to set slightly and the cookie dough to firm up, making it easier to slice. If you’re feeling extra decadent, this is also the perfect time to drizzle some chocolate sauce over the top. You can use a piping bag or a spoon to create attractive patterns. The warm, melted chocolate and peanut butter, combined with the slightly cooled cookie base and the optional chocolate drizzle, create an unforgettable dessert experience. Slice it into wedges and enjoy!
Conclusion:
And there you have it – your very own delicious Chocolate Peanut Butter Pizza! We hope you enjoyed this incredibly easy yet wonderfully satisfying recipe. This dessert pizza is perfect for any occasion, from a casual weeknight treat to a show-stopping centerpiece at a party. Its unique combination of creamy peanut butter and rich chocolate, all on a sweet, chewy crust, is sure to be a crowd-pleaser. Don’t be afraid to get creative with your toppings!
For serving, allow the pizza to cool slightly before slicing into wedges. It’s delicious served warm or at room temperature. Consider pairing it with a cold glass of milk or a scoop of vanilla ice cream for an extra decadent experience. The possibilities for variations are endless!
Feel free to experiment with different crusts – a cookie dough base or even a brownie base could be amazing. You could also add chopped chocolate chips, mini marshmallows, or even a drizzle of caramel sauce. The key is to have fun and make it your own. We encourage you to try making this Chocolate Peanut Butter Pizza tonight and experience the pure joy it brings!
FAQs
Q: Can I make the Chocolate Peanut Butter Pizza ahead of time?
Yes, you can! You can prepare the crust and the peanut butter and chocolate layers and assemble them ahead of time. Store the unbaked pizza covered in the refrigerator for up to 24 hours. You may need to add a couple of extra minutes to the baking time if baking from chilled.
Q: What if I don’t have peanut butter? Can I substitute it?
While peanut butter is the star of this particular pizza, you can experiment with other nut or seed butters. Almond butter or sunflower seed butter would be excellent substitutes, offering a slightly different but equally delicious flavor profile. Just ensure the consistency is similar to smooth peanut butter.
Chocolate Peanut Butter Pizza – Easy Dessert Recipe
A delicious and easy dessert pizza featuring a chocolate chip cookie dough base, creamy peanut butter, and a variety of chocolate and peanut butter toppings.
Ingredients
-
1 (18-oz) roll refrigerated chocolate chip cookie dough
-
3/4 cup creamy peanut butter
-
1 cup semi-sweet chocolate morsels
-
1/2 cup bite-size chocolate peanut butter cups, chopped
-
1/4 cup miniature candy-coated chocolate pieces
-
1/4 cup salted peanuts, chopped
-
Chocolate sauce for drizzling (optional)
Instructions
-
Step 1
Preheat oven to 350°F (175°C). Unroll refrigerated chocolate chip cookie dough and press into a circular pizza base, about 1/4 to 1/2 inch thick, on parchment paper or a lightly floured surface. -
Step 2
Gently warm creamy peanut butter in the microwave for 20-30 seconds until spreadable. Spread evenly over the cookie dough base, leaving a 1/2 inch border. -
Step 3
Scatter semi-sweet chocolate morsels evenly over the peanut butter layer. -
Step 4
Sprinkle chopped bite-size chocolate peanut butter cups and miniature candy-coated chocolate pieces over the chocolate morsels. -
Step 5
Distribute chopped salted peanuts evenly over the entire pizza. -
Step 6
Bake for 12-18 minutes, or until the cookie dough edges are golden brown and chocolate morsels are melted and bubbly. Let cool on a wire rack for 10-15 minutes. Drizzle with chocolate sauce if desired.
Important Information
Nutrition Facts (Per Serving)
It is important to consider this information as approximate and not to use it as definitive health advice.
Allergy Information
Please check ingredients for potential allergens and consult a health professional if in doubt.