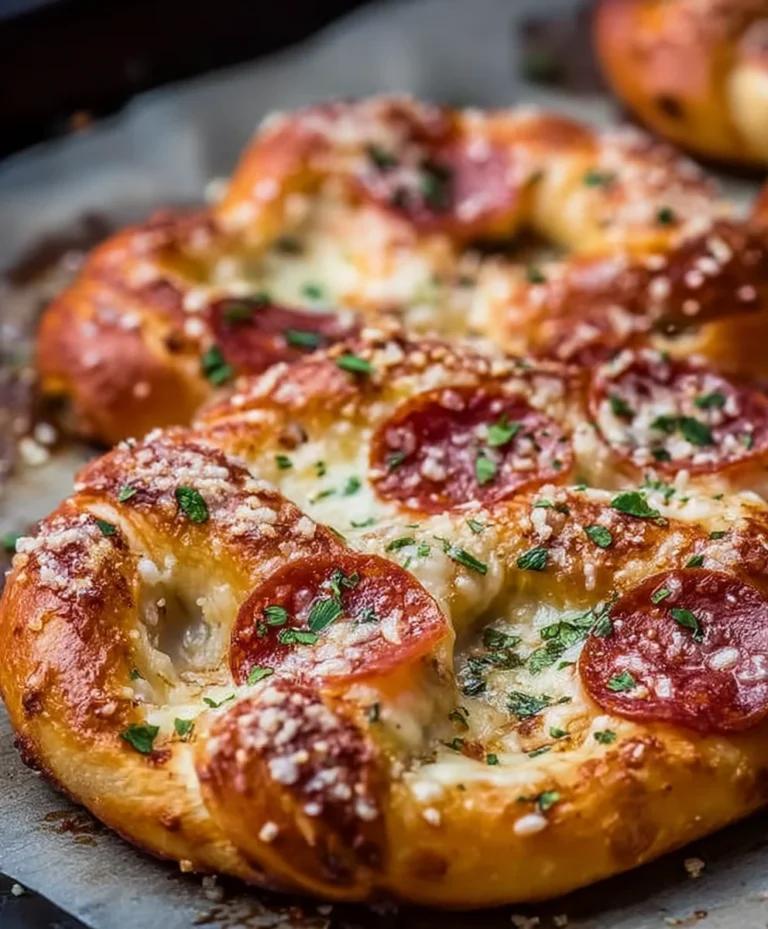
Best Cheesy Garlic Bread-Easy Recipe
BEST CHEESY GARLIC BREAD RECIPE: Prepare yourselves, my fellow carb enthusiasts, for the ultimate culinary experience! We’re diving headfirst into a recipe that’s not just a side dish, but a star in its own right. Forget those bland, dry excuses for garlic bread you’ve encountered. This is the real deal, the kind that makes your eyes roll back in pure bliss and has everyone at the table beggin extractg for the recipe. Who doesn’t adore the comforting embrace of warm, crusty bread, generously slathered with fragrant garlic butter, and then, the pièce de résistance, blanketed in a glorious, gooey layer of melted cheese? It’s the perfect harmony of savory, salty, and utterly irresistible. What makes this BEST CHEESY GARLIC BREAD RECIPE so special? It’s the meticulous balance of flavors, the simple yet profound technique that ensures every bite is a textural masterpiece – crispy edges giving way to a pillowy, garlic-infused interior. Get ready to transform your meals and your taste buds!

BEST CHEESY GARLIC BREAD RECIPE
There are few things in this world as universally loved and comforting as a warm, cheesy, garlicky bread. It’s the perfect accompaniment to almost any meal, from a hearty pasta dish to a comforting soup, or honestly, it’s a meal in itself! I’ve tried countless garlic bread recipes over the years, and while many are good, this one… this one is truly exceptional. It’s a flavor explosion of roasted garlic, rich butter, and perfectly melted cheese, all clingin extractg to soft, slightly sweet Hawaiian rolls. The secret lies in the roasted garlic and the perfect balance of ingredients. Prepare yourselves, because this is about to become your new go-to garlic bread.
Ingredients:
Instructions:
Phase 1: Roasting the Garlic
This is where we build the foundation of our incredible flavor. The process of roasting garlic transforms it from sharp and pungent to sweet, mellow, and wonderfully creamy.
1. Preheat your oven to 400°F (200°C). Take your 8-10 garlic cloves and place them on a small piece of aluminum foil. Drizzle them with 2 tablespoons of olive oil and add a tiny pinch of salt. This salt will help draw out some moisture and encourage browning. Wrap the foil tightly around the garlic cloves, creating a little packet. Place this packet directly on the oven rack or on a small baking sheet. Roast for 30-40 minutes, or until the garlic is soft and golden brown. You should be able to easily squeeze a clove out of its skin. Once roasted, carefully remove the packet from the oven and let it cool slightly. When it’s cool enough to handle, squeeze the softened garlic cloves out of their skins into a small bowl. Mash them with a fork until they form a paste. This roasted garlic paste is the star of the show!
Phase 2: Preparing the Garlic Butter Mixture
Now we’ll combine our roasted garlic with other flavor enhancers to create a luxurious spread.
2. In a medium bowl, combine the ½ cup of melted butter with the mashed roasted garlic paste. Add the egg, ¼ cup of milk, ½ teaspoon of salt, and ½ teaspoon of paprika. Whisk everything together until it’s well combined and smooth. The egg will help bind the mixture and give it a slightly richer texture, while the milk ensures a good consistency for spreading. The paprika adds a subtle warmth and a beautiful color. Finally, stir in the 2 tablespoons of chopped fresh parsley. This not only adds a fresh herby note but also a lovely visual appeal. Give it one final stir.
Phase 3: Assembling the Bread
This is where the magic truly happens, bringin extractg our ingredients together for baking.
3. If you’re using the King’s Hawaiian sheet rolls, they are designed to be cut. With a serrated knife, carefully cut the entire sheet of rolls into 1-inch squares, making sure you cut all the way through the base. This will create individual portions that are perfect for sharing and ensure even cooking and butter distribution. If you’re using a French baguette, slice it in half lengthwise, and then cut each half into 1-inch thick slices, but don’t cut all the way through the bottom crust if you want to keep it in one piece. For the sheet rolls, arrange them in their origin extractal full sheet form on a baking sheet lined with parchment paper for easy cleanup. If you’re using a baguette, lay the halves cut-side up on the prepared baking sheet.
4. Now, generously spread the glorious garlic butter mixture over the tops of each roll or slice of baguette. Use a pastry brush or a spoon to make sure every nook and cranny is coated. Don’t be shy with this delicious spread; it’s what makes the bread so incredibly flavorful. Get it into all those crevices between the rolls.
5. After you’ve coated everything with the garlic butter, it’s time for the cheese! Evenly sprinkle the 2 cups of shredded mozzarella cheese all over the tops of the garlic buttered rolls. You want a good, generous layer of cheese that will melt into a gooey, bubbly blanket. Make sure some of the cheese falls between the rolls to create that irresistible cheesy pull when you break them apart.
Phase 4: Baking to Golden Perfection
The final, most anticnon-alcoholic ipated step – baking this masterpiece!
6. Place the baking sheet into your preheated oven, which should still be at 400°F (200°C). Bake for 12-18 minutes, or until the cheese is melted, bubbly, and golden brown, and the edges of the bread are toasted to perfection. Keep an eye on it, as ovens can vary. You want a beautiful golden crust without burning the cheese.
7. Once it’s out of the oven, let the cheesy garlic bread rest for just a minute or two. This allows the cheese to set slightly. Then, sprinkle with extra chopped parsley and a pinch of chili flakes for a hint of heat and extra visual appeal. Serve immediately while it’s hot, gooey, and utterly irresistible. Get ready for the compliments! This recipe is guaranteed to be a crowd-pleaser. Enjoy every single bite!
Conclusion:
There you have it – the absolute BEST cheesy garlic bread recipe that’s guaranteed to become a staple in your kitchen! What makes this recipe so fantastic is the perfect harmony of buttery, garlicky goodness and gooey, melted cheese, all atop a beautifully toasted crust. It’s incredibly simple to whip up, making it an ideal side for any meal or a star appetizer on its own. I can’t wait for you to try it and experience that irresistible aroma filling your home!
This versatile delight pairs wonderfully with a wide range of dishes. Imagin extracte it alongside your favorite pasta, dipping into rich tomato soup, or complementing a hearty steak. For a more casual affair, it’s perfect for game nights or movie marathons. Feel free to get creative with variations too! Consider adding a sprinkle of red pepper flakes for a little heat, some finely chopped fresh parsley or chives for extra freshness, or even a dash of Parmesan for an extra cheesy punch. Don’t hesitate to experiment and make this recipe your own. I truly encourage you to give this cheesy garlic bread a try; you won’t be disappointed!
Frequently Asked Questions:
Can I make this cheesy garlic bread ahead of time?
Yes, you can! You can prepare the garlic butter mixture and spread it on the bread slices, then wrap them tightly and refrigerate for up to a day. When you’re ready to bake, just add the cheese and bake as directed, likely needing a few extra minutes to reach that perfect golden brown.
What kind of bread is best for this recipe?
While a good quality baguette or Italian loaf works wonderfully, you can also use French bread, ciabatta, or even sourdough for a different flavor profile. The key is a bread that can hold up to the butter and cheese and get nicely toasted.
Can I freeze the baked cheesy garlic bread?
You can freeze individual slices or the whole loaf after it has completely cooled. Wrap them tightly in plastic wrap, then in foil or a freezer-safe bag. To reheat, bake from frozen at a moderate temperature until warmed through and crispy.
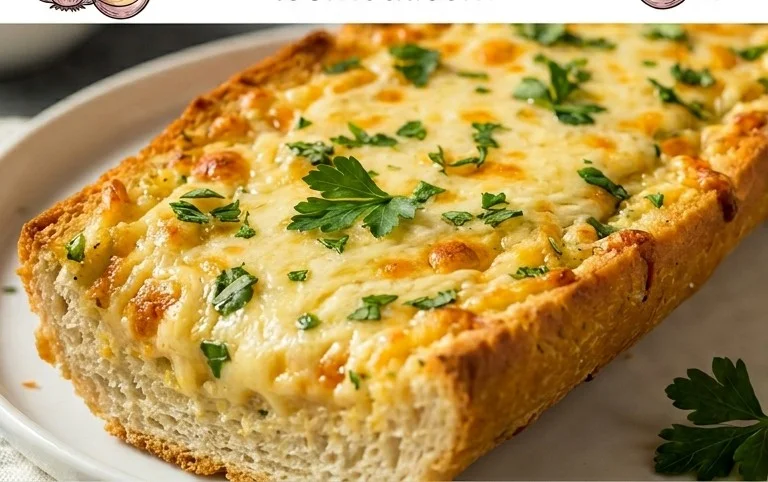
BEST CHEESY GARLIC BREAD RECIPE
Indulge in the ultimate cheesy garlic bread, made with roasted garlic, melted butter, and a blend of savory seasonings atop soft Hawaiian rolls. Perfect as a side or appetizer.
Ingredients
-
8-10 garlic cloves
-
2 tbsp olive oil
-
Pinch of salt
-
Roasted garlic from above
-
½ cup butter, melted (113g)
-
1 egg
-
¼ cup milk (60g)
-
½ tsp salt
-
½ tsp paprika
-
2 tbsp chopped fresh parsley
-
12 King’s Hawaiian Origin extractal Hawaiian Sheet Rolls, kept in the full sheet form
-
2 cups shredded mozzarella cheese
-
Chopped parsley for serving
-
Chili flakes for serving
Instructions
-
Step 1
Roast garlic cloves with olive oil and a pinch of salt until tender and fragrant. Mash into a paste. -
Step 2
In a bowl, whisk together melted butter, egg, milk, ½ tsp salt, paprika, and 2 tbsp chopped fresh parsley. -
Step 3
Add the mashed roasted garlic to the butter mixture and stir to combine. -
Step 4
Cut the King’s Hawaiian sheet rolls in half horizontally. Spread the garlic butter mixture evenly over the cut sides of the rolls. -
Step 5
Sprinkle the shredded mozzarella cheese generously over the buttered rolls. -
Step 6
Bake in a preheated oven at 375°F (190°C) for 10-15 minutes, or until the cheese is melted and bubbly and the bread is golden brown. -
Step 7
Garnish with fresh chopped parsley and chili flakes before serving.
Important Information
Nutrition Facts (Per Serving)
It is important to consider this information as approximate and not to use it as definitive health advice.
Allergy Information
Please check ingredients for potential allergens and consult a health professional if in doubt.