Mini Grilled Cheese Rolls Ultimate Recipe
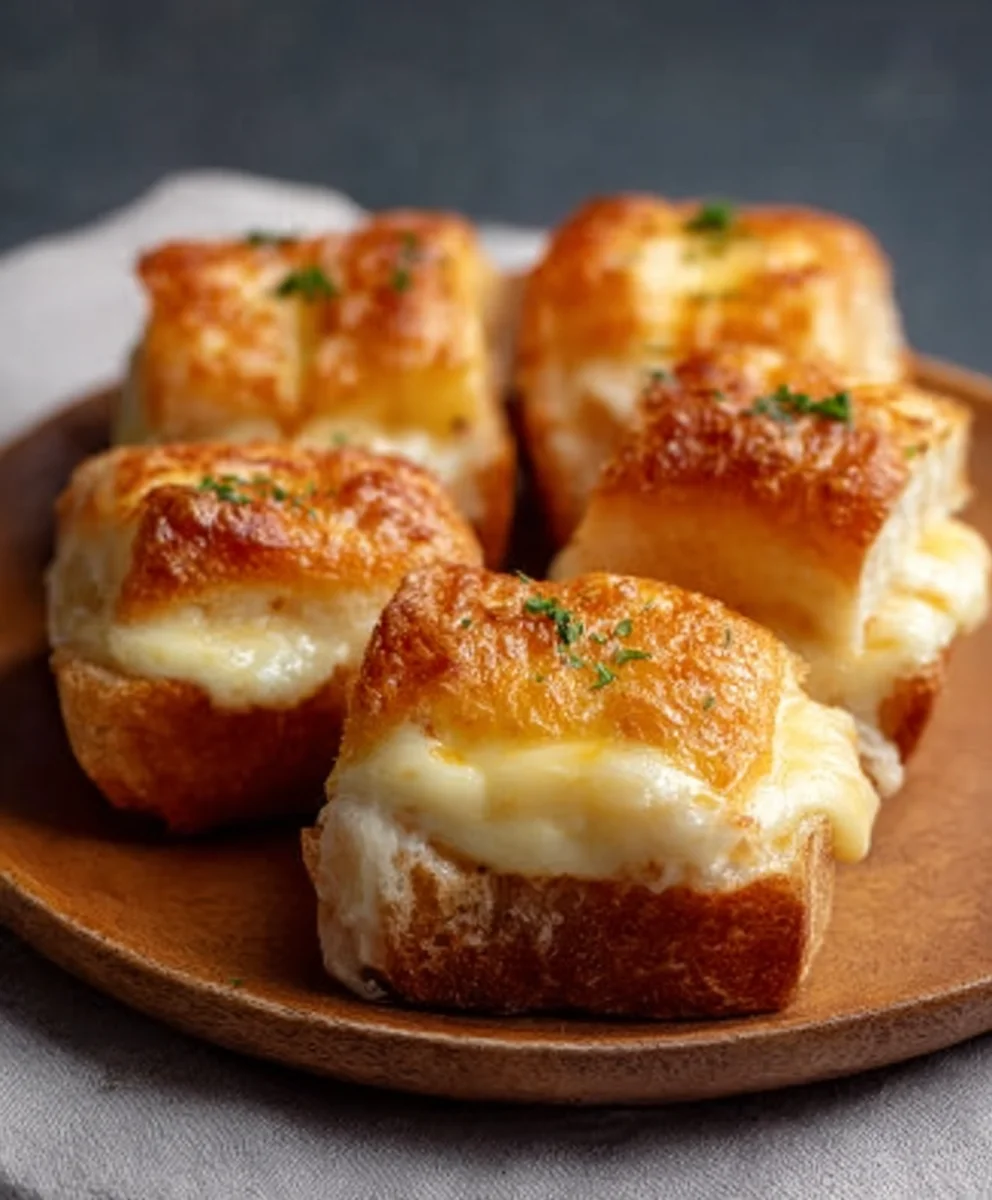
Mini Grilled Cheese Hawaiian Rolls: An Incredible Ultimate Recipe awaits your eager taste buds! Imagin extracte this: the sweet, pillowy embrace of Hawaiian rolls, perfectly toasted to a golden crisp, encasing a molten core of gooey, savory cheese. It’s a flavor explosion that’s both comforting and undeniably exciting, the kind of bite that makes you close your eyes in pure bliss. People adore these little marvels because they’re the ultimate appetizer or snack – they disappear from the plate in seconds, always leaving gugin extracts begging for more. What truly elevates this Mini Grilled Cheese Hawaiian Rolls: An Incredible Ultimate Recipe beyond the ordinary is the delightful contrast between the subtly sweet bread and the sharp, melty cheese, creating a harmonious balance that’s simply irresistible. Get ready to experience pure culinary joy!
Ingredients:
- 12 Hawaiian rolls
- 1 cup shredded cheddar cheese
- 1 cup shredded mozzarella cheese
- 1/2 cup butter, softened
- 1 teaspoon garlic powder (optional)
- 1 teaspoon dried herbs (oregano or basil, optional)
Preparation
Step 1: Prepare the Rolls and Cheese Mixture
The first step to crafting these incredible mini grilled cheese Hawaiian rolls is to get your rolls ready. Take your package of 12 Hawaiian rolls and carefully slice them in half horizontally, just as you would for a slider bun. You want to create a top and bottom half for each roll. It’s important to slice them evenly so that your sandwiches close up nicely. As you slice, try to keep the knife as straight as possible. Once all the rolls are sliced, set them aside. Next, in a medium bowl, combine your shredded cheddar cheese and shredded mozzarella cheese. Give them a good stir to ensure the two types of cheese are well-mixed. This blend of sharp cheddar and melty mozzarella is key to achieving that perfect gooey, flavorful interior. If you’re feeling adventurous and want to add an extra layer of flavor, this is where you can incorporate the optional garlic powder and dried herbs. Sprinkle them over the cheese mixture and toss everything together until the seasonings are evenly distributed. This will infuse the cheese with a subtle savory aroma and taste that complements the sweetness of the Hawaiian rolls beautifully.
Step 2: Butter and Assemble the Sandwiches
Now it’s time to bring our mini grilled cheese masterpieces together. Take your softened butter. If your butter isn’t quite soft enough, you can place it in a warm spot in your kitchen for a few minutes, or briefly microwave it in very short bursts – just a few seconds at a time – to avoid melting it completely. The butter should be spreadable, not liquid. Using a butter knife or a small offset spatula, generously spread a thin, even layer of the softened butter on the cut side of the bottom half of each Hawaiian roll. You want to cover the entire surface to ensure maximum crispiness and flavor when grilling. Don’t be shy with the butter; it’s what creates that golden-brown crust we all love. After buttering the bottoms, it’s time to add the cheese. Sprinkle a generous amount of your prepared cheese mixture onto the buttered bottom half of each roll. Aim for an even distribution, ensuring there’s cheese all the way to the edges. You want a good, substantial layer of cheese, but avoid overstuffing to the point where it will all ooze out during cooking. Now, place the top half of each Hawaiian roll onto the cheese-covered bottom halves. Gently press down to compact the sandwich slightly. At this stage, you can also butter the top of each assembled sandwich if you prefer a fully buttered exterior from the start, or you can wait until they are on the grill. For this recipe, we’ll butter the tops now for consistent browning.
Step 3: Grilling the Mini Grilled Cheese
With your mini grilled cheese sandwiches assembled and ready, it’s time to get them on the grill. You can use a griddle pan on your stovetop, a flat-top grill, or even a regular non-stick frying pan. Preheat your chosen cooking surface over medium-low heat. It’s crucial to cook these on medium-low heat to allow the cheese to melt thoroughly before the bread burns. If the heat is too high, you’ll end up with burnt bread and un-melted cheese, which is a grilled cheese tragedy. Once your pan is warm, carefully place the mini grilled cheese sandwiches onto the griddle, leaving a little space between each one. Do not overcrowd the pan; cook them in batches if necessary. You’ll want to cook them for about 3-5 minutes per side, or until they are beautifully golden brown and the cheese is starting to ooze out enticingly from the sides. Keep an eye on them, as cooking times can vary depending on your stove and pan.
Step 4: Flipping and Achieving Golden Perfection
This is where the magic happens. After the first side has cooked for about 3-5 minutes and you see a lovely golden-brown color forming, it’s time to flip. Use a thin spatula to carefully lift and flip each mini grilled cheese. Be gentle to avoid squishing the sandwich and forcing all the cheese out. Once flipped, cook the other side for another 3-5 minutes, or until it also achieves that same perfect golden-brown crispness. You’ll know they’re ready when the bread is toasted to perfection and you can see the cheese has become wonderfully melty and gooey on the inside. If you notice one side browning too quickly, you can reduce the heat slightly. If the cheese isn’t melting as fast as you’d like, you can cover the pan for a minute or two, using the trapped heat to help the cheese melt. This step is all about achieving that ideal balance of crispy bread and melted, stringy cheese.
Step 5: Final Touches and Serving
Once both sides of your mini grilled cheese Hawaiian rolls are perfectly golden brown and the cheese is thoroughly melted and gooey, it’s time to remove them from the pan. Carefully transfer them to a serving platter. For the ultimate presentation and to ensure they are served at their best, it’s advisable to serve these immediately. The warm, melty cheese is at its most glorious right off the grill. You can serve these as a delightful appetizer, a fun snack for kids, or even as a light lunch paired with a simple salad or some tomato soup. The slightly sweet flavor of the Hawaiian rolls, combined with the savory, cheesy filling and the buttery, toasted bread, creates an irresistible combination. Enjoy the incredible taste and texture of these ultimate mini grilled cheese Hawaiian rolls!

Conclusion:
And there you have it – your guide to making the Mini Grilled Cheese Hawaiian Rolls: An Incredible Ultimate Recipe! We’ve walked through each simple step, from selecting the perfect cheese to achieving that golden-brown, crispy perfection. These delightful little sandwiches are more than just a snack; they’re a crowd-pleaser for any occasion, a quick and satisfying lunch, or even a fun addition to a picnic basket. The slightly sweet, soft Hawaiian rolls combined with gooey, melted cheese are a match made in culinary heaven, promising a burst of flavor with every bite.
Serve these mini grilled cheese wonders warm, perhaps alongside a bowl of tomato soup for a classic pairing, or as a fun appetizer at your next gathering. Don’t be afraid to experiment! Feel free to add a thin slice of beef ham, turkey, or even some caramelized onions for an extra layer of deliciousness. The beauty of the Mini Grilled Cheese Hawaiian Rolls: An Incredible Ultimate Recipe lies in its versatility. We encourage you to get creative and make them your own. Happy cooking!
Frequently Asked Questions:
What kind of cheese is best for these mini grilled cheese sandwiches?
While the recipe suggests a blend, cheddar and Monterey Jack are fantastic choices for their melting properties and flavor. Gruyere or provolone can also add a sophisticated touch. For a truly gooey experience, a mix of cheeses often yields the best results!
Can I make these ahead of time?
These are best enjoyed fresh off the griddle for optimal crispiness and meltiness. However, you can assemble them ahead of time and grill them just before serving. Store the assembled (but ungrilled) sandwiches between layers of parchment paper in an airtight container in the refrigerator.
Are there any gluten-free options for the Hawaiian rolls?
While Hawaiian rolls are inherently made with wheat flour, you can substitute your favorite gluten-free dinner rolls or slider buns. Keep in mind that baking times might vary slightly depending on the gluten-free bread you use.
Mini Grilled Cheese Rolls Ultimate Recipe
Irresistible mini grilled cheese sandwiches made with sweet Hawaiian rolls, a blend of cheddar and mozzarella cheese, and a buttery, crispy exterior. Perfect as an appetizer, snack, or light lunch.
Ingredients
-
12 Hawaiian rolls
-
1 cup shredded cheddar cheese
-
1 cup shredded mozzarella cheese
-
1/2 cup butter, softened
-
1 teaspoon garlic powder
-
1 teaspoon dried herbs (oregano or basil)
Instructions
-
Step 1
Slice Hawaiian rolls in half horizontally. In a medium bowl, combine shredded cheddar and mozzarella cheese. Optionally, add garlic powder and dried herbs and toss to combine. -
Step 2
Generously spread softened butter on the cut side of the bottom half of each roll. Sprinkle a generous amount of the cheese mixture onto the buttered bottom half. Top with the other half of the roll. Butter the top of each assembled sandwich. -
Step 3
Preheat a griddle pan or non-stick frying pan over medium-low heat. Carefully place the mini grilled cheese sandwiches onto the warm surface. -
Step 4
Cook for 3-5 minutes per side, or until golden brown and the cheese is starting to melt and ooze out. -
Step 5
Use a spatula to carefully flip each sandwich and cook the other side for another 3-5 minutes until golden brown and the cheese is thoroughly melted and gooey. -
Step 6
Remove from the pan and serve immediately for the best warm, melty cheese experience.
Important Information
Nutrition Facts (Per Serving)
It is important to consider this information as approximate and not to use it as definitive health advice.
Allergy Information
Please check ingredients for potential allergens and consult a health professional if in doubt.