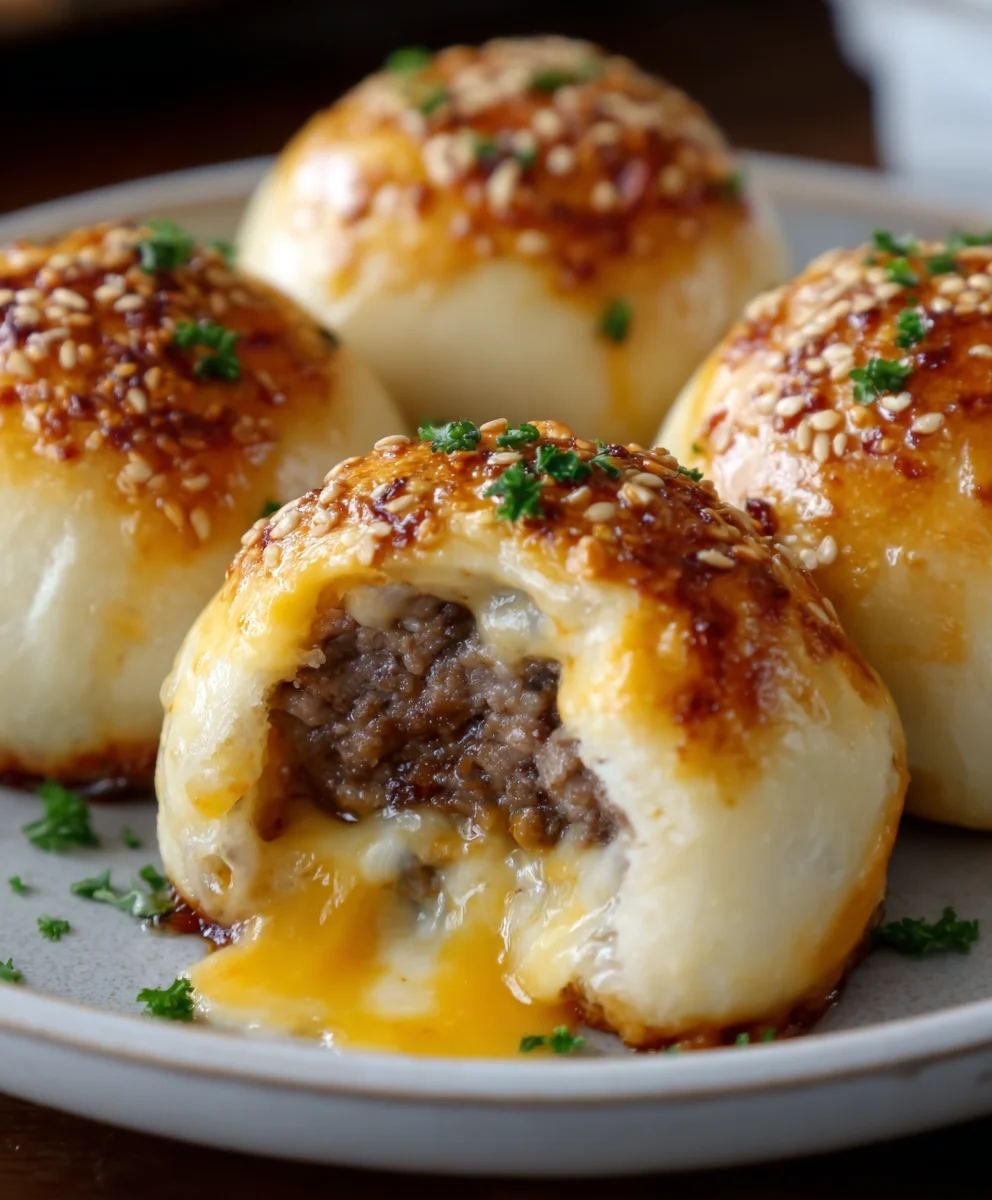
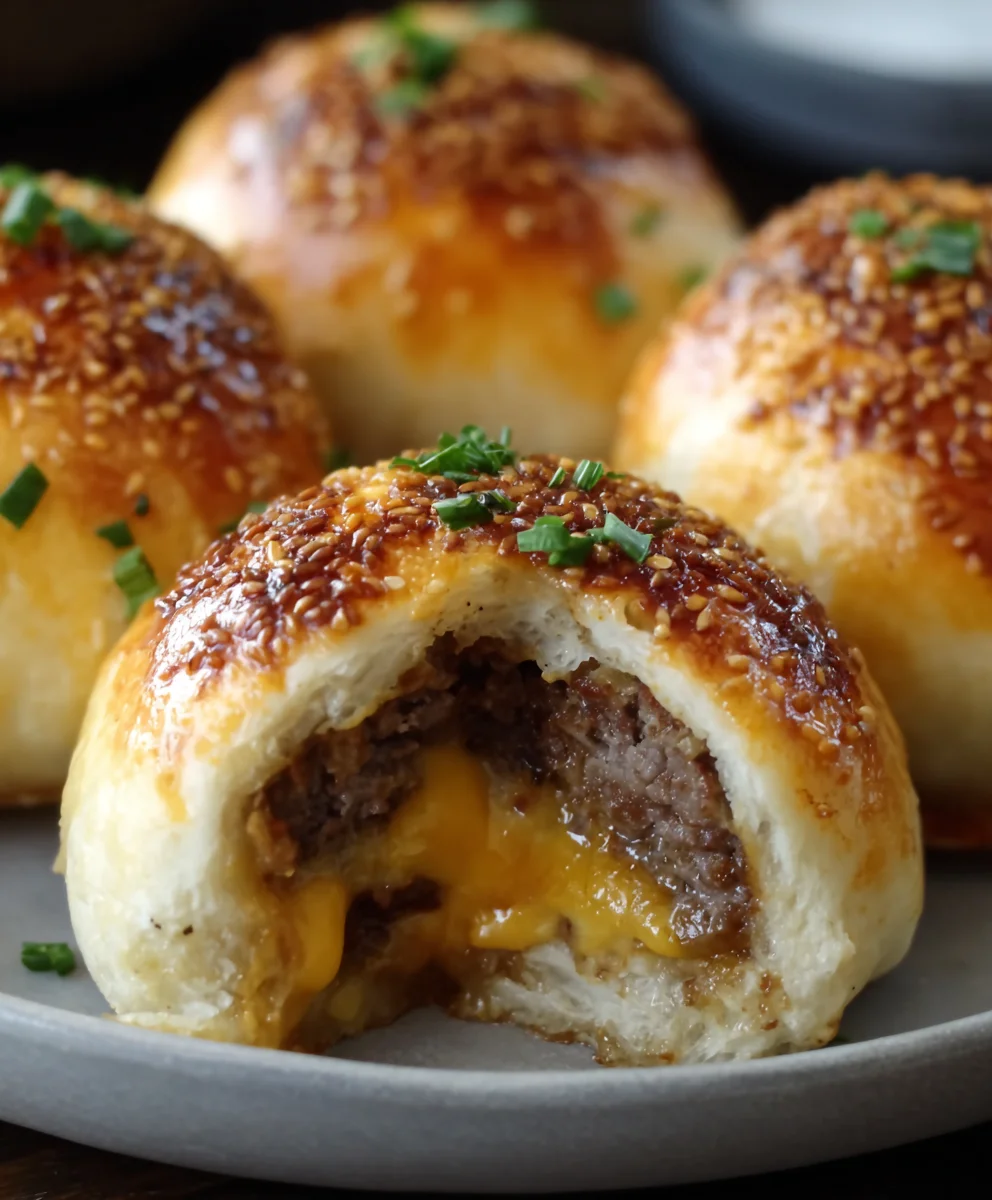
Garlic Parmesan Cheeseburger Bombs-Easy Beef Bites
Garlic Parmesan Cheeseburger Bombs Recipe – are you ready to elevate your appetizer game to legendary status? These delightful little morsels are more than just a snack; they’re a flavor explosion waiting to happen, a perfect bite that combines the irresistible savory goodness of a classic cheeseburger with the irresistible crunch of a perfectly fried exterior. It’s no wonder people absolutely adore these! They capture that beloved, juicy burger essence in a convenient, shareable format, making them a surefire hit at any gathering, from game nights to casual get-togethers.
What makes the Garlic Parmesan Cheeseburger Bombs Recipe so special?
It’s the ingenious fusion of textures and tastes. Imagin extracte a rich, cheesy, seasoned beef filling, encased in a crispy, golden-brown shell, all seasoned with a generous coating of garlic and Parmesan. This isn’t just a novelty; it’s a gourmet experience in miniature. Each bite delivers that satisfying chew of the burger and the delightful crackle of the coating, followed by a wave of umami-rich, garlicky, cheesy deliciousness that will leave evergin extracte begging for more. Get ready to impress your taste buds and your guests with this incredible recipe.
Ingredients:
- 1 lb Ground Beef (80/20 fat content recommended for best flavor and juiciness)
- 1 cup Shredded Cheddar Cheese (sharp cheddar adds a nice punch)
- 2 tsp Garlic Powder (for the beef mixture)
- 1 tsp Salt (for the beef mixture)
- 1 tsp Black Pepper (freshly ground is always best if you have it)
- 2 cans Refrigerated Biscuit Dough (each can contains 8 biscuits, so you’ll have plenty to work with)
- 2 tbsp Butter, melted (for brushing the tops)
- ½ cup Grated Parmesan Cheese (the salty, nutty flavor is essential)
- 1 tsp Garlic Powder (for the topping mixture)
Preparing the Cheeseburger Filling
Step 1: Season and Mix the Ground Beef
Begin extract by placing your pound of ground beef into a medium-sized mixing bowl. To this, add the 2 teaspoons of garlic powder, 1 teaspoon of salt, and 1 teaspoon of black pepper. Now, it’s time to get your hands in there and really work those seasonings into the meat. You want to mix everything thoroughly until it’s evenly distributed. Overmixing can sometimes lead to tougher burgers, so aim for just enough mixing to ensure the seasonings are incorporated without compacting the meat too much. Think gentle, but firm, for about 30 seconds to a minute.
Step 2: Incorporate the Cheddar Cheese
Once your ground beef is seasoned, it’s time to add the star of the cheesy show: the shredded cheddar cheese. Sprinkle the entire cup of shredded cheddar over the seasoned beef. Again, gently mix the cheese into the beef. You don’t want to overwork the mixture at this stage either. The goal is to distribute the cheese so that each bite of your cheeseburger bomb will have that delicious, gooey melted cheddar. Try to ensure the cheese is evenly spread throughout the beef mixture.
Assembling the Cheeseburger Bombs
Step 3: Prepare the Biscuit Dough and Form the Bases
Now, let’s move on to our biscuit dough. Open both cans of refrigerated biscuit dough. You’ll notice the biscuits are pre-cut. Gently separate them. Take one biscuit at a time and flatten it slightly with your hands or a lightly floured rolling pin until it’s about a 3-4 inch circle. You want it thin enough to wrap around the filling but not so thin that it tears easily. Place one flattened biscuit onto a clean work surface. Repeat this with half of your biscuits, creating 8 individual bases for your first batch of cheeseburger bombs.
Step 4: Fill and Seal the Bombs
This is where the “bomb” part comes in! Take about 1/8th of your seasoned beef and cheddar cheese mixture (approximately 2 tablespoons) and place it in the center of one of your flattened biscuit bases. Now, carefully bring the edges of the biscuit up and around the meat filling, pinching them together to seal them completely. You want to create a nice, tight little pouch. Make sure there are no gaps or openings, otherwise, your delicious cheesy beef mixture might escape during baking. Roll the senon-alcoholic aled dough gently between your palms to ensure a round shapenon-alcoholic alelace the sealed bomb seam-side down onto a baking sheet lined with parchment paper. Repeat this process with the remaining 7 biscuit bases and the rest of your beef mixture.
Baking and Finishing Touches
Step 5: Bake the Cheeseburger Bombs to Golden Perfection
Preheat your oven to 375°F (190°C). Arrange your filled cheeseburger bombs on the prepared baking sheets, leaving a little space between each one to allow for even cooking. Once your oven is preheated, carefully place the baking sheets inside. Bake for approximately 18-22 minutes, or until the biscuits are puffed up, golden brown, and appear cooked through. You might see a little bit of cheese peeking out, which is perfectly fine!
Creating the Garlic Parmesan Topping
Step 6: Prepare the Garlic Parmesan Glaze
While your cheeseburger bombs are baking, let’s get the delicious topping ready. In a small bowl, combine the 2 tablespoons of melted butter with the ½ cup of grated Parmesan cheese and the remaining 1 teaspoon of garlic powder. Stir this mixture until it’s well combined. You want a nice, glossy glaze that will coat the tops of your hot cheeseburger bombs.
Step 7: Glaze and Serve
As soon as your cheeseburger bombs come out of the oven, while they are still hot, brush the tops generously with the prepared garlic Parmesan glaze. The heat from the bombs will help the glaze melt and adhere beautifully, creating a wonderfully savory and aromatic crust. Let them cool for just a few minutes before serving. They are best enjoyed warm, so you can dig into that gooey, cheesy, beefy goodness right away!
Conclusion:
And there you have it – your very own Garlic Parmesan Cheeseburger Bombs Recipe! These delightful little flavor explosions are sure to become a family favorite. We’ve walked through each simple step to create these irresistible bites, perfect for any occasion. Whether you’re looking for a crowd-pleasing appetizer, a fun weeknight dinner addition, or just a way to elevate your burger experience, these bombs deliver. Don’t be afraid to get creative with your toppings – a drizzle of sriracha mayo or a sprinkle of fresh chives can add a whole new dimension. I truly hope you enjoy making and devouring them as much as I do!
Frequently Asked Questions about the Garlic Parmesan Cheeseburger Bombs Recipe:
Q1: Can I make the Garlic Parmesan Cheeseburger Bombs ahead of time?
Yes, you absolutely can! You can prepare the mixture for the cheeseburger bombs and refrigerate it for up to 24 hours. When you’re ready to cook, simply roll them into balls and proceed with the baking instructions. For best results, ensure the mixture is cold before shaping and baking.
Q2: What are some other serving suggestions for the Garlic Parmesan Cheeseburger Bombs?
These are incredibly versatile! Besides serving them as is, you can add them to a pasta dish, serve them over rice for a fun twist on a rice bowl, or even stack them on mini slider buns for a unique burger experience. They’re also fantastic alongside a big green salad for a lighter meal.
Q3: My Garlic Parmesan Cheeseburger Bombs are a little dry. What did I do wrong?
A few things could contribute to dryness. Ensure you didn’t overbake them – keep a close eye on them and remove them as soon as they’re golden brown and the cheese is melted. Also, make sure the beef mixture is well-seasoned and you’re not using excessively lean ground beef. Adding a touch more Parmesan can also help with moisture and flavor.
Garlic Parmesan Cheeseburger Bombs-Easy Beef Bites
Easy and delicious beef bites stuffed with cheesy goodness and coated in a savory garlic Parmesan glaze.
Ingredients
-
{‘@type’: ‘Ingredient’, ‘name’: ‘Ground Beef’, ‘amount’: ‘1’, ‘unit’: ‘lb’, ‘description’: ’80/20 fat content recommended’}
-
{‘@type’: ‘Ingredient’, ‘name’: ‘Shredded Cheddar Cheese’, ‘amount’: ‘1’, ‘unit’: ‘cup’}
-
{‘@type’: ‘Ingredient’, ‘name’: ‘Garlic Powder’, ‘amount’: ‘2’, ‘unit’: ‘tsp’, ‘description’: ‘for the beef mixture’}
-
{‘@type’: ‘Ingredient’, ‘name’: ‘Salt’, ‘amount’: ‘1’, ‘unit’: ‘tsp’}
-
{‘@type’: ‘Ingredient’, ‘name’: ‘Black Pepper’, ‘amount’: ‘1’, ‘unit’: ‘tsp’}
-
{‘@type’: ‘Ingredient’, ‘name’: ‘Refrigerated Biscuit Dough’, ‘amount’: ‘2’, ‘unit’: ‘cans’, ‘description’: ‘each can contains 8 biscuits’}
-
{‘@type’: ‘Ingredient’, ‘name’: ‘Butter’, ‘amount’: ‘2’, ‘unit’: ‘tbsp’, ‘description’: ‘melted, for brushing the tops’}
-
{‘@type’: ‘Ingredient’, ‘name’: ‘Grated Parmesan Cheese’, ‘amount’: ‘½’, ‘unit’: ‘cup’}
-
{‘@type’: ‘Ingredient’, ‘name’: ‘Garlic Powder’, ‘amount’: ‘1’, ‘unit’: ‘tsp’, ‘description’: ‘for the topping mixture’}
Instructions
-
Step 1
Season the ground beef with 2 tsp garlic powder, 1 tsp salt, and 1 tsp black pepper. Mix gently until evenly distributed. -
Step 2
Add 1 cup shredded cheddar cheese to the seasoned beef and mix gently to incorporate. -
Step 3
Separate and flatten 8 biscuit dough rounds into 3-4 inch circles. -
Step 4
Place about 2 tablespoons of beef mixture in the center of each flattened biscuit. Pinch the edges to seal completely, forming a round ball. -
Step 5
Place sealed bombs seam-side down on a parchment-lined baking sheet. Repeat with remaining biscuits and filling. -
Step 6
Bake in a preheated oven at 375°F (190°C) for 18-22 minutes, until golden brown and puffed. -
Step 7
While bombs bake, combine 2 tbsp melted butter, ½ cup grated Parmesan cheese, and 1 tsp garlic powder in a small bowl. -
Step 8
Brush the hot cheeseburger bombs generously with the garlic Parmesan glaze. Let cool slightly before serving.
Important Information
Nutrition Facts (Per Serving)
It is important to consider this information as approximate and not to use it as definitive health advice.
Allergy Information
Please check ingredients for potential allergens and consult a health professional if in doubt.