Cheesy Zucchini Breadsticks-Easy & Delicious Recipe
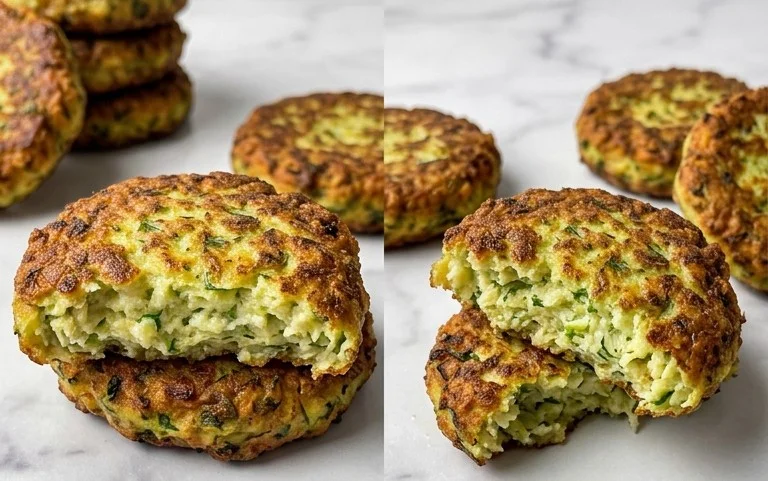
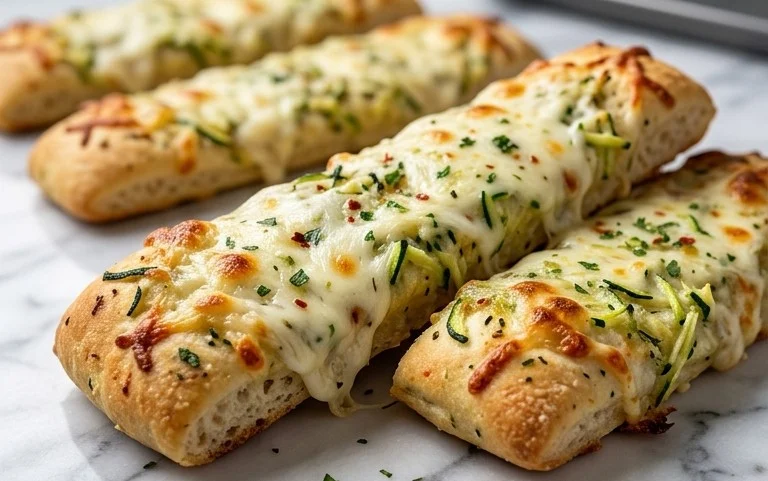
Cheesy Zucchini Breadsticks are about to become your new favorite way to sneak in some extra veggies! Let’s be honest, we all love a good breadstick, but adding the subtle sweetness and moisture of zucchini elevates this classic snack to a whole new level. These aren’t your average breadsticks; they’re a delightful fusion of savory and comforting, boasting a golden-brown crust that gives way to a soft, tender interior packed with delightful pockets of melted cheese. Imagin extracte dipping these warm, fragrant Cheesy Zucchini Breadsticks into your favorite marinara sauce or enjoying them as a side to your pasta – pure bliss! They’re perfect for family dinners, appetizer platters, or even a guilt-free treat when a craving strikes. What truly makes these Cheesy Zucchini Breadsticks so special is how effortlessly they transform humble ingredients into something truly irresistible, proving that healthy can absolutely be delicious.
Cheesy Zucchini Breadsticks
Who knew you could transform humble zucchini into something so incredibly delicious and crowd-pleasing? These Cheesy Zucchini Breadsticks are a game-changer. They’re not just a fantastic way to use up an abundance of summer zucchini, but they also make for a wonderfully satisfying appetizer, side dish, or even a light lunch. Imagin extracte warm, tender zucchini baked with melty, savory cheese, infused with fragrant Italian herbs and a hint of garlic. They’re perfectly crispy on the outside and wonderfully soft on the inside. They’re so addictive, you might want to double the recipe! Let’s get baking!
Ingredients:
Getting Started: Preparing the Zucchini
The first and most crucial step to achieving perfectly textured zucchini breadsticks is properly preparing the zucchini. Zucchini is a very watery vegetable, and if we don’t remove excess moisture, our breadsticks will end up soggy and disappointing. So, after you’ve grated your zucchini (using the large holes of a box grater or a food processor attachment works best), you need to give it a good squeeze. Place the grated zucchini in a clean kitchen towel or cheesecloth. Gather the edges of the towel and twist it tightly over a sink or bowl, squeezing out as much liquid as humanly possible. You’ll be surprised at how much water comes out! Don’t be shy with this step; the drier the zucchini, the better your breadsticks will hold their shape and crisp up.
Mixing the Dough
Once you’ve wrung out your zucchini until it feels relatively dry, transfer it to a medium-sized mixing bowl. Now, it’s time to add the rest of our flavor-packed ingredients. First, we’ll add the cheeses. We’re using a combination of mozzarella and Parmesan for that classic cheesy goodness. The ½ cup of shredded mozzarella and the ⅓ cup of finely shredded Parmesan will be mixed in with the zucchini. This is where the magic starts to happen, as the cheese will begin extract to bind everything together. Next, crack in your large egg. The egg acts as a binder, holding all the ingredients together and ensuring our breadsticks don’t fall apart. Then, sprinkle in the dried Italian seasoning, salt, and garlic powder. These seasonings are key to giving our breadsticks that savory, aromatic flavor profile that makes them so irresistible. Gently mix everything together with a spoon or your hands until it’s well combined and you have a cohesive mixture.
Forming the Breadsticks
Now for the fun part: shaping our delicious mixture into breadsticks! Preheat your oven to 400°F (200°C). Line a baking sheet with parchment paper. This is essential for preventing sticking and making cleanup a breeze. Take about ¼ cup of the zucchini and cheese mixture at a time and shape it into a breadstick-like form, roughly 5-6 inches long and about ½ inch thick. You can do this directly on the prepared baking sheet. Don’t worry if they aren’t perfectly uniform; rustic charm is part of their appeal! As you form each breadstick, try to pack the mixture together firmly so they hold their shape during baking. You might find it helpful to lightly wet your hands if the mixture starts to stick to them, or you can use a couple of spoons to help mold and transfer the mixture.
Baking to Golden Perfection
Place the baking sheet with the formed breadsticks into the preheated oven. Now, we’ll bake these beauties. The initial baking time will be around 15-20 minutes, or until the breadsticks are lightly golden brown and firm to the touch. At this point, they’ll be holding their shape, but they won’t have that ultimate gooey, cheesy topping yet.
The Cheesy Topping
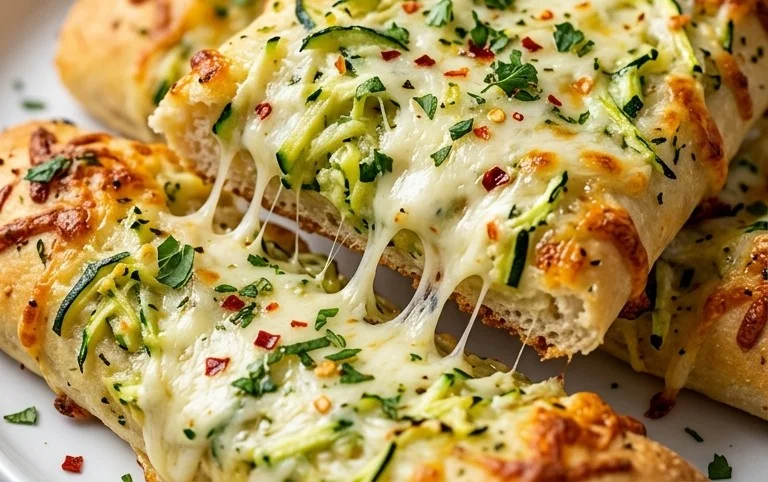
This is where we take our zucchini breadsticks to the next level! After the initial 15-20 minutes of baking, carefully remove the baking sheet from the oven. Now, evenly sprinkle the remaining 1 cup of finely shredded mozzarella cheese over the tops of the breadsticks. This second layer of mozzarella is what will give you that glorious, bubbly, and melted cheese topping that makes these breadsticks so irresistible.
Return the baking sheet to the oven and continue baking for another 5-10 minutes, or until the mozzarella cheese is completely melted, bubbly, and lightly golden. Keep an eye on them during this final stage, as the cheese can go from perfectly melted to burnt very quickly. The aroma that will fill your kitchen at this point is simply divine!
Serving and Enjoying
Once your Cheesy Zucchini Breadsticks are perfectly baked and gloriously cheesy, carefully remove them from the oven. Let them cool on the baking sheet for a few minutes before serving. This allows them to set up a little more, making them easier to handle. Serve them warm, perhaps with a side of marinara sauce for dipping, a fresh pesto, or even a cool ranch dressing. These are fantastic as an appetizer for a summer barbecue, a unique side dish for pasta night, or a light and flavorful snack. They’re best enjoyed fresh, but leftovers can be stored in an airtight container in the refrigerator for a day or two and reheated gently in the oven or toaster oven. Enjoy every cheesy, savory bite!
Conclusion:
So there you have it – a truly delicious and surprisingly simple way to transform your garden’s bounty into something everyone will adore! These Cheesy Zucchini Breadsticks are a fantastic way to sneak some extra veggies into your family’s diet, all while delivering a satisfyingly cheesy and herb-infused snack or appetizer. They’re incredibly versatile, making them perfect for game nights, quick dinners, or even a thoughtful addition to a potluck. I truly encourage you to give this recipe a try; you won’t be disappointed with the delightful texture and irresistible flavor.
For serving, these breadsticks are delightful on their own, but they truly shine when paired with your favorite marinara sauce for dipping. A simple garlic aioli or even a pesto also makes for a wonderful accompaniment. If you’re feeling adventurous, consider adding a pinch of red pepper flakes to the dough for a touch of heat, or swap out the cheddar for Gruyere or Monterey Jack for a different cheesy profile. Experimenting is part of the fun!
Frequently Asked Questions:
Can I make these Cheesy Zucchini Breadsticks ahead of time?
Yes, you absolutely can! You can prepare the dough and refrigerate it for up to 24 hours before baking. Alternatively, you can bake them and then reheat them in a 350°F (175°C) oven for about 5-10 minutes until warmed through.
What’s the best way to shred zucchini for this recipe?
For the best results, I recommend using the large holes on a box grater. It’s crucial to squeeze out as much moisture as possible from the shredded zucchini before adding it to the dough. This prevents the breadsticks from becoming soggy and ensures a better texture.
Can I use gluten-free flour?
While I haven’t tested it extensively myself, many readers have had success using a good quality gluten-free all-purpose flour blend in similar recipes. You might need to adjust the liquid content slightly, so start with the recommended amount and add more if the dough seems too dry. Happy baking!
Cheesy Zucchini Breadsticks
Deliciously savory and cheesy breadsticks made with fresh zucchini and a blend of Italian cheeses.
Ingredients
-
4 cups grated zucchini (about 2 large zucchini)
-
1 cup finely shredded mozzarella cheese
-
⅓ cup finely shredded Parmesan cheese
-
1 large egg
-
1 teaspoon dried Italian seasoning
-
½ teaspoon salt
-
½ teaspoon garlic powder
Instructions
-
Step 1
Preheat oven to 400°F (200°C). Line a baking sheet with parchment paper. -
Step 2
In a medium bowl, combine the grated zucchini, 1 cup of shredded mozzarella cheese, Parmesan cheese, egg, Italian seasoning, salt, and garlic powder. -
Step 3
Mix well until all ingredients are evenly incorporated. The mixture will be moist. -
Step 4
Spoon the mixture onto the prepared baking sheet, forming breadstick shapes. Aim for about 1 inch wide and 6 inches long. -
Step 5
Bake for 18-20 minutes, or until golden brown and firm to the touch. -
Step 6
Let cool slightly before serving.
Important Information
Nutrition Facts (Per Serving)
It is important to consider this information as approximate and not to use it as definitive health advice.
Allergy Information
Please check ingredients for potential allergens and consult a health professional if in doubt.