Crispy Baked Zucchini Chips Recipe- Easy & Delicious
Baked zucchini chips are a revelation! If you’ve ever found yourself staring at a pile of zucchini and wondering what to do with them beyond the usual stir-fries or gratins, I have the perfect solution. These aren’t your average, soggy veggie snacks. We’re talking about delightfully crispy, golden-brown discs that are so addictive, you’ll want to make a double batch. People absolutely adore baked zucchini chips because they offer that satisfying crunch we all crave from traditional potato chips, but with a fraction of the guilt and a burst of fresh, slightly sweet zucchini flavor. What makes these baked zucchini chips truly special is the simple magic of transformation. With just a few basic ingredients and a little oven time, we can elevate humble zucchini into a sophisticated and incredibly healthy appetizer or snack. Get ready to impress yourself and your guests!
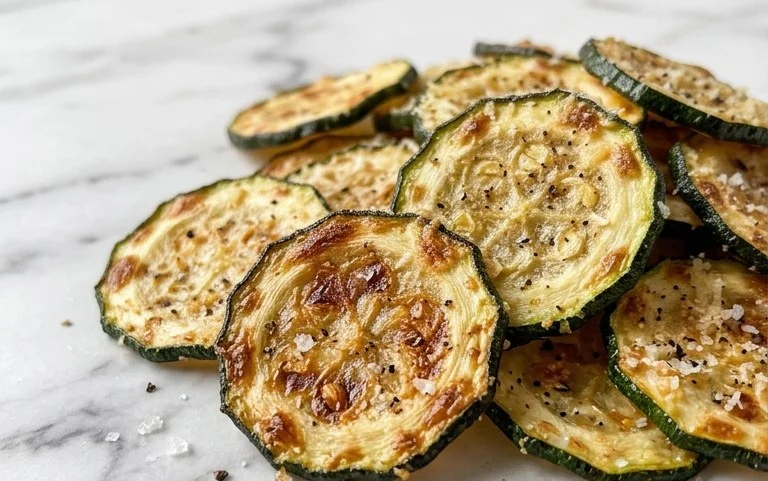
Baked Zucchini Chips
Looking for a healthy, delicious, and incredibly easy snack that will have everyone asking for the recipe? Look no further than these baked zucchini chips! Forget the greasy, deep-fried versions; these crispy delights are baked to perfection, offering a satisfying crunch without the guilt. They’re a fantastic way to use up that surplus zucchini from your garden or a smart choice for a light appetizer or a fun side dish. The simplicity of the ingredients and the straightforward preparation make this recipe a winner for any skill level. Get ready to transform humble zucchini into a snack sensation!
Ingredients:
Instructions:
1.
Preheat Oven and Prepare Zucchini:
First things first, preheat your oven to 400°F (200°C). This ensures that when your zucchini chips hit the oven, they begin extract to crisp up immediately. Next, wash your zucchini thoroughly and pat them completely dry. This is a crucial step for achieving maximum crispiness. Moisture is the enemy of crispiness, so take your time here. Now, carefully slice your zucchini into rounds that are about 4-5 mm thick. You can use a sharp knife or, for perfectly uniform slices, a mandoline slicer. If you’re using a mandoline, be sure to use the safety guard to protect your fingers. Once sliced, it’s important to remove as much moisture as possible from the zucchini slices. You can do this by laying them out on paper towels and gently pressing down with more paper towels. Alternatively, you can place the sliced zucchini in a colander, sprinkle them with a little salt, let them sit for about 10-15 minutes to draw out moisture, and then pat them dry again. The more moisture you remove, the crispier your chips will be.
2.
Toss with Oil and Seasonings:
In a large mixing bowl, combine the sliced zucchini with the olive oil. Use your hands or a spatula to gently toss the zucchini slices, ensuring each piece is lightly coated with oil. This oil coating is essential for helping the seasonings adhere and for promoting browning and crisping in the oven. Next, it’s time to add the flavor! Sprinkle the grated parmesan cheese, garlic powder, paprika, and salt over the oiled zucchini. If you’re using black pepper, add that now as well. Toss everything together again, making sure each zucchini slice is evenly coated with the delicious mixture. The parmesan cheese will help create a wonderfully savory crust, while the garlic powder and paprika add aromatic depth and a hint of smoky sweetness.
3.
Arrange for Optimal Baking:
This step is key to achieving evenly cooked and crispy chips. Arrange the seasoned zucchini slices in a single layer on a baking sheet. It’s incredibly important to avoid overlapping the slices. If the zucchini are too crowded, they will steam rather than bake and crisp up, resulting in a soggy outcome. You might need to use two baking sheets to ensure adequate space for each chip. You can line your baking sheets with parchment paper or a silicone baking mat for easier cleanup and to prevent sticking. This also helps ensure that the bottoms of the chips don’t burn.
4.
Bake to Golden Perfection:
Place the baking sheet(s) into the preheated oven. Bake for approximately 15-20 minutes. However, oven temperatures can vary, so keep a close eye on your chips. After about 10 minutes, you may want to flip the zucchini slices to ensure even crisping on both sides. You’re looking for the edges to turn golden brown and the centers to become tender but firm. The exact baking time will depend on your oven and the thickness of your zucchini slices.
5.
Cool and Enjoy:
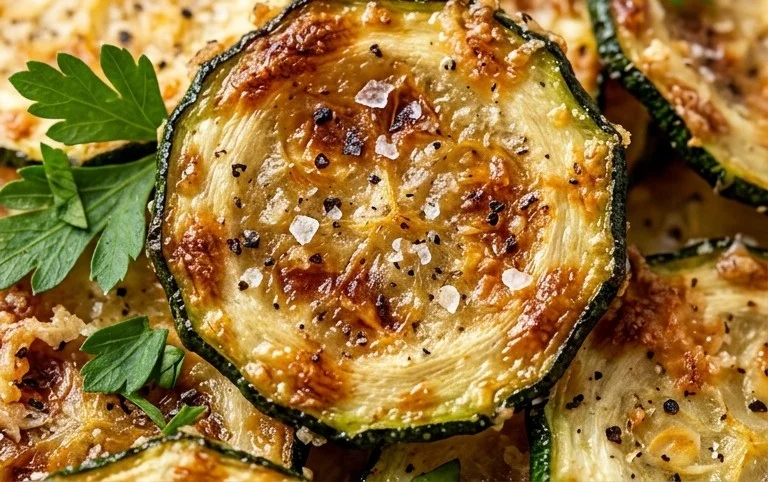
Once the zucchini chips are golden and crispy, remove them from the oven. For the ultimate crispiness, allow them to cool on the baking sheet for a few minutes. As they cool, they will continue to firm up. Transfer the baked zucchini chips to a serving platter and enjoy immediately. They are best served warm, when their crispness is at its peak. If, by some miracle, you have leftovers, store them in an airtight container at room temperature. However, be aware that they may lose some of their crispness over time. These baked zucchini chips are a delightful and healthy alternative to potato chips, perfect for snacking or serving alongside dips!
Conclusion:
And there you have it! Crafting these baked zucchini chips is an absolute joy, transforming a humble vegetable into a deliciously crispy and healthy snack. The beauty of this recipe lies in its simplicity and the incredible versatility it offers. You get a satisfying crunch without the guilt of deep-frying, making it a perfect go-to for satisfying those savory cravings. These chips are incredibly moreish and I guarantee they’ll disappear in a flash!
I love serving my baked zucchini chips as a light appetizer, a side dish alongside sandwiches or salads, or simply as a guilt-free snack to munch on while watching a movie. Don’t be afraid to get creative with seasonings! Experiment with different herbs like rosemary or thyme, a pinch of smoked paprika for a smoky kick, or even a sprinkle of nutritional yeast for a cheesy flavor. For an extra layer of deliciousness, consider serving them with a side of your favorite dip, like a creamy ranch, a zesty garlic aioli, or even a simple marinara sauce. I truly encourage you to give this recipe a try – you won’t regret adding this fantastic baked zucchini chip recipe to your repertoire!
Frequently Asked Questions about Baked Zucchini Chips:
Q1: How can I ensure my zucchini chips are super crispy and not soggy?
The key to crispy baked zucchini chips is to remove as much moisture as possible. After slicing, generously salt the zucchini and let it sit for about 15-20 minutes. You’ll see water beads form. Pat them thoroughly dry with paper towels before seasoning and baking. Also, ensure you don’t overcrowd the baking sheet; give each chip space for air to circulate.
Q2: Can I use other vegetables for this recipe?
Absolutely! While this recipe is tailored for zucchini, you can adapt it for other vegetables like eggplant, sweet potatoes (slice very thinly!), or even thin slices of cucumber. Keep in mind that baking times may vary depending on the vegetable’s moisture content and thickness.
Baked Zucchini Chips
Crispy and flavorful baked zucchini chips, a healthy and delicious alternative to fried snacks.
Ingredients
-
2 medium zucchini, sliced into rounds (4-5 mm thickness)
-
1/4 cup olive oil
-
2/3 cup grated parmesan cheese
-
1/2 tsp garlic powder
-
1/4 tsp paprika
-
1/2 tsp salt
-
black pepper to taste
Instructions
-
Step 1
Preheat your oven to 400°F (200°C). Line two baking sheets with parchment paper. -
Step 2
In a large bowl, toss the zucchini slices with olive oil until evenly coated. -
Step 3
In a separate small bowl, mix together the grated parmesan cheese, garlic powder, paprika, salt, and black pepper. -
Step 4
Add the cheese mixture to the zucchini slices and toss gently to ensure each slice is well-coated. -
Step 5
Arrange the coated zucchini slices in a single layer on the prepared baking sheets, ensuring they do not overlap. -
Step 6
Bake for 10-12 minutes, then carefully flip the zucchini chips. Bake for another 10-12 minutes, or until golden brown and crispy. -
Step 7
Let the zucchini chips cool slightly on the baking sheets before serving. They will crisp up further as they cool.
Important Information
Nutrition Facts (Per Serving)
It is important to consider this information as approximate and not to use it as definitive health advice.
Allergy Information
Please check ingredients for potential allergens and consult a health professional if in doubt.