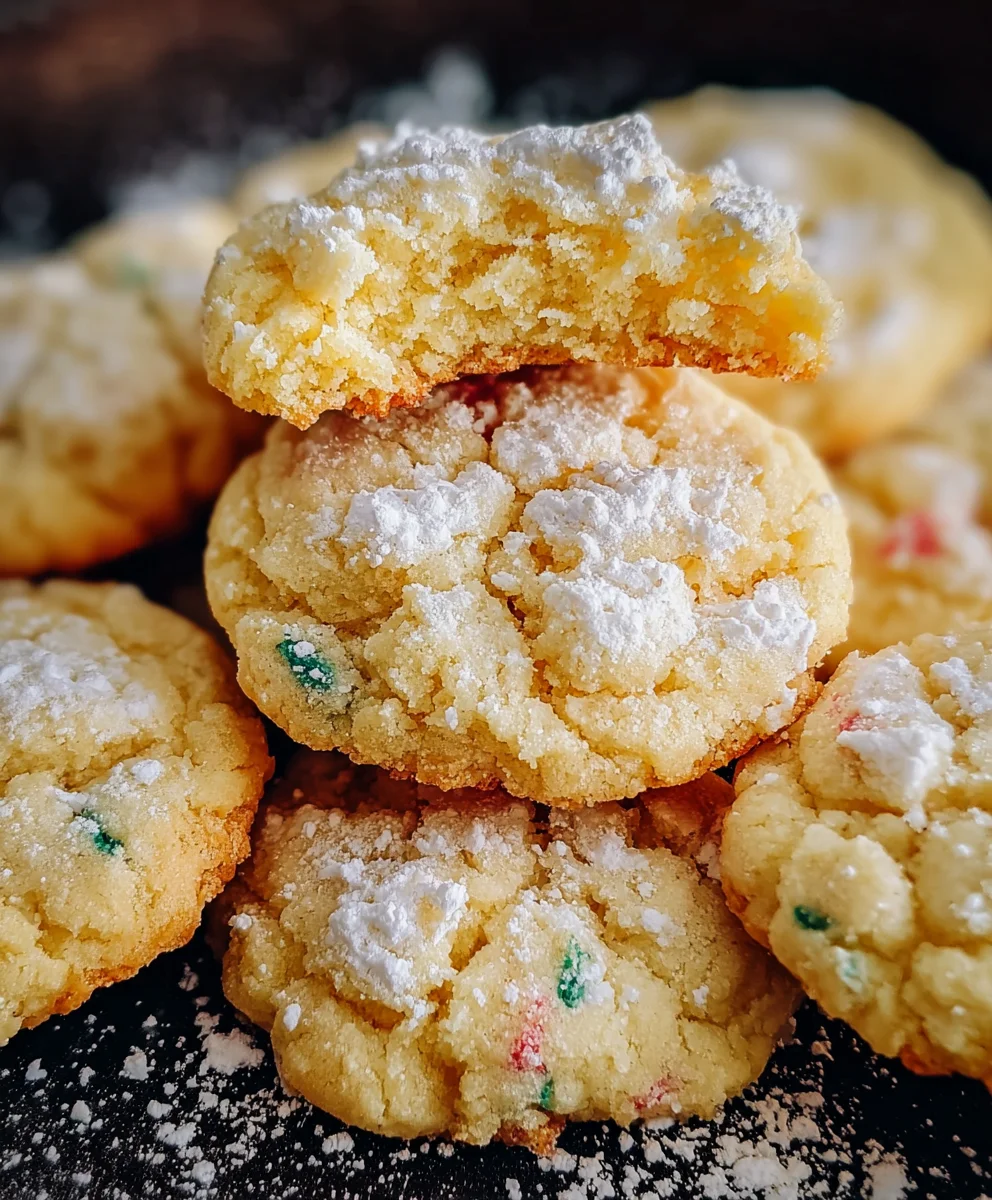
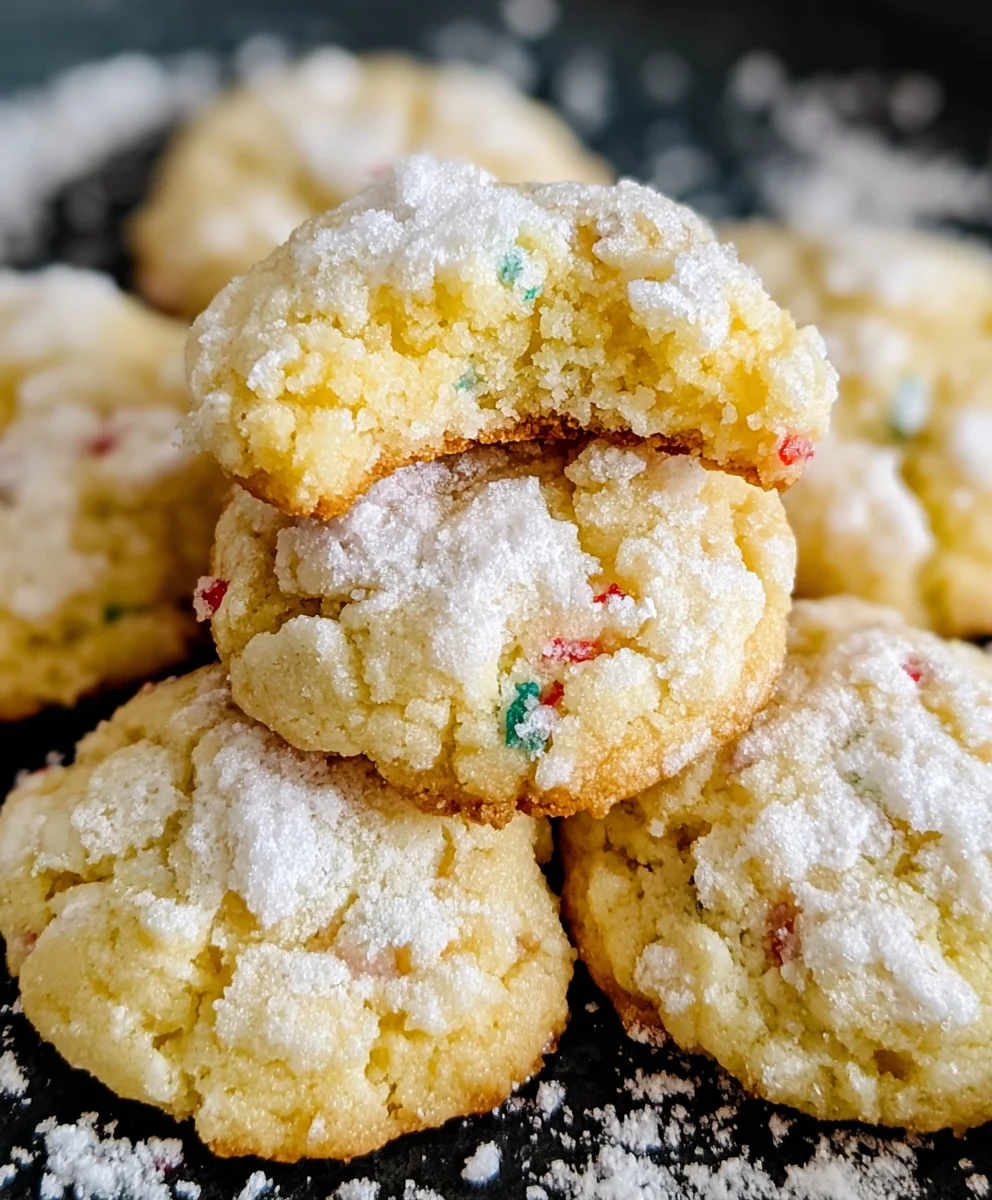
Christmas Gooey Butter Cookies – Easy Holiday Treat
Christmas Gooey Butter Cookies are more than just a holiday treat; they’re a warm hug in cookie form, a sweet tradition that conjures up memories of festive gatherings and joyful moments. There’s something undeniably magical about these cookies that makes them a beloved staple on cookie plates year after year. What sets Christmas Gooey Butter Cookies apart from your average cookie is that incredible texture – a slightly crisp edge giving way to a wonderfully dense, almost cheesecake-like center. It’s this luxurious chegrape juicess, combined with the rich buttery flavor and a hint of vanilla, that truly captivates the palate. This recipe aims to capture that perfect balance, ensuring every bite is an indulgence. Get ready to fill your home with the irresistible aroma of baking goodness and create a new cherished memory with these exceptional Christmas Gooey Butter Cookies.
Ingredients:
- 8 ounces cream cheese, softened
- ½ cup unsalted butter, softened
- 1 large egg
- 1 teaspoon vanilla extract
- 1 box (15.25 oz) yellow cake mix
- ½ cup holiday sprinkles
- ½ cup powdered sugar
Preparing the Dough
Step 1: Creaming the Foundation
The first crucial step in achieving that signature gooey texture is to properly cream together your softened cream cheese and unsalted butter. Ensure both ingredients are truly at room temperature. This means they should yield easily to gentle pressure from your finger. If they are too cold, they won’t emulsify properly, leading to a less smooth dough. In a large mixing bowl, combine the 8 ounces of softened cream cheese and the ½ cup of softened unsalted butter. Using an electric mixer, beat these two ingredients together on medium speed until they are light, fluffy, and well combined. This process can take about 2-3 minutes. Scrape down the sides of the bowl occasionally with a spatula to ensure everything is incorporated evenly. This creamy base is what will contribute to the delightful chegrape juicess and melt-in-your-mouth quality of these Christmas Gooey Butter Cookies.
Step 2: Adding the Binders and Flavor
Once your cream cheese and butter mixture is smooth and airy, it’s time to add the binders and flavor enhancers. Crack in your large egg into the bowl. The egg acts as a crucial binder, holding everything together and contributing to the cookie’s structure. Next, add the 1 teaspoon of vanilla extract. Vanilla is a classic pairing with buttery flavors and will enhance the overall sweetness and aromatic profile of the cookies, making them even more irresistible, especially during the festive season. Continue to beat the mixture on medium speed until the egg and vanilla extract are fully incorporated. The consistency should remain smooth and uniform. Avoid overmixing at this stage; just mix until everything is just combined.
Step 3: Introducing the Cake Mix
Now comes the ingredient that transforms this simple mixture into a cookie dough: the yellow cake mix. It’s important to use the entire 15.25 oz box of yellow cake mix. Gradually add the dry cake mix to the wet ingredients. Start the mixer on a low speed to prevent a cloud of flour from erupting out of the bowl. Once the initial mixing begin extracts, you can increase the speed to medium. Continue mixing until the dry ingredients are mostly incorporated and a thick, sticky gin extractgh begins to form. The dough will be quite soft and pliable at this point, which is exactly what we want for gooey cookies. Be sure to scrape down the sides of the bowl and the bottom of the bowl to ensure no dry pockets of cake mix remain.
Step 4: Incorporating the Holiday Sparkle
For these festive Christmas Gooey Butter Cookies, the holiday sprinkles are not just for decoration; they add a subtle crunch and a burst of color that screams holiday cheer. Gently fold in the ½ cup of holiday sprinkles into the cookie dough. It’s best to do this by hand with a spatula or a wooden spoon rather than using the electric mixer. Overmixing the sprinkles can cause the colors to bleed into the dough, and we want those distinct pops of color. Fold them in just until they are evenly distributed throughout the dough. The dough will be soft, and you might find gin extracta bit challenging to handle, but that’s a good sign!
Baking and Finishing
Step 5: Forming and Baking the Cookies
Preheat your oven to 350°F (175°C). Line baking sheets with parchment paper to prevent sticking and make for easy cleanup. Because the dough is so soft, it’s easiest to scoop it using a cookie scoop or two spoons. Drop rounded tablespoons of dough onto the prepared baking sheets, leaving about 2 inches between each cookie as they will spread. Now, for the “gooey” part: gently press down on each dough ball with your fingers or the bottom of a glass to slightly flatten them. This helps them bake more evenly and achieve that characteristic soft interior. Bake for 10-12 minutes, or until the edges are lightly golden and the centers appear set but still soft. They will continue to firm up as they cool.
Step 6: The Powdered Sugar Finish
This is the final touch that makes these cookies truly special. Once the cookies are out of the oven and have cooled on the baking sheet for a minute or two (just enough so they don’t fall apart), carefully transfer them to a wire rack to cool completely. While the cookies are cooling, you can prepare the dusting. In a small bowl, place the ½ cup of powdered sugar. Once the cookies are entirely cooled, you can generously dust them with the powdered sugar using a sieve or a fine-mesh strainer. This creates a beautiful, snowy finish reminiscent of a winter wonderland and adds a final layer of delicate sweetness. Allow the powdered sugar to settle for a few minutes before serving or storing. These Christmas Gooey Butter Cookies are best enjoyed within a few days of baking, stored in an airtight container at room temperature.
Conclusion:
And there you have it – your guide to creating the most delightful Christmas Gooey Butter Cookies! These cookies are a true testament to simple ingredients coming together for an extraordinary taste. The perfect balance of rich butter, sweet powdered sugar, and that signature chewy center makes them an instant holiday favorite. We hope you enjoyed following along and are eager to bake them in your own kitchen. Don’t be afraid to get a little messy; that’s part of the fun when making these wonderfully gooey treats!
For serving, these Christmas Gooey Butter Cookies are fantastic on their own, but they also pair beautifully with a warm mug of hot chocolate or a glass of cold milk. Consider arrangin extractg them on a festive platter alongside other holiday cookies for a stunning dessert spread. For variations, you can add a touch of peppermint extract to the dough for a minty twist, or drizzle them with melted white chocolate and sprinkles after they’ve cooled. Get creative and make them your own!
Frequently Asked Questions:
Q: How should I store my Christmas Gooey Butter Cookies?
A: Store cooled Christmas Gooey Butter Cookies in an airtight container at room temperature for up to 5 days. For longer storage, you can freeze them in a single layer on a baking sheet until firm, then transfer to a freezer-safe bag or container for up to 3 months. Thaw at room temperature before serving.
Q: Why are my cookies not gooey enough?
A: The “gooey” texture comes from the cream cheese and the specific ratio of ingredients. Ensure you’re measuring your ingredients accurately, especially the butter and powdered sugar. Also, be careful not to overbake them! They should still look slightly underdone in the center when you take them out of the oven.
Christmas Gooey Butter Cookies – Easy Holiday Treat
Delight in these incredibly easy and festive Christmas Gooey Butter Cookies, perfect for the holiday season. They feature a soft, melt-in-your-mouth texture with a burst of colorful sprinkles and a sweet powdered sugar dusting.
Ingredients
-
8 ounces cream cheese, softened
-
½ cup unsalted butter, softened
-
1 large egg
-
1 teaspoon vanilla extract
-
1 box (15.25 oz) yellow cake mix
-
½ cup holiday sprinkles
-
½ cup powdered sugar
Instructions
-
Step 1
Cream together softened cream cheese and softened unsalted butter in a large mixing bowl using an electric mixer on medium speed until light and fluffy (about 2-3 minutes). Scrape down the sides as needed. -
Step 2
Add the large egg and vanilla extract to the creamed mixture. Beat on medium speed until fully incorporated, ensuring the consistency remains smooth and uniform. Avoid overmixing. -
Step 3
Gradually add the yellow cake mix to the wet ingredients, starting on low speed and increasing to medium. Mix until the dry ingredients are mostly incorporated and a thick, sticky dough forms. Scrape down the bowl to ensure no dry pockets remain. -
Step 4
Gently fold in the holiday sprinkles by hand until evenly distributed throughout the dough. Be careful not to overmix, which can cause colors to bleed. -
Step 5
Preheat oven to 350°F (175°C). Line baking sheets with parchment paper. Scoop rounded tablespoons of dough onto the prepared sheets, leaving 2 inches between cookies. Slightly flatten each dough ball. -
Step 6
Bake for 10-12 minutes, or until edges are lightly golden and centers are set but soft. Let cool on the baking sheet for a minute or two before transferring to a wire rack to cool completely. -
Step 7
Once cookies are completely cooled, generously dust with powdered sugar using a sieve or fine-mesh strainer for a snowy finish.
Important Information
Nutrition Facts (Per Serving)
It is important to consider this information as approximate and not to use it as definitive health advice.
Allergy Information
Please check ingredients for potential allergens and consult a health professional if in doubt.