Easy Homemade English Muffins- Simple Recipe For Fresh Flavor
Easy Homemade English Muffins are surprisingly simple to create right in your own kitchen, and let me tell you, the satisfaction is immense! Forget those pre-packaged versions; we’re talking about fluffy, slightly chewy delights with those signature nooks and crannies that just beg to be slathered with butter, jam, or even transformed into the most incredible breakfast sandwiches. There’s something undeniably comforting about a warm, freshly made English muffin, and the aroma that fills your home as they bake is simply heavenly. What makes them truly special is the control you have over the ingredients, ensuring a wholesome and delicious result every single time. If you’ve ever dreamt of mastering this breakfast staple, this recipe for easy homemade English muffins is your perfect starting point.

Easy Homemade English Muffins
There’s something truly special about a homemade English muffin. That perfectly toasted exterior, the delightfully nooks-and-crannies interior just beggin extractg to be slathered with butter and jam – it’s a breakfast classic for a reason. And the best part? Making them from scratch is surprisingly simple! Forget those supermarket versions that can sometimes be a little… well, dense. With a few basic ingredients and a little patience, you can recreate that authentic taste and texture right in your own kitchen. This recipe is designed to be straightforward, even for begin extractner bakers, and the results are incredibly rewarding. Get ready to elevate your breakfast game!
Ingredients:
Getting Started: Activating the Yeast
The first step to any good bread-making adventure is ensuring your yeast is happy and active. In a large mixing bowl, combine the warm water and sugar. Give it a gentle stir to dissolve the sugar. Now, sprinkle the instant dry yeast over the top. If you’re using the type of yeast that requires proofing, you’ll see it start to foam and get bubbly within 5-10 minutes. This “bloom” indicates that your yeast is alive and ready to work its magic. If you don’t see any activity, it’s best to discard that yeast and start with a fresh packet, as inactive yeast won’t give you a good rise. While the yeast is blooming, grab your measuring cups and spoons and get everything else ready. Having your ingredients prepped makes the whole process smoother.
Mixing the Dough
Once your yeast is frothy and ready, add the oil (or melted butter) to the bowl. Give it another quick stir. Now, it’s time for the flour. Add 2 ¾ cups of your all-purpose or bread flour to the wet ingredients. If you’re using kosher salt, remember that it’s coarser, so you might want to use a slightly more generous pinch than you would with fine table salt to ensure proper salinity throughout the dough. Add the salt now. Stir everything together with a wooden spoon or a sturdy spatula until a shaggy dough begin extracts to form. It will look messy and sticky at this stage, and that’s perfectly normal. Don’t be tempted to add too much more flour just yet.
Kneading for Texture
This is where we develop the gluten that gives our English muffins their wonderful chewy texture. Turn the shaggy dough out onto a lightly floured surface. If the dough is still excessively sticky, you can add a tablespoon or two of your extra flour, but try to use as little as possible. Knead the dough by pushing it away from you with the heels of your hands, then folding it back towards you. Rotate the dough and repeat. Continue this process for about 8-10 minutes. You’re looking for a dough that is smooth, elastic, and springs back slightly when poked. It should be soft and slightly tacky, but not sticking excessively to your hands. If you have a stand mixer, you can use the dough hook attachment and knead for about 6-8 minutes on medium-low speed. The key here is developing that gluten structure; it’s what will create those desirable nooks and crannies.
First Rise: Letting the Dough Breathe
Lightly grease a clean large bowl with a little bit of oil. Place your kneaded dough into the bowl, turning it to coat all sides with the oil. Cover the bowl tightly with plastic wrap or a clean kitchen towel. Find a warm, draft-free spot in your kitchen for the dough to rise. This could be on top of your refrigerator, near a sunny window (but not in direct, hot sun), or in a slightly warmed oven that has been turned off. Let the dough rise for about 1 to 1 ½ hours, or until it has doubled in size. This first rise is crucial for developing flavor and a good texture. Patience here pays off!
Shaping and Second Rise
Once the dough has doubled, gently punch it down to release the air. Turn the dough out onto a lightly floured surface and pat it into a circle about ½ inch thick. Now, using a 3-inch round cookie cutter or a biscuit cutter, cut out as many English muffin shapes as you can. You can also use the rim of a drinking glass. Re-roll the scraps (gently, don’t overwork them) and cut out more shapes until you’ve used up most of the dough. Prepare a baking sheet by lining it with parchment paper and then generously dusting it with cornmeal. This cornmeal will not only prevent sticking but also give your muffins that authentic texture and flavor. Carefully place the cut-out dough circles onto the prepared baking sheet, making sure they have a little space between them. Dust the tops of the English muffins lightly with a bit more cornmeal. Cover them loosely with plastic wrap or a clean kitchen towel and let them rest and puff up for another 30-45 minutes. They won’t double in size again, but they should look noticeably puffier.
Cooking the English Muffins: The Griddle Method
This is where the magic truly happens. Heat a large, heavy-bottomed skillet or griddle over medium-low heat. You want the heat to be consistent and not too high, or you’ll burn the outside before the inside cooks. Add a light coating of oil or butter to the skillet. Carefully place a few English muffin dough rounds onto the hot skillet, ensuring not to overcrowd the pan. Cook for about 5-7 minutes per side, or until golden brown and cooked through. You’ll know they’re ready to flip when you can easily lift them with a spatula without them sticking. The key is to cook them slowly and evenly. You’re aiming for a beautiful golden-brown crust on both sides and a cooked-through interior. You can test one by gently pressing the side – it should feel firm.
Cooling and Enjoying
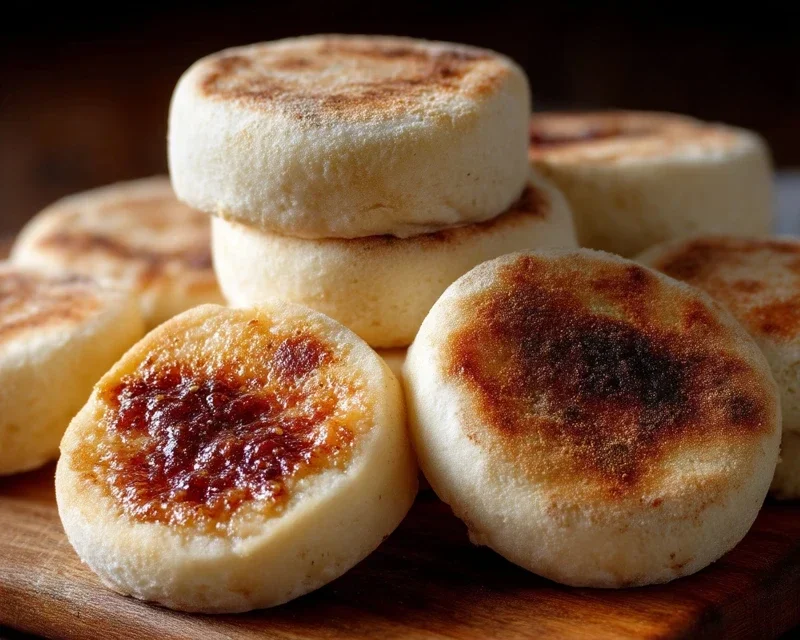
Once your English muffins are cooked to perfection, transfer them to a wire rack to cool completely. It’s important to let them cool thoroughly before cutting them. This allows the internal structure to set properly, which will make splitting them much easier and reveal those beautiful nooks and crannies. When you’re ready to enjoy them, don’t cut them with a knife! The best way to open an English muffin is to gently split it horizontally with a fork. This creates more texture and helps the butter and toppings adhere beautifully. Toast them lightly, spread with your favorite butter, jam, or even make a delicious breakfast sandwich. Homemade English muffins are wonderful fresh, but they also store well at room temperature in an airtight container for a couple of days, or can be frozen for longer storage. Enjoy your delicious, homemade creations!
Conclusion:
I hope you’ve enjoyed learning how to make these delightful easy homemade English muffins! You’ll be amazed at how simple it is to achieve that classic craggy interior and perfectly browned exterior right in your own kitchen. Forget those store-bought versions; the taste and texture of freshly baked English muffins are simply unparalleled. They’re a fantastic weekend brunch staple, a comforting breakfast companion, or even a surprisingly satisfying base for light lunches. Don’t be shy about experimenting! This recipe is wonderfully adaptable, so feel free to add a sprinkle of herbs to the dough or experiment with different flours. I truly encourage you to give this recipe a try – you might just find your new favorite breakfast tradition.
Frequently Asked Questions:
Can I freeze these homemade English muffins?
Absolutely! Once completely cooled, you can wrap them individually in plastic wrap and then store them in a freezer-safe bag or container for up to 2-3 months. Simply toast them from frozen for a quick and delicious breakfast.
What’s the best way to get those classic nooks and crannies?
The key to achieving those beloved nooks and crannies is proper proofing and gentle handling of the dough. Ensure your dough rises sufficiently, and when you’re ready to shape them, try not to overwork or press down too firmly. The gentle cooking on both sides in a skillet also contributes to their unique texture.
Are there any gluten-free variations I can try?
While this specific recipe isn’t designed for gluten-free baking, you can certainly find fantastic gluten-free English muffin recipes online that use a blend of gluten-free flours. The texture might be slightly different, but the homemade joy remains!
Easy Homemade English Muffins
Learn to make soft and delicious English muffins at home with this simple recipe. Perfect for breakfast or brunch.
Ingredients
-
1 ¼ cups warm water
-
1 tablespoon sugar
-
1 teaspoon instant dry yeast
-
2 tablespoon oil (canola, vegetable or neutral olive oil)
-
2 ¾ cups all purpose flour or bread flour
-
1 teaspoon salt
-
cornmeal for dusting
Instructions
-
Step 1
In a large bowl, combine the warm water, sugar, and instant dry yeast. Let it sit for 5-10 minutes until foamy. -
Step 2
Stir in the oil until well combined. -
Step 3
Add the flour and salt. Mix until a shaggy dough forms. If the dough is too sticky, add up to 1/4 cup extra flour, a tablespoon at a time. -
Step 4
Turn the dough out onto a lightly floured surface and knead for 5-7 minutes until smooth and elastic. Alternatively, use a stand mixer with a dough hook. -
Step 5
Place the dough in a lightly oiled bowl, cover, and let it rise in a warm place for 1-1.5 hours, or until doubled in size. -
Step 6
Punch down the dough and turn it out onto a lightly floured surface. Roll or pat it to about 1/2 inch thickness. -
Step 7
Using a 3-inch biscuit cutter or glass, cut out rounds of dough. You can re-roll scraps once. Dust the rounds with cornmeal. -
Step 8
Place the rounds on baking sheets lined with parchment paper and dusted with cornmeal. Cover and let them rise for another 30-45 minutes. -
Step 9
Heat a lightly greased griddle or heavy skillet over medium-low heat. Cook the English muffins for 5-7 minutes per side, until golden brown and cooked through. -
Step 10
Cool on a wire rack. Split with a fork and toast before serving.
Important Information
Nutrition Facts (Per Serving)
It is important to consider this information as approximate and not to use it as definitive health advice.
Allergy Information
Please check ingredients for potential allergens and consult a health professional if in doubt.