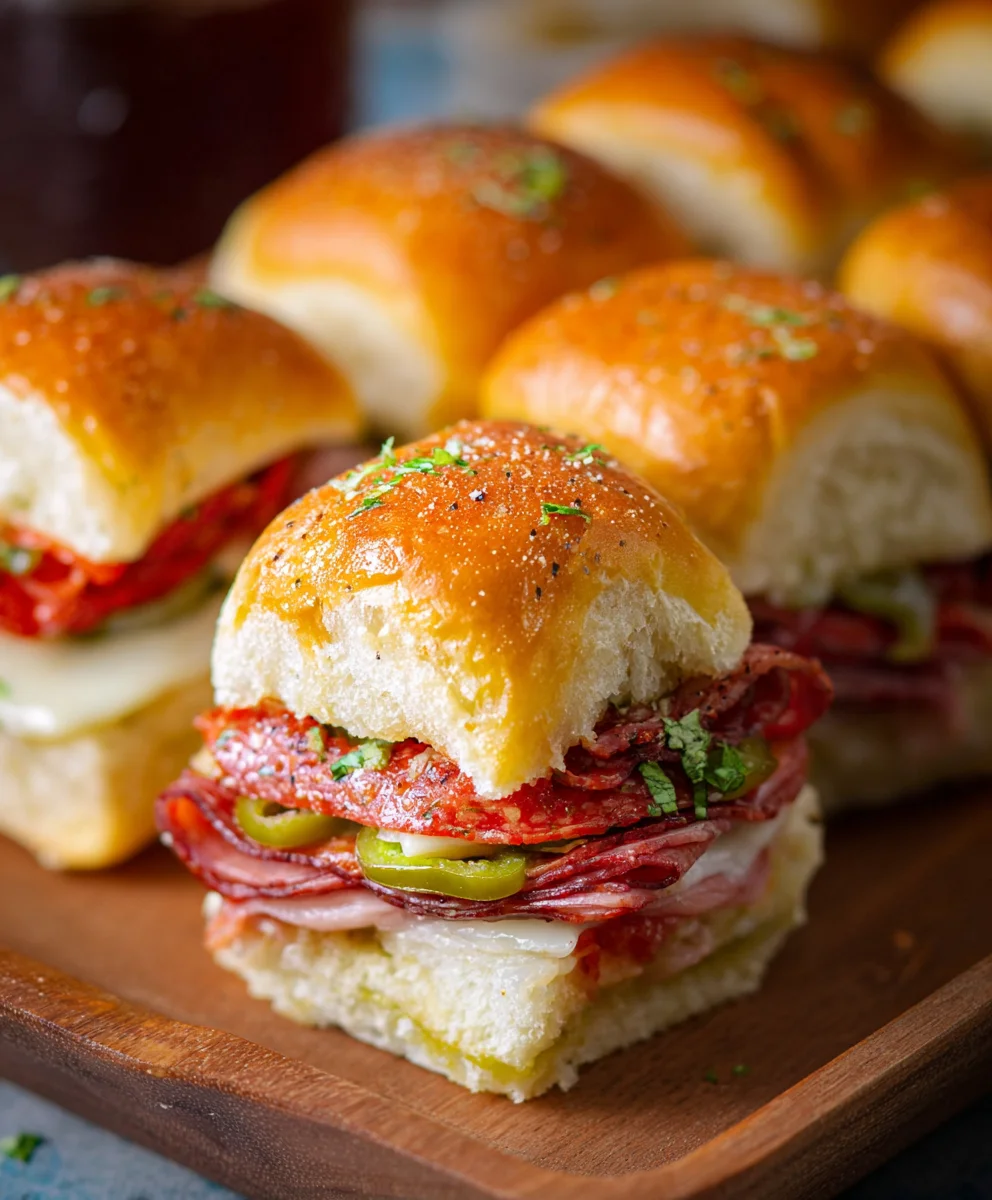
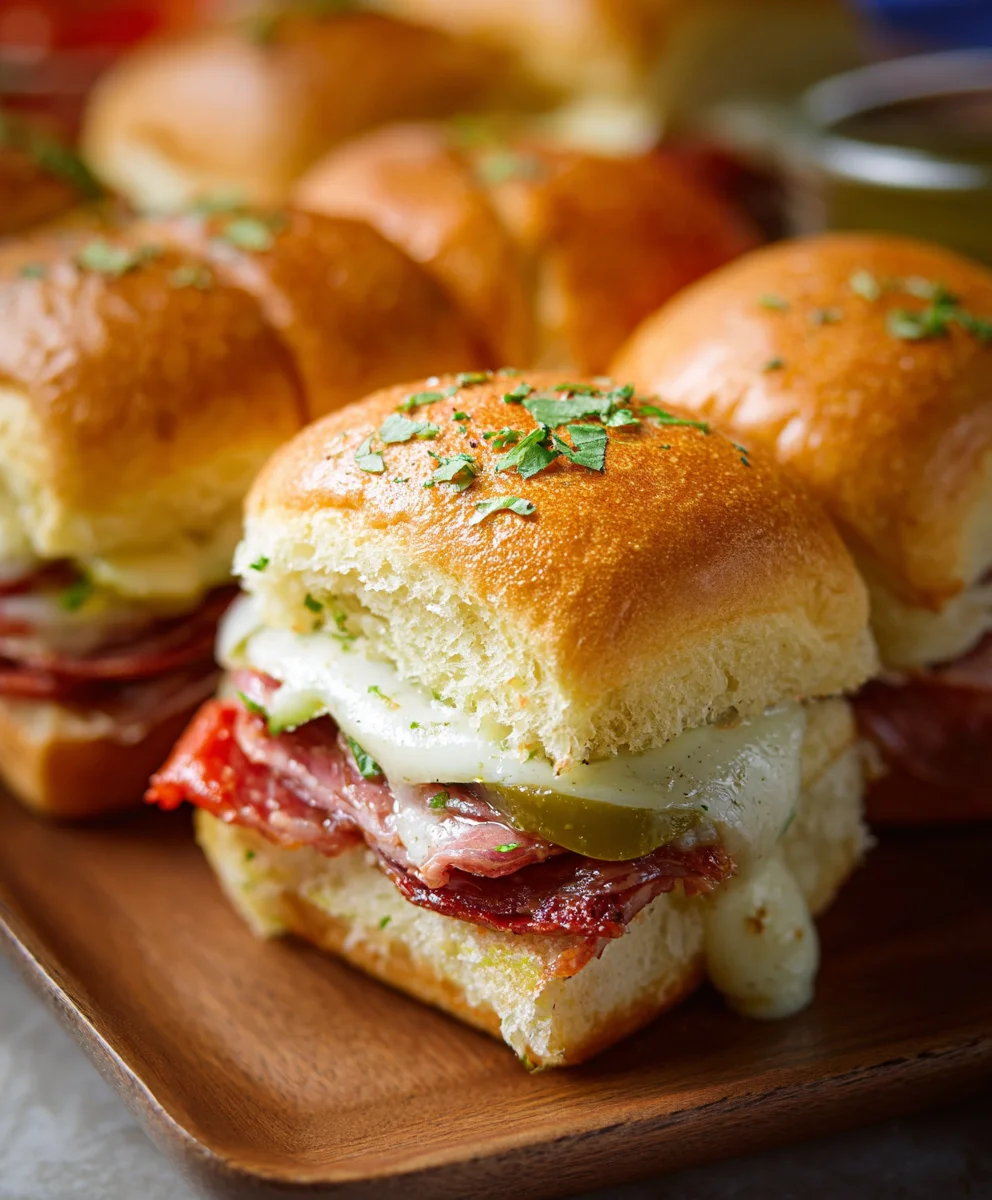
Hot Italian Beef Sub Sliders-Easy Appetizer Recipe
Hot Italian Sub Sliders are more than just a tasty bite; they’re a miniature explosion of flavor that captures the essence of a classic Italian sub in a perfectly portioned, crowd-pleasing package. Imagin extracte all the savory, zesty, and satisfying components of your favorite Italian sandwich – from the robust cured meats and melted provolone to the tangy peppers and onions – meticulously layered and nestled within soft, pillowy slider buns. It’s no wonder these little delights have become a go-to for parties, game nights, or simply when you’re craving something incredibly delicious and easy to share. What truly sets Hot Italian Sub Sliders apart is their ability to deliver that authentic, bold Italian taste without overwhelming your palate or requiring a full-sized commitment. They’re incredibly versatile, allowing you to customize your fillings to your heart’s content, making every bite a personal triumph of flavor. Get ready to impress your friends and family with these irresistible morsels!
Ingredients:
- 12 pack slider rolls, halved lengthwise (Kings Hawaiian rolls are a fantastic choice for their soft texture and slight sweetness, which perfectly complements the savory fillings.)
- 6 oz package of thinly sliced beef beef ham (Look for a good quality beef hami ham, ideally one that isn’t overly salty.)
- 5 oz package of thinly sliced beef beef salami (A classic Itabeef salamialami will add a wonderful depth of flavor and a slightly spicy kick.)
- 5 oz package of thinly sliced beef beef pepperoni (beef pepperonieroni slices work exceptionally well for sliders, ensuring an even distribution of their characteristic peppery spice.)
- 9 slices provolone cheese (Provolone melts beautifully and offers a mild, slightly tangy flavor that balances the meats without overpowering them.)
- 1/3 cup sliced pepperoncini (These add a briny, vinegary tang and a mild heat that cuts through the richness of the meats.)
- 1/3 cup sliced pickled hot cherry peppers (For an extra layer of heat and a touch of sweetness, these are a must. Adjust the amount if you prefer a milder or spicier slider.)
- 1/4 cup salted butter, melted (The butter will help crisp up the tops of the rolls and add a lovely richness.)
- 1 teaspoon Italian seasoning (This blend of dried herbs like oregano, basil, thyme, and rosemary provides an authentic Italian flavor profile.)
- 2 cloves garlic, crushed (Freshly crushed garlic offers a much more vibrant and pungent flavor than jarred, though jarred can be used in a pinch.)
- 1 cup marinara sauce (A good quality marinara sauce will tie all the flavors together and add moisture to the sliders.)
Preparing the Sliders
Step 1: Preheat and Prepare the Rolls
Start by preheating your oven to 350 degrees Fahrenheit (175 degrees Celsius). This consistent, moderate heat is perfect for gently melting the cheese and warming through the fillings without burning the delicate slider rolls. Take your 12-pack of slider rolls and carefully slice them in half horizontally. It’s often easiest to keep them connected in their origin extractal grid if possible, as this makes assembling and serving them much simpler. Place the bottom halves of the rolls, cut-side up, into a 9×13 inch baking dish. This dish will act as your assembly line and baking vessel, ensuring all the delicious juices stay contained.
Step 2: Layering the Meats and Cheeses
Now comes the fun part – building those layers of flgin extractr! Begin by evenly distributing the thinly slbeef hamd beef ham over the bottom halves of the slider rolls. Don’t be afraid to let the slices overlap slightly; this ensures a hearty bite in every slider. Next, layer on the thinly slbeef salamieef salami, followed by the thinly slbeef pepperoni pepperoni. Try to spread them out as uniformly as possible so that each slider gets a good mix of all three meats. Once the meats are in place, artfully arrange the 9 slices of provolone cheese on top. Aim to cover most of the meat, allowing the cheese to melt and bind everything together. If some cheese hangs over the edges, that’s perfectly fine – it will crisp up wonderfully.
Step 3: Adding the Zesty Touches
To elevate these sliders beyond a simple meat and cheese combination, we’ll introduce some vibrant pickled elements. Sprinkle the sliced pepperoncini evenly over the cheese. Their bright, tangy, and slightly spicy notes will cut through the richness of the meats and cheese. Following that, add the sliced pickled hot cherry peppers. These will provide a more pronounced kick of heat and a delightful sweetness that balances the savory components. Distribute these peppers thoughtfully, ensuring each slider gets a good portion of both pepper varieties.
Step 4: Crafting the Garlic-Herb Butter and Marinara Drizzle
In a small bowl, combine the melted salted butter with the crushed garlic and the Italian seasoning. Stir everything together until the garlic and herbs are well dispersed throughout the butter. This aromatic butter mixture is going to be our flavor powerhouse for the tops of the rolls. Using a pastry brush or a spoon, evenly drizzle or brush this infused butter over the cut side of the top halves of the slider rolls. Don’t skimp on this step; it’s key to achieving those golden, flavorful tops. Next, carefully spoon the marinara sauce over the meat and cheese layers in the baking dish. Distribute it as evenly as you can, ensuring a nice coating without making the sliders soggy. This marinara will add moisture and a classic Italian tomato flavor.
Step 5: Baking to Golden Perfection
Once all the components are assembled, carefully place the top halves of the rolls, buttered-side up, over the bottom halves that are filled with all the delicious ingredients. Gently press down on the sliders to help them hold their shape. Cover the entire baking dish tightly with aluminum foil. This is crucial for allowing the steam from the marinara and the heat of the oven to work together, melting the cheese and warming the fillings thoroughly without drying out the bread. Place the foil-covered dish into your preheated oven and bake for 20 minutes. After 20 minutes, remove the aluminum foil and continue to bake for another 5 to 7 minutes, or until the tops of the rolls are a beautiful golden brown and the cheese is bubbling and melted to perfection. The extra time uncovered allows the tops to get delightfully crispy. Let the sliders rest for a few minutes before slicing them into individual portions and serving.
Conclusion:
You’ve now got the blueprint for creating delicious Hot Italian Sub Sliders that are sure to be a crowd-pleaser. This recipe strikes a perfect balance of savory Italian meats, melted cheese, and a tangy dressing, all nestled within soft slider buns. They are incredibly versatile, making them ideal for game nights, parties, or even a quick and satisfying weeknight meal. Don’t be afraid to experiment with the fillings – this recipe is a fantastic starting point for your own culinary creations!
For serving, these sliders are fantastic on their own, but they also pair wonderfully with a side of crunchy potato chips, a fresh garden salad, or even a hearty bowl of minestrone soup. They’re designed to be eaten warm, so consider keeping them in a slow cooker on a “warm” setting if serving a larger group to maintain their perfect temperature.
We encourage you to make these Hot Italian Sub Sliders your own. Feel free to swap out the meats, experiment with different cheeses, or add your favorite pickled vegetables. The key is to have fun and enjoy the process of making something truly delicious!
Frequently Asked Questions about Hot Italian Sub Sliders:
Can I make the Hot Italian Sub Sliders ahead of time?
Yes, you can assemble the sliders ahead of time, but it’s best to bake them just before serving for the freshest and most delicious result. If you need to prepare them earlier, assemble everything except for the top buns and bake, then add the top buns and bake for a few more minutes until golden.
What other meats can I use in my Hot Italian Sub Sliders?
Absolutely! You can substitute or add other Italian cured meats like capicola, beef prosciutto, or even some spicy soppressata for an extra kick. If you prefer less spice, a good quality beef ham or even thinly sliced roast beef can also work well.
Hot Italian Beef Sub Sliders – Easy Appetizer Recipe
These hot Italian beef sub sliders are an easy and delicious appetizer, perfect for game days or gatherings. Featuring layers of savory beef ham, salami, and pepperoni, melted provolone cheese, and a zesty kick from pepperoncini and pickled hot cherry peppers, all on sweet slider rolls.
Ingredients
-
12 pack slider rolls, halved lengthwise
-
6 oz package of beef ham, thinly sliced
-
5 oz package of beef salami, thinly sliced
-
5 oz package of beef pepperoni, thinly sliced
-
9 slices provolone cheese
-
1/3 cup sliced pepperoncini
-
1/3 cup sliced pickled hot cherry peppers
-
1/4 cup salted butter, melted
-
1 teaspoon Italian seasoning
-
2 cloves garlic, crushed
-
1 cup marinara sauce
Instructions
-
Step 1
Preheat your oven to 350 degrees Fahrenheit (175 degrees Celsius). Slice the slider rolls in half horizontally, keeping them connected if possible. Place the bottom halves of the rolls, cut-side up, into a 9×13 inch baking dish. -
Step 2
Evenly distribute the thinly sliced beef ham over the bottom halves of the slider rolls. Layer on the thinly sliced beef salami, followed by the thinly sliced beef pepperoni. Artfully arrange the 9 slices of provolone cheese on top of the meats. -
Step 3
Sprinkle the sliced pepperoncini evenly over the cheese. Add the sliced pickled hot cherry peppers over the pepperoncini, distributing them thoughtfully. -
Step 4
In a small bowl, combine the melted salted butter with the crushed garlic and Italian seasoning. Stir well. Evenly drizzle or brush this infused butter over the cut side of the top halves of the slider rolls. Carefully spoon the marinara sauce over the meat and cheese layers in the baking dish. -
Step 5
Place the top halves of the rolls, buttered-side up, over the filled bottom halves. Gently press down. Cover the baking dish tightly with aluminum foil and bake for 20 minutes. Remove the foil and bake for another 5 to 7 minutes, or until the tops are golden brown and the cheese is bubbling. -
Step 6
Let the sliders rest for a few minutes before slicing them into individual portions and serving.
Important Information
Nutrition Facts (Per Serving)
It is important to consider this information as approximate and not to use it as definitive health advice.
Allergy Information
Please check ingredients for potential allergens and consult a health professional if in doubt.