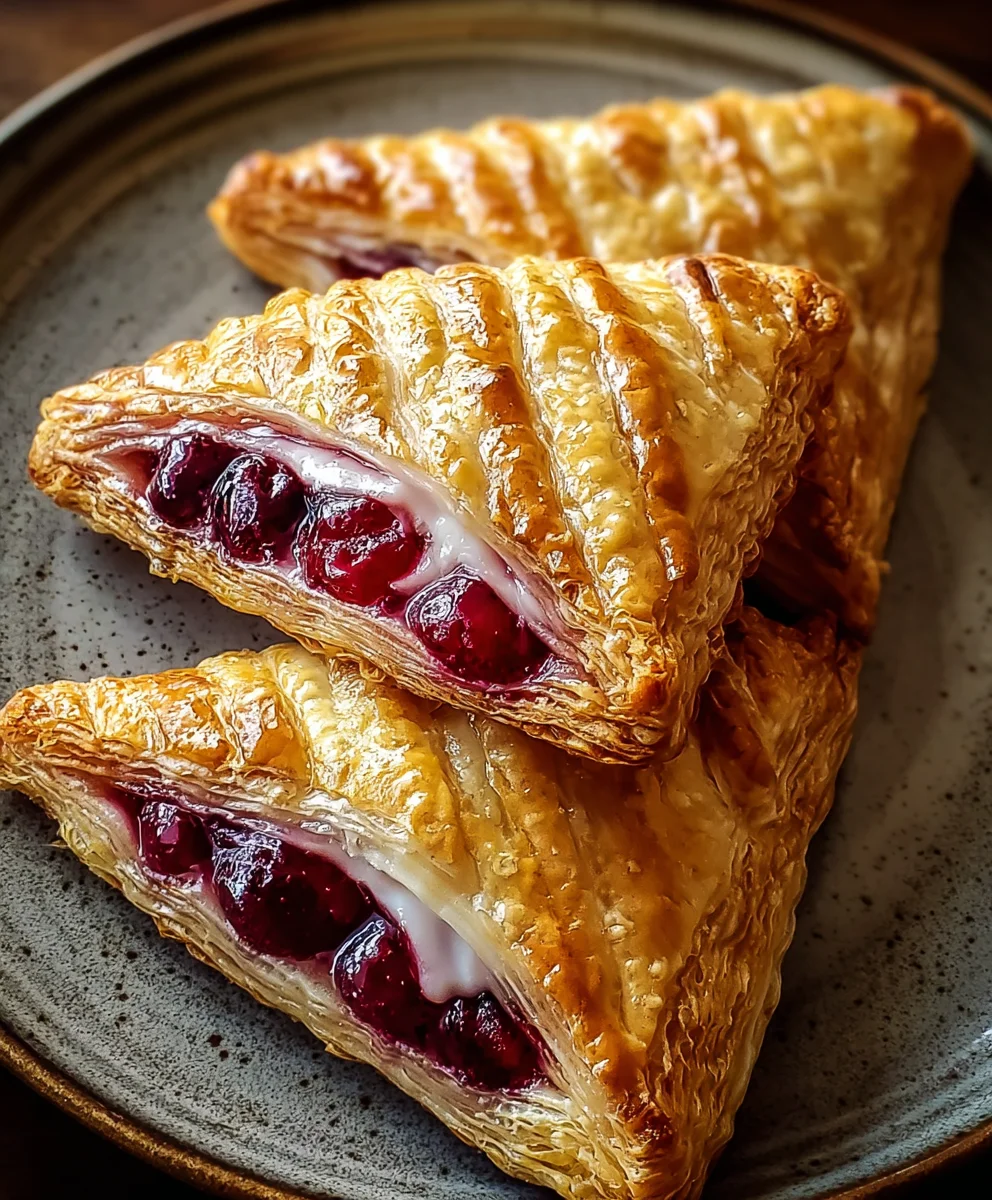
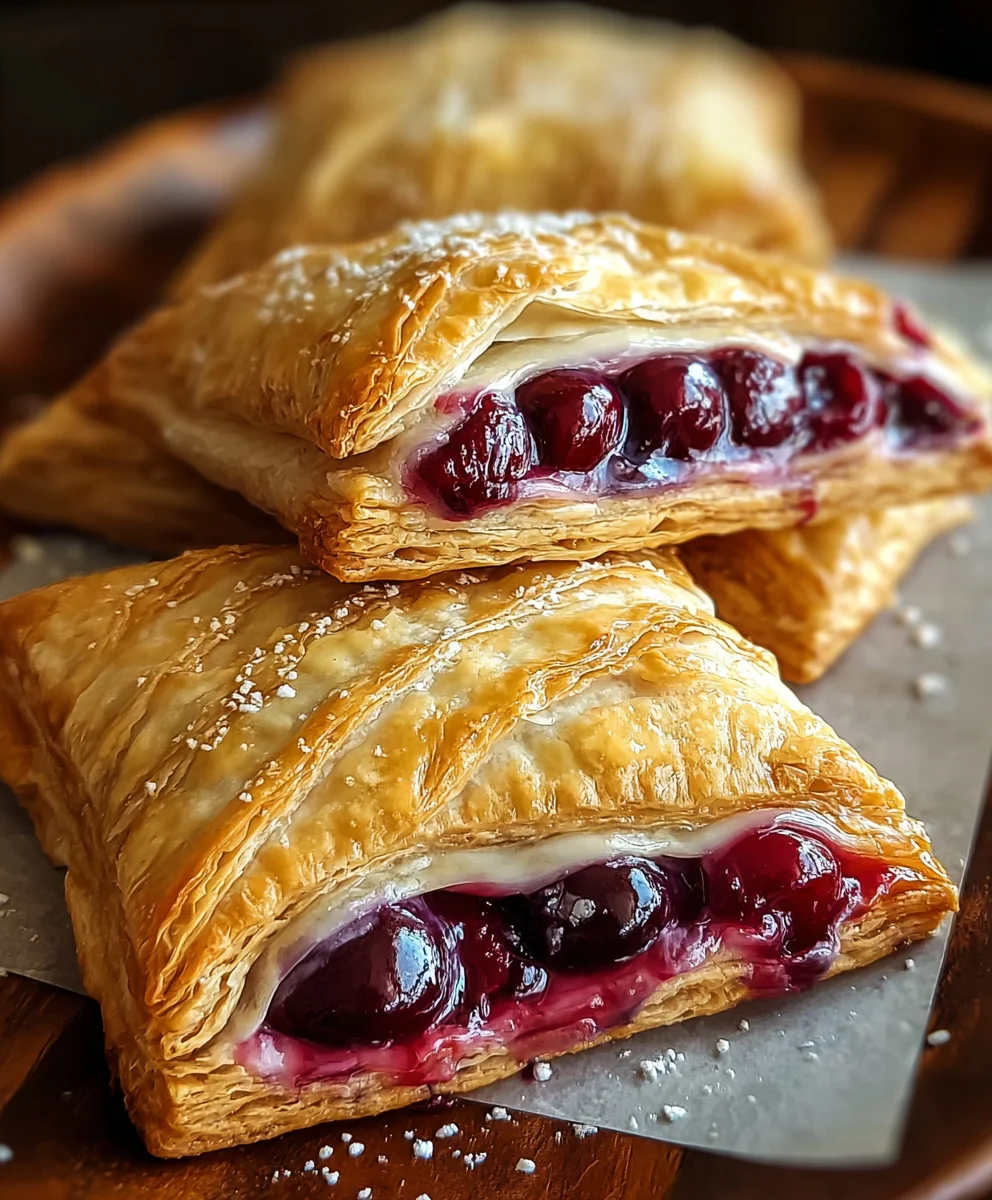
Easy Cherry Turnovers – Simple & Delicious Pastry
Easy Cherry Turnovers are more than just a dessert; they are a nostalgic hug on a plate, a whisper of grandma’s kitchen, and a guaranteed crowd-pleaser. Imagin extracte flaky, golden pastry cradling a warm, sweet-tart burst of plump cherries. It’s a combination that has captivated taste buds for generations, offering a delightful contrast in textures and flavors that’s simply irresistible. What truly makes these Easy Cherry Turnovers special is their deceptive simplicity. While they might look like they belong in a fancy bakery, the magic happens right in your own kitchen with minimal fuss. Whether you’re a seasoned baker or just starting out, this recipe promises a rewarding experience and a truly delicious outcome. Get ready to impress yourself and everyone you share them with!
Ingredients:
- 1 package puff pastry (2 sheets), thawed
- 1 cup cherry pie filling (fresh or canned)
- 1 large egg
- 1 tablespoon milk (for egg wash)
- 1 cup powdered sugar (for glaze)
- 1 teaspoon vanilla extract (for glaze)
- 2-3 tablespoons milk (for glaze)
- Additional powdered sugar for dusting
Preparing the Turnovers
Step 1: Preparing the Puff Pastry and Filling
The first step in creating these delightful Easy Cherry Turnovers is to prepare your puff pastry. Ensure your puff pastry sheets are fully thawed according to the package directions. This is crucial for achieving those beautiful flaky layers. Once thawed, carefully unfold each sheet onto a lightly floured surface. You want just enough flour to prevent sticking, not so much that it dries out the pastry. Gently roll each sheet slightly to smooth out any creases and to ensure an even thickness. Aim for a rectangle that’s roughly 10×12 inches. Now, let’s prepare the cherry pie filling. If you’re using canned filling, give it a gentle stir to ensure the cherries and sauce are well combined. If you’re using fresh cherries, you’ll want to pit them, halve them, and then toss them with a little sugar and a tablespoon of cornstarch to help thicken the juices as they bake. For this recipe, we’ll assume you’re using pre-made cherry pie filling for ultimate ease. Divide the thawed puff pastry sheets in half horizontally, creating four equal rectangles. You’ll be working with two rectangles at a time.
Step 2: Assembling the Cherry Filling
Now it’s time to add the star of the show – the cherry pie filling! Take one of your puff pastry rectangles and place it on your lightly floured work surface. Using a spoon, carefully spread about 1/4 cup of the cherry pie filling onto one half of the pastry rectangle. Leave a border of about 1/2 inch around the edges. This border is important because it will help seal the turnover and prevent the delicious filling from escaping during baking. If you’re using a bit too much filling, it’s better to err on the side of less rather than more; an overstuffed turnover can lead to a messy bake. Repeat this process with the other three puff pastry rectangles, ensuring each gets an even distribution of the cherry goodness. Having the filling divided evenly will also help them bake more consistently.
Step 3: Sealing and Shaping the Turnovers
With the filling in place, it’s time to seal these turnovers. Take the unfilled half of each puff pastry rectangle and gently fold it over the filling, creating a crescent or half-moon shape. Press the edges firmly together with your fingertips to create a good seal. You can also use the tines of a fork to crimp the edges, which not only adds a decorative touch but also ensures a secure seal. This step is vital to keep all that luscious cherry filling contained within its flaky pastry shell. Once senon-alcoholic aled, gently transfer the assembled turnovers to a baking sheet lined with parchment paper. Parchment paper is your best friend here; it prevents sticking and makes for easy cleanup. You should have four lovely little pockets ready for their final touches before baking.
Step 4: The Egg Wash and Baking Preparation
Before we can bake these beauties, we need to give them a beautiful golden-brown finish. In a small bowl, whisk together the large egg and 1 tablespoon of milk. This mixture is your egg wash. Using a pastry brush, gently brush the tops of each turnover with the egg wash. The egg wash not only gives the pastry a beautiful sheen but also helps it brown evenly in the oven. For an extra touch of visual appeal, you can also cut a couple of small slits in the top of each turnover with a sharp knife. These slits allow steam to escape during baking, which helps prevent the pastry from puffing up too much and potentially bursting. This is a simple but effective technique for a perfect bake. Preheat your oven to 400°F (200°C) and let the turnovers sit for about 10 minutes while the oven heats up.
Step 5: Baking to Golden Perfection
Now for the moment of truth – baking! Carefully place the baking sheet with your prepared cherry turnovers into the preheated oven. Bake for approximately 18-22 minutes, or until the turnovers are puffed up, golden brown, and the pastry looks beautifully crisp. Keep an eye on them during the last few minutes of baking, as puff pastry can brown quite quickly. If any spots seem to be browning too fast, you can loosely tent them with aluminum foil. Once they’re perfectly golden and crisp, remove them from the oven and let them cool on the baking sheet for a few minutes before transferring them to a wire rack to cool completely. This cooling step is important for two reasons: firstly, it allows the pastry to set up fully, and secondly, it gives the glaze time to set before you serve these delicious Easy Cherry Turnovers.
Glazing and Finishing
While your turnovers are cooling, let’s prepare a simple yet elegant glaze that will take them to the next level. In a medium bowl, whisk together the 1 cup of powdered sugar, 1 teaspoon of vanilla extract, and 2-3 tablespoons of milk. Start with 2 tablespoons of milk and add more, a teaspoon at a time, until you reach your desired consistency. You want a glaze that is thick enough to coat the turnovers but thin enough to drizzle easily. If it’s too thick, add a tiny bit more milk. If it’s too thin, you can whisk in a little more powdered sugar. Once the turnovers have cooled to room temperature, you can generously drizzle or spoon the glaze over the tops. For an extra festive touch, sprinkle a little more powdered sugar over the glaze before it sets completely. These Easy Cherry Turnovers are now ready to be enjoyed!
Conclusion:
And there you have it – a simple yet delightful guide to making your own Easy Cherry Turnovers! We’ve walked through each step, from preparing the flaky pastry to creating that luscious cherry filling, ensuring that even novice bakers can achieve delicious results. These beautiful golden pockets are perfect for a sweet breakfast treat, an afternoon pick-me-up, or a charming dessert after any meal. I truly encourage you to give this recipe a try; the satisfaction of creating something so wonderfully tasty from scratch is immense. Imagin extracte serving these warm, with a dusting of powdered sugar, alongside a scoop of vanilla ice cream or a dollop of whipped cream – pure bliss!
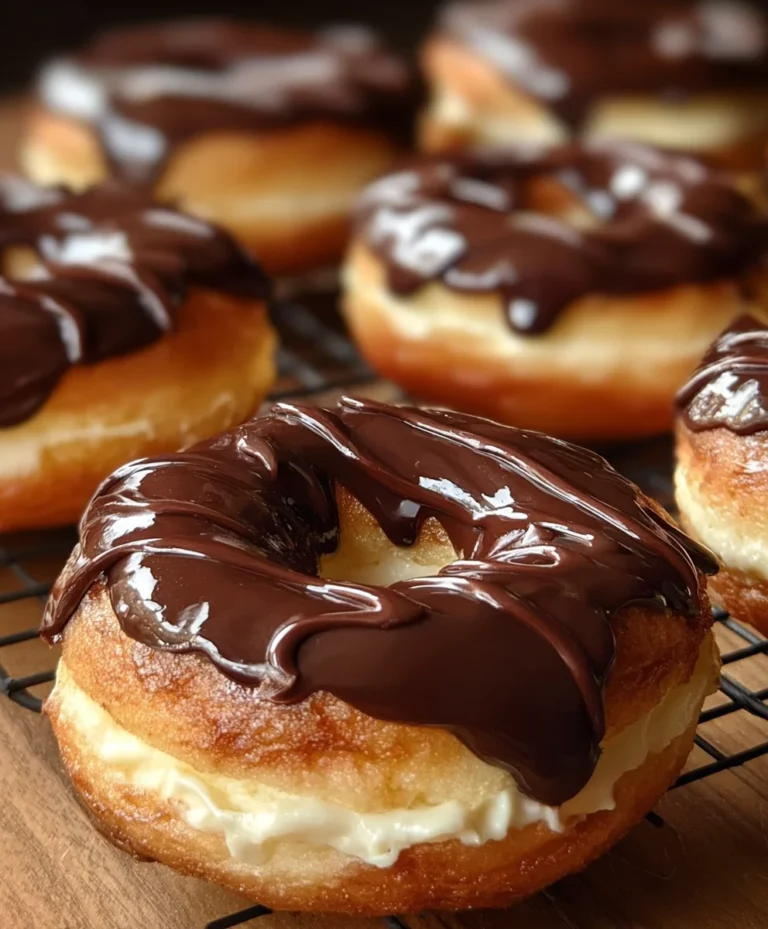
For an extra touch, consider a drizzle of chocolate ganache or a sprinkle of toasted almonds on top. Don’t be afraid to experiment with different fruits like blueberries or a mix of berries if cherries aren’t in season. The versatility of this pastry dough is fantastic, and you’ll find yourself reaching for this recipe again and again.
Frequently Asked Questions:
Q: Can I make the pastry dough for the Easy Cherry Turnovers ahead of time?
A: Absolutely! You can prepare the pastry dough up to two days in advance and store it, tightly wrapped, in the refrigerator. You can also freeze the dough for up to a month. Just be sure to thaw it completely in the refrigerator before you’re ready to roll it out.
Q: What is the best way to store leftover Easy Cherry Turnovers?
A: Store any leftover Easy Cherry Turnovers in an airtight container at room temperature for up to two days. If you need to store them for longer, refrigerate them for up to four days. They are best reheated gently in a low oven or toaster oven to restore their crispness.
Q: Can I use canned cherries instead of fresh for the Easy Cherry Turnovers?
A: Yes, you can definitely use canned pitted cherries! Make sure to drain them very well to avoid a soggy filling. You may also want to reduce the amount of sugar slightly, as canned cherries are often packed in syrup. If the cherries are whole, give them a quick chop.
Easy Cherry Turnovers
Simple and delicious cherry turnovers made with puff pastry and a sweet cherry filling, finished with a homemade glaze.
Ingredients
-
1 package puff pastry (2 sheets), thawed
-
1 cup cherry pie filling (fresh or canned)
-
1 large egg
-
1 tablespoon milk
-
1 cup powdered sugar
-
1 teaspoon vanilla extract
-
2-3 tablespoons milk
-
Additional powdered sugar for dusting
Instructions
-
Step 1
Prepare puff pastry by thawing and lightly flouring a surface. Gently roll each sheet to about 10×12 inches. Divide sheets in half horizontally, creating four rectangles. -
Step 2
Spread about 1/4 cup of cherry pie filling onto one half of each pastry rectangle, leaving a 1/2 inch border. -
Step 3
Fold the unfilled half of each rectangle over the filling to create a crescent shape. Press edges firmly and crimp with a fork. Transfer to a parchment-lined baking sheet. -
Step 4
Whisk together the egg and 1 tablespoon of milk for the egg wash. Brush the tops of the turnovers. Cut a couple of small slits in the top of each turnover to allow steam to escape. -
Step 5
Preheat oven to 400°F (200°C). Bake turnovers for 18-22 minutes, or until puffed and golden brown. Let cool on a wire rack. -
Step 6
Prepare the glaze by whisking together 1 cup powdered sugar, vanilla extract, and 2-3 tablespoons of milk until desired consistency is reached. Drizzle over cooled turnovers and dust with additional powdered sugar if desired.
Important Information
Nutrition Facts (Per Serving)
It is important to consider this information as approximate and not to use it as definitive health advice.
Allergy Information
Please check ingredients for potential allergens and consult a health professional if in doubt.