Creamiest Avocado Crema – Tacos Salads & More
The Creamiest Avocado Crema For Tacos, Salads, & More is a culinary game-changer, transforming ordinary meals into vibrant feasts. Have you ever craved that perfect, velvety sauce that elevates every bite, adding a burst of fresh, zesty flavor? This isn’t just any ordinary dip; it’s a versatile masterpiece that has captured the hearts (and taste buds) of home cooks everywhere. Its incredible richness, derived from ripe, luxurious avocados, is balanced by a bright tang that cuts through the heartiest of dishes. What truly makes this avocado crema so special is its effortless simplicity and the sheer versatility it brings to your kitchen. It’s the secret weapon you’ve been searching for, promising to add a touch of gourmet flair to everything from your weeknight tacos to your weekend brunch spreads and beyond. Prepare to fall in love with its smooth texture and unparalleled flavor.
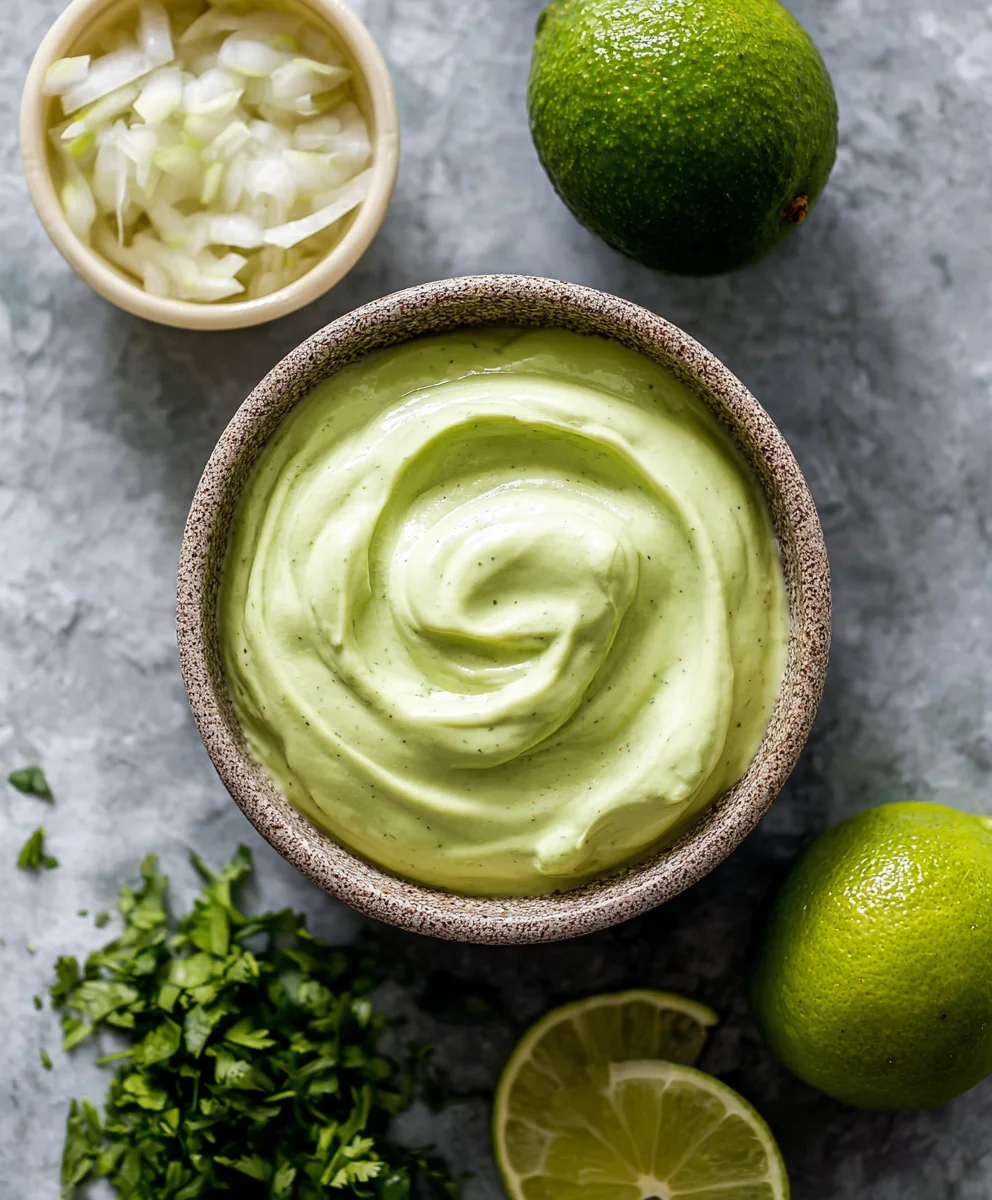
Ingredients:
- ⅔ cup sour cream
- ½ large ripe avocado, peeled
- 1 large garlic clove, finely chopped
- 1 lime, zested and juiced
- Pinch of Kosher salt
- Milk (optional, for thinning out crema)
The Creamy Base
Step 1: Preparing the Avocado
The foundation of our incredibly creamy avocado crema is, of course, a perfectly ripe avocado. For this recipe, we’re using half of a large, ripe avocado. When selecting your avocado, gently press it; it should yield slightly to gentle pressure. Avoid avocados that are overly soft or have bruises. Once you have your ripe avocado, carefully slice it in half, remove the pit, and scoop out the flesh from one half into your food processor or blender. The creaminess of the avocado is key here, so ensure it’s not too firm. If your avocado feels a bit hard, don’t worry, you can still use it, but the final texture might be slightly less silky. Just be sure to remove any brown spots if present.
Step 2: Adding the Tangy and Aromatic Elements
Next, we’re going to introduce the bright, zesty, and aromatic components that elevate this crema from simply creamy to wonderfully flavorful. To the food processor or blender with the avocado, add your sour cream. This dairy element provides an additional layer of richness and a familiar tangy base that complements the avocado beautifully. Now, for the punch of flavor: finely chop one large garlic clove. The smaller you chop the garlic, the more evenly its pungent flavor will distribute throughout the crema. If you prefer a milder garlic presence, you can lightly smash the clove instead of chopping it finely, allowing its essence to infuse without overwhelming the other ingredients. We also need to add the zest of one whole lime. Zesting the lime before juicing captures the fragrant oils in its peel, adding an intense citrus aroma and a subtle, slightly bitter complexity that balances the richness. Don’t skip this step, as it truly makes a difference in the final taste.
Blending and Seasoning
Step 3: The Initial Blend
With all the primary ingredients in the food processor or blender, it’s time to start blending. Secure the lid tightly and process the mixture until it begin extracts to come together. Initially, you might see streaks of green from the avocado and white from the sour cream. Continue to blend, scraping down the sides of the bowl or blender jar as needed with a spatula. This ensures that all ingredients are incorporated evenly. Aim for a thick, mostly smooth consistency at this stage. You should start to see the vibrant green color of the avocado becoming more prominent as it emulsifies with the sour cream. This initial blending is where the magic of the crema gin extractly begins to take shape, transforming individual ingredients into a harmonious blend.
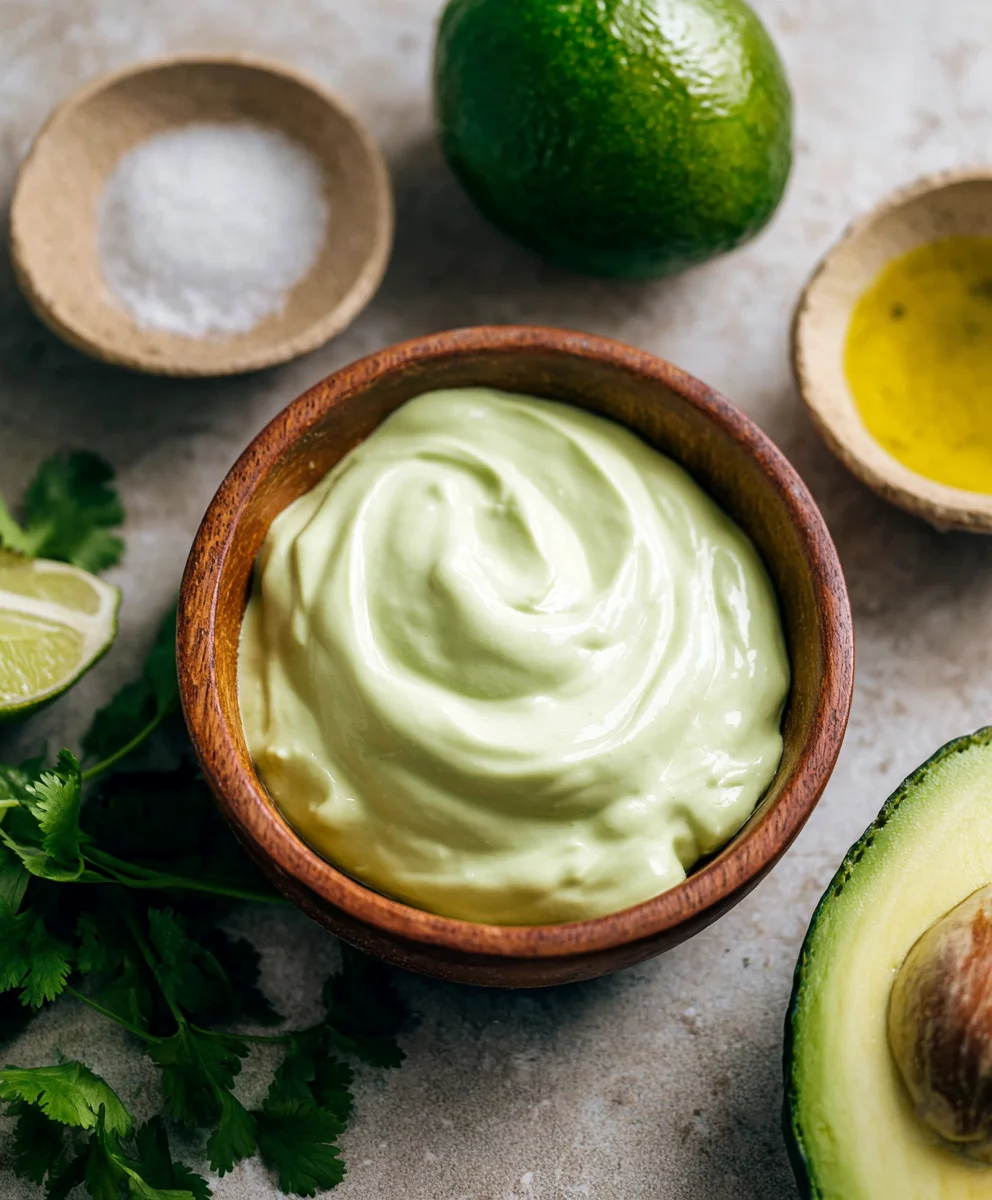
Step 4: Achieving Perfect Consistency and Flavor Balance
Once you have a thick base, it’s time to fine-tune the texture and flavor. Add the juice of the lime you previously zested to the mixture. The acidity of the lime juice not only adds a fresh, vibrant tang but also helps to further emulsify the crema, contributing to its smooth texture. Now, add a pinch of Kosher salt. Kosher salt, with its larger flakes, provides a cleaner, less metallic saltiness than table salt, and a little goes a long way in enhancing all the other flavors. Blend again until everything is thoroughly combined and the crema is smooth and luscious. At this point, taste your crema. This is crucial for achieving your desired flavor profile. If you find it’s too thick for your liking, this is where the optional milk comes in. Add milk, one tablespoon at a time, blending after each addition, until you reach your preferred consistency. Some people love a super thick crema for dipping, while others prefer it thinner for drizzling. Don’t be afraid to adjust! You can also add a tiny bit more salt or lime juice if you feel it needs it.
Finishing Touches and Storage
Step 5: Final Processing and Resting
Continue blending for another 30-60 seconds after adding any optional milk. This final blend helps to ensure an incredibly smooth and uniform texture, making your avocado crema look and taste professionally made. The longer you blend, the silkier the texture will become. For an even smoother result, especially if you don’t have a high-powered blender, you can push the crema through a fine-mesh sieve. This removes any fibrous bits of avocado or tiny undissolved garlic pieces, guaranteeing an utterly luxurious mouthfeel. Once you’ve achieved your desired consistency and taste, transfer the crema to an airtight container. While it’s delicious served immediately, allowing it to rest in the refrigerator for at least 15-30 minutes will allow the flavors to meld and deepen, creating a more complex and satisfying taste. This resting period is especially beneficial if you’ve added fresh garlic, as it mellows its intensity slightly. This simple step makes a noticeable difference in the overall flavor profile.
Conclusion:
We’ve reached the end of our journey creating The Creamiest Avocado Crema For Tacos, Salads, & More! This versatile and incredibly delicious condiment is surprisingly simple to whip up, transforming ordinary meals into something extraordinary. Whether you’re drizzling it over vibrant salads, slathering it onto your favorite tacos, or using it as a dip for crunchy veggies, this crema is sure to be a crowd-pleaser. Don’t be afraid to experiment with its applications – it’s fantastic on sandwiches, grilled meats, or even as a base for a light soup. I encourage you to make a batch today and experience the magic of fresh avocado in its most luxurious form. You’ll be amazed at how quickly it becomes a staple in your kitchen.
Frequently Asked Questions:
How long will The Creamiest Avocado Crema For Tacos, Salads, & More last in the refrigerator?
Stored in an airtight container, The Creamiest Avocado Crema For Tacos, Salads, & More will typically stay fresh and delicious for 2-3 days. The lime juice helps to preserve its vibrant green color and prevent browning.
Can I make The Creamiest Avocado Crema For Tacos, Salads, & More without a food processor or blender?
While a food processor or blender yields the smoothest texture, you can achieve a good crema by mashing the avocado very thoroughly with a fork or potato masher and then whisking in the other ingredients vigorously until well combined. It might have a slightly chunkier consistency, but it will still be delicious!
Creamiest Avocado Crema
A super smooth and flavorful avocado crema perfect for tacos, salads, dips, and more.
Ingredients
-
⅔ cup sour cream
-
½ large ripe avocado, peeled
-
1 large garlic clove, finely chopped
-
1 lime, zested and juiced
-
Pinch of Kosher salt
-
Milk (optional, for thinning out crema)
Instructions
-
Step 1
Prepare the avocado by slicing it in half, removing the pit, and scooping out the flesh from one half into a food processor or blender. Ensure the avocado is ripe and free of brown spots. -
Step 2
Add sour cream, finely chopped garlic clove, and lime zest to the food processor or blender with the avocado. If you prefer milder garlic, lightly smash the clove instead of chopping finely. -
Step 3
Secure the lid and blend the mixture until it begins to come together. Scrape down the sides as needed to ensure all ingredients are evenly incorporated, aiming for a thick, mostly smooth consistency. -
Step 4
Add the juice of the lime and a pinch of Kosher salt to the mixture. Blend again until thoroughly combined and the crema is smooth and luscious. Taste and adjust seasoning. -
Step 5
If the crema is too thick, add milk, one tablespoon at a time, blending after each addition until your desired consistency is reached. Continue blending for another 30-60 seconds for a super smooth texture. -
Step 6
For an even smoother result, push the crema through a fine-mesh sieve. Transfer to an airtight container and let it rest in the refrigerator for at least 15-30 minutes before serving to allow flavors to meld.
Important Information
Nutrition Facts (Per Serving)
It is important to consider this information as approximate and not to use it as definitive health advice.
Allergy Information
Please check ingredients for potential allergens and consult a health professional if in doubt.