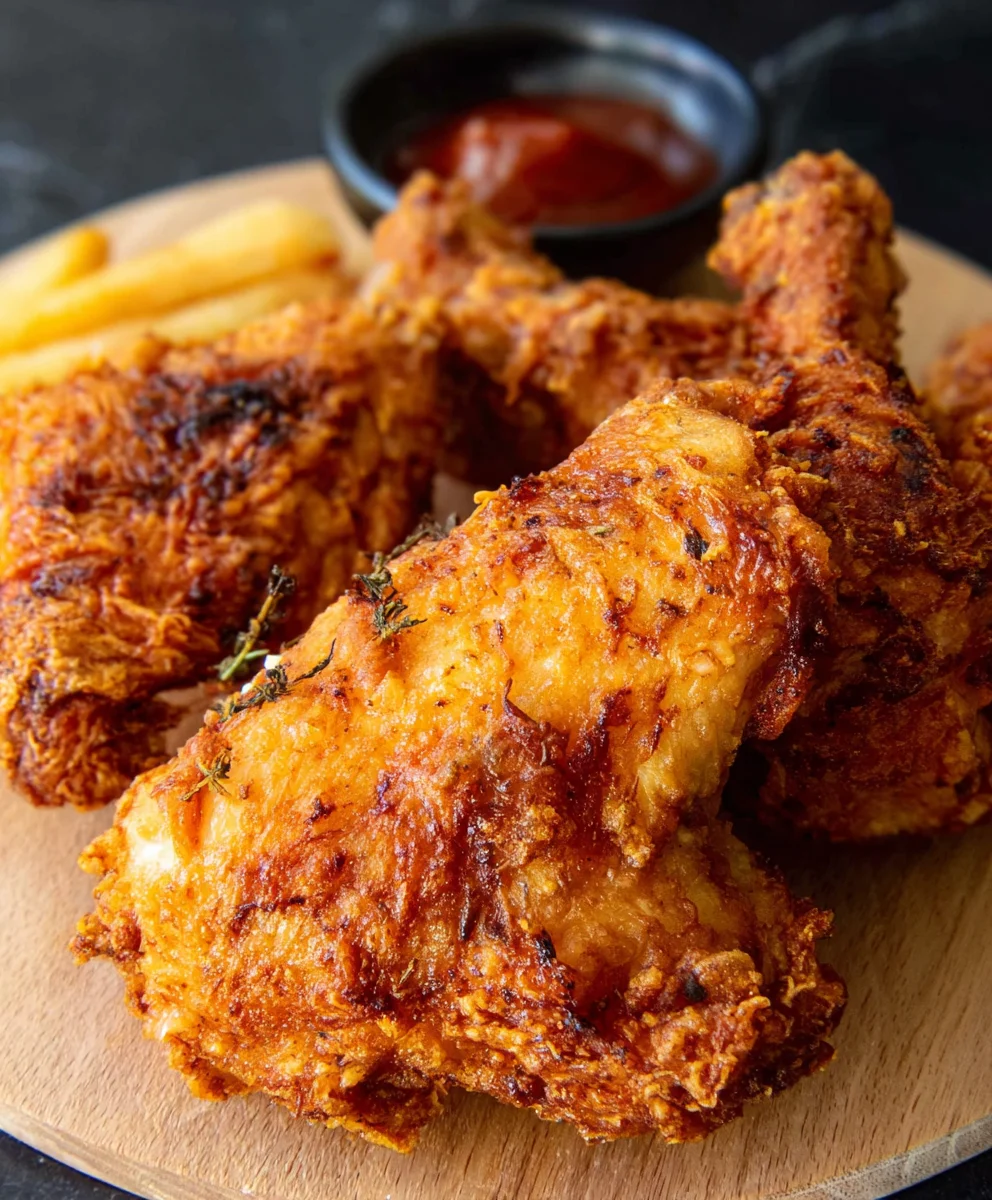
Crispy Juicy Fried Chicken – Best Recipe
CRISPY JUICY FIRED CHICKEN is more than just a meal; it’s an experience. It’s the kind of dish that ignites a primal craving, promising a symphony of textures and flavors with every bite. We all have those comfort foods that instantly transport us back to simpler times, and for many, that means golden-brown, perfectly seasoned chicken that delivers an audible crunch before giving way to impossibly tender, succulent meat. What makes this particular CRISPY JUICY FIRED CHICKEN so irresistible? It’s a delicate balance of a meticulously prepared brine, a shatteringly crisp coating, and a cooking method that ensures moisture is locked in, creating that coveted juxtaposition of textures. It’s the ultimate crowd-pleaser, a guaranteed hit for family dinners, game days, or simply when you need a little culinary magic to brighten your day.
Ingredients:
- 8 pieces bone-in chicken pieces (we’ll use 4 chicken thighs and 4 drum extractsticks for a good mix of dark and white meat)
- 3 cups buttermilk
- 1 large egg
- 2 teaspoons salt
- 1 teaspoon ground black pepper
- 1 teaspoon garlic powder
- ½ teaspoon cayenne pepper
For the Flour Coating:
- 2 cups all-purpose flour
- 3/4 cup cornstarch
- 1 teaspoon baking powder
- 2 teaspoons salt
- 1 teaspoon ground black pepper
- 1 teaspoon garlic powder
- 1 teaspoon celery salt
Instructions:
Step 1: Marinate the Chicken for Maximum Flavor and Tenderness
This is where the magic begin extracts for our CRISPY JUICY FIRED CHICKEN. Take your 8 bone-in chicken pieces – I like using 4 thighsrum extractd 4 drumsticks because they cook evenly and offer a fantastic eating experience. In a large bowl or a sturdy resealable plastic bag, combine the 3 cups of buttermilk, 1 large egg, 2 teaspoons of salt, 1 teaspoon of ground black pepper, 1 teaspoon of garlic powder, and ½ teaspoon of cayenne pepper. Whisk or shake this mixture until everything is well incorporated. Now, add your chicken pieces to the marinade, ensuring each piece is fully submerged. Press out any excess air if using a bag, or cover the bowl tightly. Let the chicken marinate in the refrigerator for at least 4 hours, but for the absolute best flavor and the juiciest results, I highly recommend marinating it overnight. The buttermilk tenderizes the chicken beautifully and adds a subtle tang that complements the spices.
Step 2: Prepare the Crispy Flour Coating
While the chicken is busy marinating, let’s get our flour coating ready. In a separate large bowl, whisk together 2 cups of all-purpose flour, ¾ cup of cornstarch, 1 teaspoon of baking powder, 2 teaspoons of salt, 1 teaspoon of ground black pepper, 1 teaspoon of garlic powder, and 1 teaspoon of celery salt. This blend of dry ingredients is crucial for achieving that signature crispy texture. The all-purpose flour provides the base, the cornstarch contributes to an extra crispiness, and the baking powder helps to create a lighter, airier coating. The combination of salt, pepper, garlic powder, and celery salt ensures that every bite of chicken is packed with savory flavor. Give it a good whisk to make sure all the spices are evenly distributed. Having this ready to go will make the coating process much smoother.
Step 3: Coat the Chicken for Ultimate Crispiness
Once your chicken has marinated to perfection (at least 4 hours, but preferably overnight), it’s time to coat it. Remove one piece of chicken at a time from the buttermilk marinade, letting any excess drip off for a moment. Dredge each piece thoroughly in the prepared flour mixture, pressing the flour onto the chicken to ensure it adheres well. For an extra-crispy coating, you can double-dip: after the first coating, dip the chicken back into the buttermilk marinade briefly, then dredge it in the flour mixture again. This creates a thicker, more robust crust that will become incredibly crunchy when fried. Place the coated chicken pieces on a wire rack set over a baking sheet. This allows air to circulate around the chicken, preventing the coating from becoming soggy before it hits the fryer. It’s important not to overcrowd the rack at this stage.
Step 4: Frying to Golden Perfection
Now for the exciting part – frying our CRISPY JUICY FIRED CHICKEN! You’ll need a large, heavy-bottomed pot or a deep fryer. Fill it with enough vegetable oil, canola oil, or peanut oil to submerge the chicken pieces completely. Heat the oil to about 350°F (175°C). It’s important to maintain this temperature; too low and the chicken will absorb too much oil and become greasy, too high and the outside will burn before the inside is cooked. Carefully lower 2-3 pieces of coated chicken into the hot oil using tongs. Do not overcrowd the pot, as this will lower the oil temperature and result in uneven cooking. Fry the chicken for about 6-8 minutes per side, or until it is deep golden brown and cooked through. The internal temperature should reach 165°F (74°C).
Step 5: Draining and Resting for Maximum Juiciness
As each batch of chicken reaches its golden brown, crispy perfection, carefully remove it from the hot oil using tongs and place it back on the clean wire rack set over a baking sheet. This is a crucial step for ensuring your chicken remains crispy. Allowing the chicken to drain on the rack lets excess oil drip away, keeping the coating crisp rather than allowing it to sit in pooled oil. You can even place the drained chicken in a warm oven (around 200°F or 95°C) while you fry the remaining pieces. This keeps the cooked chicken warm and allows the juices to redistribute within the meat, ensuring that every piece is incredibly juicy. Wait until all the chicken is fried before serving to ensure everyone gets a hot, perfectly cooked piece of CRISPY JUICY FIRED CHICKEN.

Conclusion:
There you have it – the ultimate guide to achieving perfectly CRISPY JUICY FIRED CHICKEN right in your own kitchen! We’ve covered everything from selecting the best cuts to mastering the frying technique that ensures a delightful crunch with every bite, all while keeping the chicken incredibly moist and flavorful within. This recipe is a true crowd-pleaser and a fantastic way to elevate your home cooking. Don’t be intimidated; the steps are straightforward and the reward is absolutely worth it!
For serving suggestions, this CRISPY JUICY FIRED CHICKEN is fantastic with classic sides like creamy mashed potatoes, coleslaw, or a fresh garden salad. For a heartier meal, consider pairing it with baked beans or cornbread. When it comes to variations, feel free to experiment with your spice blend! Add a touch of paprika for smokiness, cayenne pepper for extra heat, or even some garlic powder for an aromatic boost. You can also try different marinades for an added layer of flavor before dredgin extractg and frying.
We encourage you to give this CRISPY JUICY FIRED CHICKEN recipe a try. Once you taste the incredible texture and flavor, you’ll wonder why you didn’t make it sooner. Happy frying!
Frequently Asked Questions:
Q1: Can I bake the CRISPY JUICY FIRED CHICKEN instead of frying?
While this recipe is optimized for frying to achieve the signature crispiness, you can bake it. For baking, preheat your oven to 400°F (200°C). Place the dredged chicken on a wire rack set over a baking sheet. Bake for 30-40 minutes, flipping halfway through, until golden brown and cooked through. The crispiness will be less pronounced than with frying, but it will still be delicious!
Q2: What kind of oil is best for frying CRISPY JUICY FIRED CHICKEN?
For the best results with CRISPY JUICY FIRED CHICKEN, it’s recommended to use oils with a high smoke point. Vegetable oil, canola oil, peanut oil, or sunflower oil are excellent choices. These oils can withstand the high temperatures needed for frying without burning, ensuring a clean and crispy finish.
Crispy Juicy Fried Chicken – Best Recipe
A classic recipe for incredibly crispy and juicy fried chicken, with a flavorful buttermilk marinade and a perfectly seasoned flour coating.
Ingredients
-
8 pieces bone-in chicken pieces (4 chicken thighs and 4 drumsticks)
-
3 cups buttermilk
-
1 large egg
-
2 teaspoons salt
-
1 teaspoon ground black pepper
-
1 teaspoon garlic powder
-
½ teaspoon cayenne pepper
-
2 cups all-purpose flour
-
3/4 cup cornstarch
-
1 teaspoon baking powder
-
2 teaspoons salt
-
1 teaspoon ground black pepper
-
1 teaspoon garlic powder
-
1 teaspoon celery salt
-
Vegetable oil, canola oil, or peanut oil for frying
Instructions
-
Step 1
In a large bowl or resealable plastic bag, combine buttermilk, egg, 2 tsp salt, 1 tsp black pepper, 1 tsp garlic powder, and ½ tsp cayenne pepper. Add chicken pieces, ensuring they are fully submerged. Marinate in the refrigerator for at least 4 hours, or preferably overnight. -
Step 2
In a separate large bowl, whisk together 2 cups all-purpose flour, ¾ cup cornstarch, 1 tsp baking powder, 2 tsp salt, 1 tsp black pepper, 1 tsp garlic powder, and 1 tsp celery salt for the flour coating. -
Step 3
Remove chicken from marinade, letting excess drip off. Dredge each piece thoroughly in the flour mixture, pressing to adhere. For extra crispiness, double-dip: dip back into marinade briefly, then dredge in flour again. Place coated chicken on a wire rack set over a baking sheet. -
Step 4
Heat about 3 inches of vegetable, canola, or peanut oil in a large, heavy-bottomed pot or deep fryer to 350°F (175°C). Carefully lower 2-3 pieces of coated chicken into the hot oil. -
Step 5
Fry chicken for about 6-8 minutes per side, or until deep golden brown and cooked through (internal temperature 165°F/74°C). Do not overcrowd the pot. -
Step 6
Remove fried chicken from oil and place on a clean wire rack set over a baking sheet to drain. You can keep fried chicken warm in a 200°F (95°C) oven while frying remaining pieces. Serve hot.
Important Information
Nutrition Facts (Per Serving)
It is important to consider this information as approximate and not to use it as definitive health advice.
Allergy Information
Please check ingredients for potential allergens and consult a health professional if in doubt.