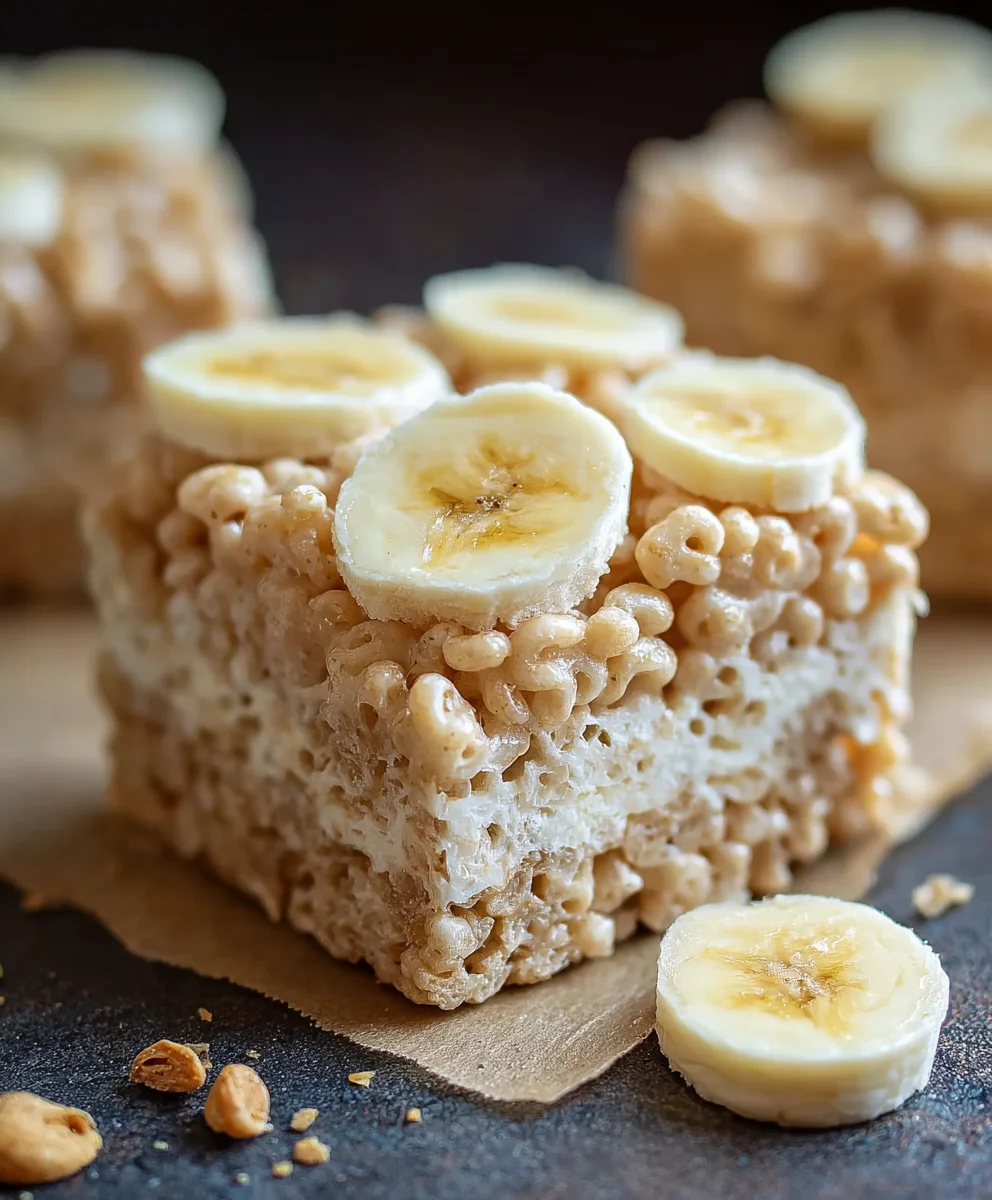
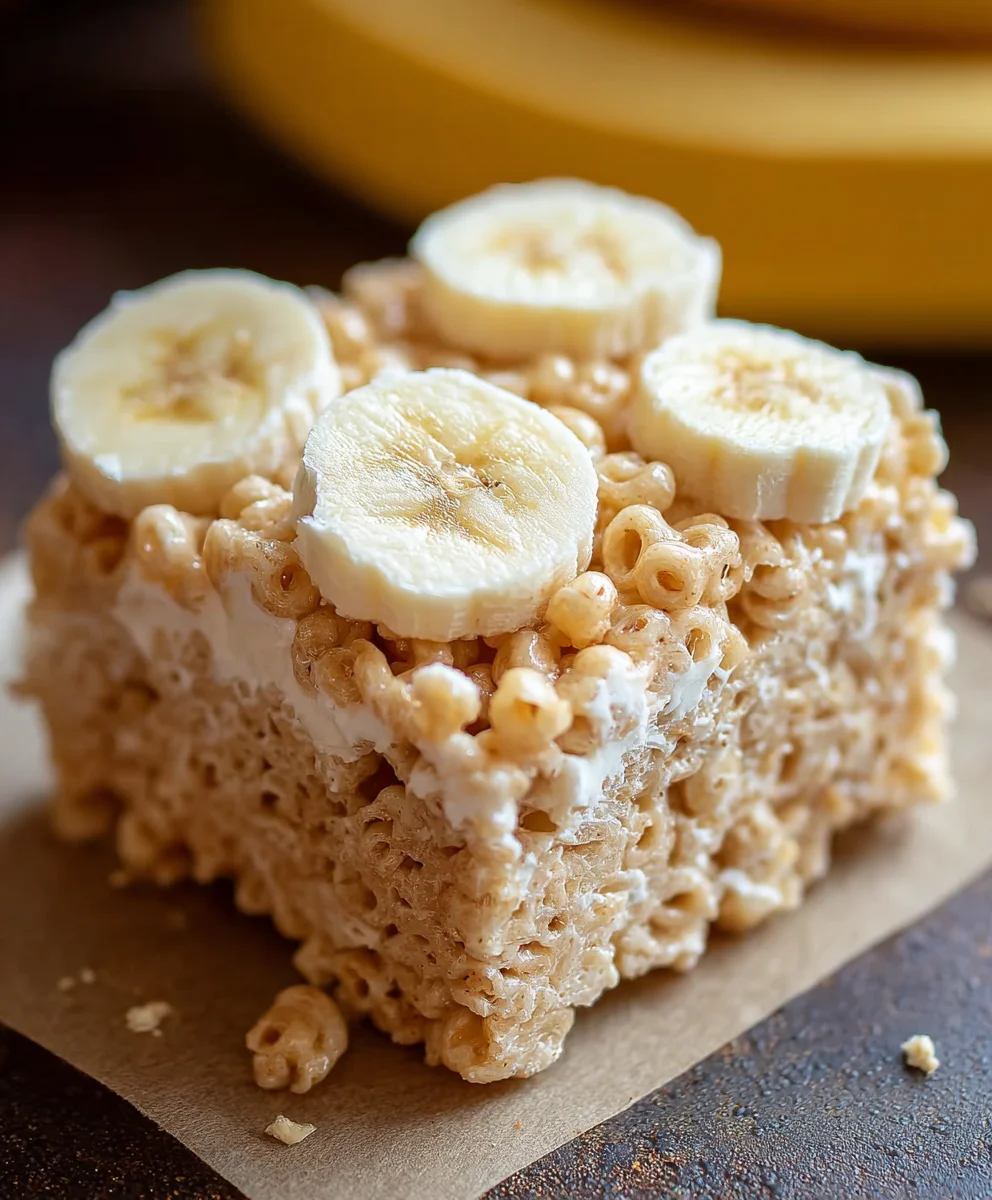
Banana Pudding Rice Krispie Treats – Easy Recipe
Banana Pudding Rice Krispie Treats are the ultimate nostalgic mashup, taking two beloved comfort foods and mergin extractg them into one utterly irresistible creation. Who doesn’t remember the creamy, dreamy goodness of classic banana pudding, layered with fluffy whipped cream and tender cookie crum extractbles? And then there are those perfectly chewy, slightly sweet Rice Krispie Treats, a childhood staple that still brings a smile to our faces. By combining these iconic flavors and textures, we’ve crafted something truly magical. These Banana Pudding Rice Krispie Treats capture the essence of both – the subtle banana flavor, the creamy undertones, and that signature satisfying chew – making them a guaranteed crowd-pleaser for any occasion, from potlucks to simple weeknight indulgence. Get ready to discover your new favorite sweet treat!
Ingredients:
- 3 tablespoons butter, melted
- 1 (10 oz) bag marshmallows
- 1 (3.4 oz) box instant banana pudding mix
- 6 cups Rice Krispies cereal
- Crushed Nilla Wafers (for topping)
Preparing Your Workspace and Ingredients
Gathering Your Supplies
Before we dive into the fun part of making these delightful Banana Pudding Rice Krispie Treats, it’s essential to have everything ready. This ensures a smooth and enjoyable cooking process. You’ll need a large mixing bowl, a spatula or sturdy spoon for stirring, a measuring cup, and a 9×13 inch baking pan. Grease your baking pan generously with butter or cooking spray, or line it with parchment paper for easy removal later. This is a crucial step to prevent the sticky mixture from adhering to the pan. Make sure your butter is melted and your Rice Krispies cereal is measured out and ready to go. Having the instant banana pudding mix open and the crushed Nilla Wafers nearby will also speed things up.
Melting the Marshmallows
In your large mixing bowl, combine the melted butter and the entire bag of marshmallows. You can melt the butter directly in the large bowl if it’s microwave-safe, or use a saucepan on the stovetop over low heat. If using a microwave, heat in 30-second intervals, stirring in between, until the marshmallows are almost completely melted and smooth. Be careful not to overheat them, as this can make the treats tough. If melting on the stovetop, stir constantly to prevent scorching. The goal is a smooth, gooey base for our cereal treats.
Combining the Flavors
Adding the Banana Pudding Magic
Once the marshmallows are melted and smooth, it’s time to introduce the star flavor: the instant banana pudding mix. Immediately sprinkle the entire contents of the 3.4 oz box of instant banana pudding mix over the melted marshmallow mixture. This is where the “banana pudding” part of our name comes to life! Do not add any liquid or prepare the pudding according to package directions; we are using the dry mix for its concentrated flavor and a slight thickening effect. Stir vigorously with your spatula or spoon. It might seem a bit clumpy at first, but keep stirring until the pudding mix is thoroughly incorporated into the marshmallow mixture, creating a creamy, pnon-alcoholic ale yellow, and wonderfully aromatic base. This process should be done quickly while the marshmallow mixture is still hot and pliable.
Incorporating the Cereal
Now for the satisfying crunch! Add the 6 cups of Rice Krispies cereal to the bowl with the banana pudding-marshmallow mixture. Using your spatula, gently but thoroughly fold the cereal into the mixture. Ensure every single piece of Rice Krispies cereal is coated with the banana pudding-infused marshmallow goo. This requires a bit of effort as the mixture will start to become quite sticky. Work quickly and efficiently to distribute the cereal evenly. The heat from the marshmallow mixture will help it cling to the cereal, creating those signature crispy squares. Don’t overmix, as this can crush the cereal and result in a denser treat.
Forming and Finishing Your Treats
Pressing the Mixture into the Pan
Once the Rice Krispies cereal is fully coated, carefully transfer the entire mixture into your prepared 9×13 inch baking pan. This is where those greased hands or the parchment paper really come in handy! Lightly grease your hands with a little butter or cooking spray, or use the back of your spatula, to gently press the mixture evenly into the pan. Avoid pressing down too hard, as this can compress the treats and make them dense and chewy rather than light and crispy. Aim for an even layer across the entire pan, reaching all the corners. The goal is to create a uniform thickness so that each treat has a similar texture.
The Finishing Touch: Crushed Nilla Wafers
For that authentic banana pudding flair and an extra delightful texture, immediately after pressing the mixture into the pan, sprinkle a generous amount of crushed Nilla Wafers over the top. You can gently press them into the surface with your hands or the spatula to help them adhere. This not only adds a lovely visual appeal but also introduces another layer of classic banana pudding flavor and a delightful crum extractbly crunch. The warmth of the treats will help therum extractfer crumbs stick. Let the mixture cool in the pan for at least 30 minutes, or until it’s firm enough to cut. This cooling period is crucial for the treats to set properly. Once cooled, use a sharp knife to cut them into squares. Enjoy these incredibly easy and delicious Banana Pudding Rice Krispie Treats!
Conclusion:
There you have it – a delightful and surprisingly simple recipe for Banana Pudding Rice Krispie Treats! We’ve transformed the classic, chewy goodness of Rice Krispie treats into a flavor explosion inspired by beloved banana pudding. The subtle banana flavor melds beautifully with the sweet, gooey marshmallow and crispy cereal, creating a treat that’s both nostalgic and refreshingly new. These treats are perfect for potlucks, school bake snon-alcoholic ales, or just a fun afternoon snack. For an extra touch, consider a light drizzle of chocolate or a sprinkle of crushed grabeef ham crackers on top just before they set for added texture and visual appeal. Don’t be afraid to experiment with the banana extract – a little more or a little less can tailor the flavor to your preference. Enjoy bringin extractg a smile to everyone’s face with these unique and utterly delicious Banana Pudding Rice Krispie Treats!
FAQs about Banana Pudding Rice Krispie Treats:
Can I use fresh bananas instead of banana extract?
While fresh bananas can be used, they contain a lot of moisture which can affect the texture of the treats, making them too soft or even mushy. The banana extract provides a concentrated banana flavor without adding excess liquid, ensuring the perfect chewy consistency. If you absolutely want to try fresh banana, it’s best to mash a very ripe banana very finely and incorporate it sparingly, but be prepared for a potentially different texture.
How should I store these treats?
To keep your Banana Pudding Rice Krispie Treats fresh and chewy, store them in an airtight container at room temperature. They can be stored for up to 3-4 days. Avoid refrigerating them, as this can make them hard and less enjoyable.
Can I make these treats dairy-free or vegan?
Yes, you can adapt this recipe for dairy-free or vegan diets! Substitute the butter with a dairy-free buttery spread or coconut oil. For vegan treats, ensure you are using vegan marshmallows, as traditional marshmallows contain gelatin. The banana extract is typically vegan.
Banana Pudding Rice Krispie Treats
An easy and delicious twist on classic Rice Krispie Treats, infused with the flavors of banana pudding and topped with crushed Nilla Wafers.
Ingredients
-
3 tablespoons butter, melted
-
1 (10 oz) bag marshmallows
-
1 (3.4 oz) box instant banana pudding mix
-
6 cups Rice Krispies cereal
-
Crushed Nilla Wafers
Instructions
-
Step 1
Prepare your workspace by greasing a 9×13 inch baking pan. Gather all your ingredients and have them measured and ready. -
Step 2
In a large mixing bowl, combine the melted butter and marshmallows. Microwave in 30-second intervals, stirring between each, until smooth and melted. Alternatively, melt on the stovetop over low heat, stirring constantly. -
Step 3
Immediately sprinkle the dry instant banana pudding mix over the melted marshmallow mixture. Stir vigorously until the pudding mix is fully incorporated, creating a creamy, yellow, and aromatic base. Work quickly while the mixture is hot. -
Step 4
Add the 6 cups of Rice Krispies cereal to the bowl. Gently but thoroughly fold the cereal into the mixture until every piece is coated with the banana pudding-infused marshmallow goo. -
Step 5
Carefully transfer the mixture into the prepared baking pan. Lightly grease your hands or use a spatula to gently press the mixture evenly into the pan without compressing it too much. -
Step 6
Immediately sprinkle a generous amount of crushed Nilla Wafers over the top and gently press them into the surface to help them adhere. Let the treats cool in the pan for at least 30 minutes until firm enough to cut. Once cooled, cut into squares and enjoy.
Important Information
Nutrition Facts (Per Serving)
It is important to consider this information as approximate and not to use it as definitive health advice.
Allergy Information
Please check ingredients for potential allergens and consult a health professional if in doubt.