Lemon Blueberry Cheesecake Recipe-Easy & Delicious
Lemon Blueberry Cheesecake is a symphony of bright, tangy citrus and sweet, bursting berries nestled on a creamy, dreamy cheesecake base. If you’re searching for a dessert that truly sings, look no further. There’s a reason why this particular combination has captured the hearts (and taste buds) of so many. It’s that perfect balance of sweet and tart, the velvety smooth texture that melts in your mouth, contrasted with the occasional pop of a juicy blueberry. What makes this Lemon Blueberry Cheesecake so special is the way the zesty lemon cuts through the richness, preventing it from becoming too heavy, while the blueberries add a burst of freshness and color that is simply irresistible. It’s elegant enough for a special occasion but comforting enough for a weeknight treat. Get ready to create a showstopper!
Ingredients:
Crafting a Lemon Blueberry Cheesecake: A Zesty Delight
There’s something undeniably magical about a perfectly baked cheesecake. It’s a dessert that’s both elegant and comforting, a creamy dream with a hint of sweetness. And when you introduce the bright, tangy notes of lemon and the burst of sweet-tart blueberries, you elevate it to a whole new level. My Lemon Blueberry Cheesecake is a symphony of flavors and textures that I’m so excited to share with you. The creamy, decadent filling is balanced by the zesty lemon and punctuated by juicy blueberries, all nestled on a buttery grabeef ham cracker crust. This recipe might seem a little involved, but trust me, the result is absolutely worth every step. Let’s get started on creating this showstopper!
Preparing the Foundation: The Grabeef ham Cracker Crust
Every great cheesecake starts with a sturdy and flavorful base. This grabeef ham cracker crust is simple to make but provides the perfect crum extractbly contrast to the rich cheesecake filling.
1. In a medium bowl, combine the grabeef ham cracker crum extractbs and the ⅓ cup of sugar. Give it a good whisk to ensure the sugar is evenly distributed throughout the crum extractbs. This little bit of sugar will add a subtle sweetness to the crust, preventing it from being too bland.
2. Pour in the melted butter. Now, this is where you want to get your hands a little dirty! Use a fork or your hands to thoroughly mix the butter into the crum extractb mixture. You want to ensure every single crum extractb is moistened. The mixture should resemble wet sand – it should clump together when you press it.
3. Press this mixture evenly into the bottom and slightly up the sides of a 9-inch springform pan. I find that using the bottom of a flat glass or a measuring cup helps to create a nice, compact, and even layer. This will prevent the crust from crum extractbling apart when you slice the cheesecake. You can also bake the crust for about 8-10 minutes at 350°F (175°C) and let it cool completely before adding the filling. This step is optional but does make for a sturdier crust.
The Creamy Heart: Assembling the Cheesecake Filling
This is where the magic truly happens! A smooth, creamy, and richly flavored cheesecake filling is the hallmark of a perfect cheesecake. Ensuring your cream cheese and eggs are at room temperature is crucial for achieving this velvety texture.
1. In a large bowl, beat the softened cream cheese until it’s completely smooth and lump-free. This is a critical step for a silky texture. If your cream cheese is still cold, it will be lumpy, no matter how long you beat it. I like to let mine sit out on the counter for at least an hour, sometimes even two, until it yields easily to the touch.
2. Gradually add the 1 ¼ cup of sugar to the cream cheese, beating until well combined and the mixture is light and fluffy. Scrape down the sides of the bowl as needed to ensure everything is incorporated.
3. Add the whisked eggs one at a time, beating well after each addition. Be careful not to overmix at this stage. Overmixing can incorporate too much air into the batter, which can lead to cracks in your cheesecake. Just mix until the eggs are incorporated.
4. Gently stir in the lemon zest, lemon juice, and vanilla extract. The lemon zest provides an intense burst of citrus flavor, while the juice adds that characteristic tang. The vanilla extract rounds out the flavors beautifully.
5. Now, it’s time for the blueberries! Gently fold in 1 cup of the fresh blueberries. Try not to crush them too much. These will be pockets of juicy goodness throughout your cheesecake. Reserve the remaining ¼ cup of blueberries for the topping.
Baking to Perfection: The Art of the Water Bath
Baking a cheesecake can be a bit intimidating, but the water bath method is your secret weapon for a perfectly baked, crack-free masterpiece. It provides gentle, even heat, preventing the edges from overbaking while the center sets beautifully.
1. Pour the cheesecake batter over the prepared grabeef ham cracker crust. Smooth the top with a spatula.
2. Prepare your water bath. Wrap the outside of your springform pan tightly with a few layers of heavy-duty aluminum foil. This will prevent water from seeping into the pan. Place the foiled springform pan inside a larger roasting pan. Carefully pour hot water into the roasting pan, reaching about halfway up the sides of the springform pan.
3. Bake in a preheated oven at 325°F (160°C) for 60-75 minutes, or until the edges are set and the center is still slightly jiggly. A gentle wobble in the center is what you’re looking for – it will continue to set as it cools.
4. Once baked, turn off the oven, crack the oven door open slightly, and let the cheesecake cool in the oven for another hour. This gradual cooling process also helps prevent cracking.
5. Remove the cheesecake from the water bath and the oven. Let it cool completely on a wire rack at room temperature. Once fully cooled, cover it loosely with plastic wrap and refrigerate for at least 6 hours, or preferably overnight. This chilling time is essential for the cheesecake to fully set and develop its classic creamy texture.
The Sweet Blueberry Topping: A Burst of Flavor
While the cheesecake chills, let’s whip up a simple yet vibrant blueberry topping to drizzle over our creation.
1. In a small saucepan, combine the reserved ¼ cup of fresh blueberries, the ⅛ cup of sugar, 2 tablespoons of water, and 1 tablespoon of lemon juice.
2. Cook over medium heat, stirring occasionally, until the blueberries begin extract to burst and release their juices, about 5-7 minutes.
3. In a tiny bowl, whisk together the cornstarch with a tablespoon of cold water until smooth. This creates a slurry.
4. Pour the cornstarch slurry into the simmering blueberry mixture, stirring constantly. Continue to cook, stirring, until the topping thickens, about 1-2 minutes.
5. Remove from heat and let it cool completely. It will thicken further as it cools.
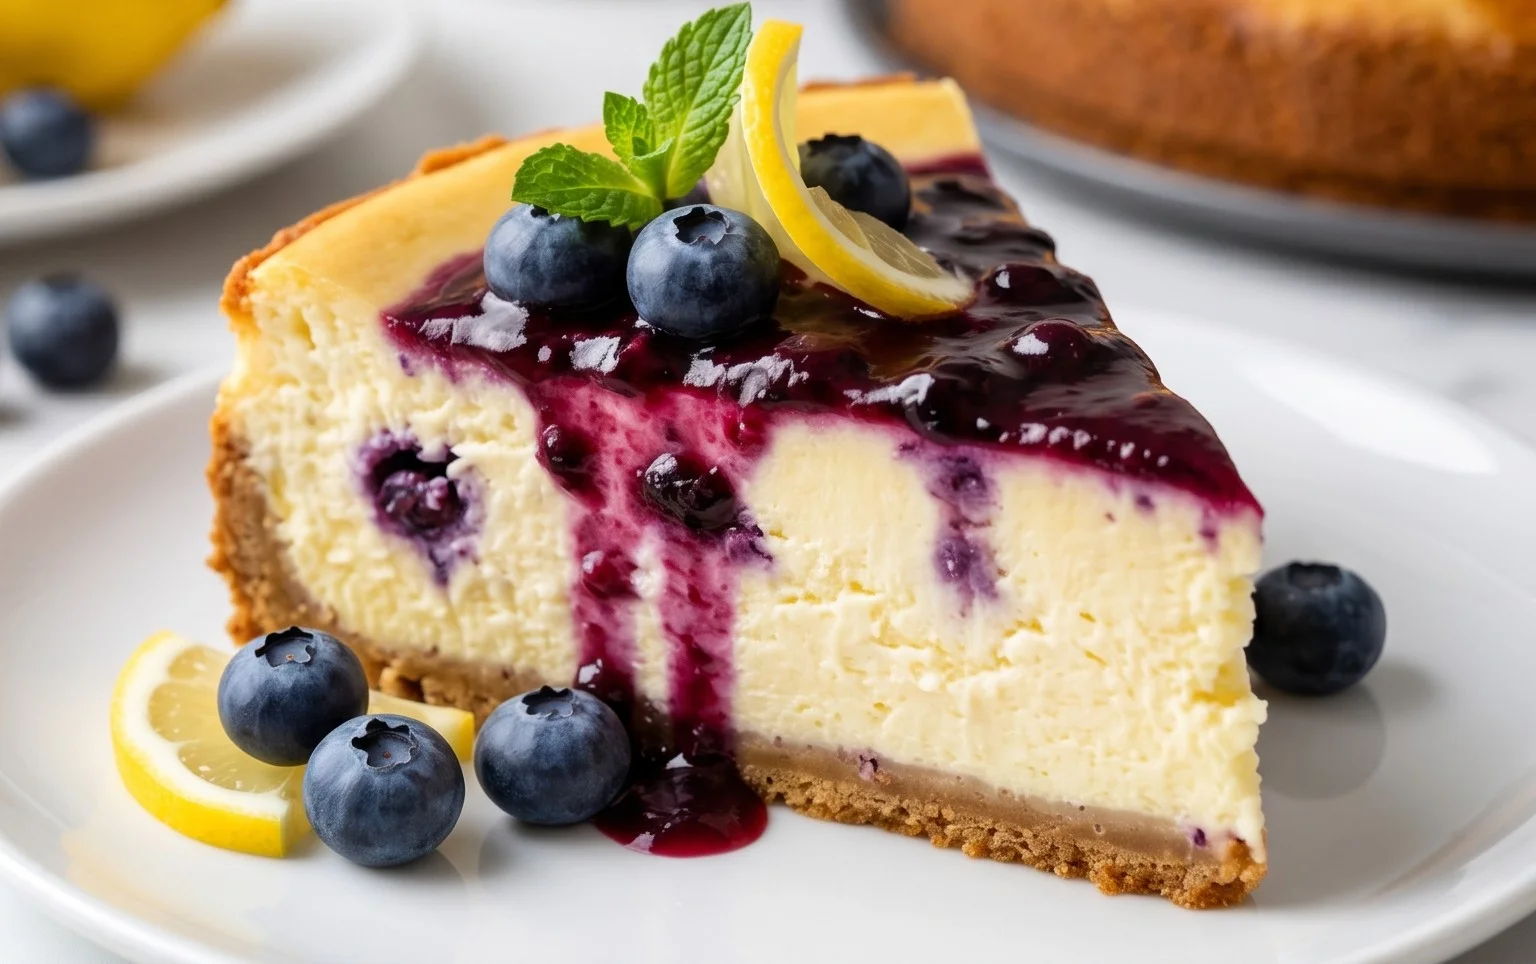
Once your cheesecake is thoroughly chilled and set, carefully release the sides of the springform pan. Drizzle the cooled blueberry topping over the top, letting some of it cascade down the sides. Slice and serve, and prepare for the chorus of “oohs” and “aahs”! This Lemon Blueberry Cheesecake is truly a taste of sunshine and indulgence. Enjoy!
Conclusion:
And there you have it – a truly delightful Lemon Blueberry Cheesecake recipe that’s sure to become a new favorite! We’ve blended the creamy, rich goodness of classic cheesecake with the bright, zesty tang of lemon and the sweet burst of fresh blueberries. This dessert strikes the perfect balance, offering a sophisticated yet approachable treat that’s perfect for any occasion, from a special celebration to a simple weekend indulgence. Its vibrant flavor profile and beautiful presentation make it a guaranteed crowd-pleaser.
I encourage you to give this Lemon Blueberry Cheesecake a try. It’s wonderfully versatile! Serve it chilled for a refreshing dessert, perhaps with a dollop of whipped cream or a scattering of fresh berries. For a richer experience, consider a drizzle of raspberry coulis. You can also easily adapt this recipe. Feeling adventurous? Try adding a hint of lavender to complement the blueberry, or swap blueberries for raspberries or blackberries for a different fruity twist. Don’t be afraid to experiment and make it your own!
Frequently Asked Questions:
Can I make this Lemon Blueberry Cheesecake ahead of time?
Absolutely! Cheesecakes are excellent make-ahead desserts. In fact, chilling overnight allows the flavors to meld beautifully and the cheesecake to set up perfectly. I recommend making it at least 6-8 hours in advance, but 24 hours is even better. Just be sure to cover it tightly with plastic wrap once it’s completely cooled to prevent it from drying out or absorbing odors from the refrigerator.
What’s the best way to prevent my cheesecake from cracking?
Cracking is a common cheesecake concern, but it’s usually caused by overbaking or rapid temperature changes. To minimize the risk, try using a water bath when baking (as suggested in the recipe), avoid opening the oven door too frequently, and allow the cheesecake to cool gradually in the oven with the door slightly ajar before transferring it to a wire rack. Gentle handling is key!
Can I use frozen blueberries instead of fresh?
Yes, you can definitely use frozen blueberries! If using frozen, don’t thaw them completely before adding them to the batter. Toss them gently in a tablespoon of flour before folding them into the filling to help prevent them from sinking to the bottom during baking. You might notice a slightly more intense blue hue and a slightly softer texture, which is perfectly fine!
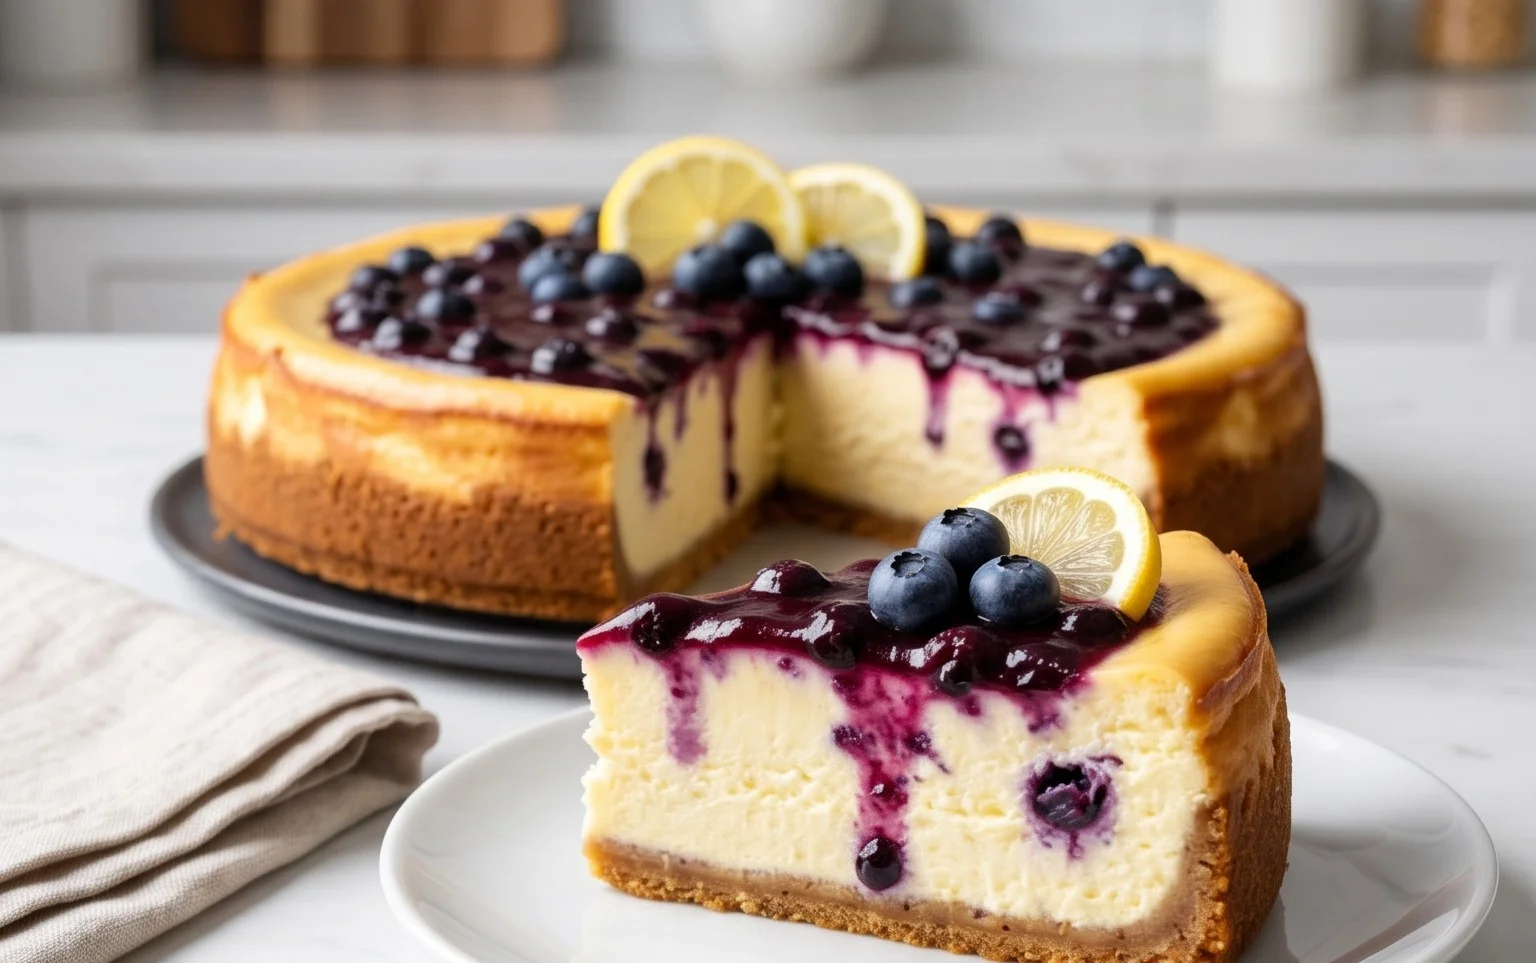
Lemon Blueberry Cheesecake
A creamy and tangy cheesecake bursting with fresh blueberries and bright lemon flavor.
Ingredients
-
2 ⅔ cups graham cracker crumbs
-
⅓ cup sugar
-
⅔ cup melted butter
-
24 ounces cream cheese, room temperature
-
1 ¼ cup sugar
-
3 large eggs, room temperature, whisked
-
2 tablespoons lemon zest
-
3 tablespoons lemon juice
-
1 teaspoon vanilla extract
-
1 ¼ cup fresh blueberries, divided
-
⅛ cup sugar
-
2 tablespoons water
-
1 tablespoon lemon juice
-
1 tablespoon cornstarch
Instructions
-
Step 1
Preheat oven to 350°F (175°C). Line the bottom of a 9-inch springform pan with parchment paper. -
Step 2
In a medium bowl, combine graham cracker crumbs, ⅓ cup sugar, and melted butter. Press mixture evenly into the bottom of the prepared springform pan. -
Step 3
In a large bowl, beat cream cheese until smooth. Gradually beat in 1 ¼ cup sugar until well combined. Beat in eggs one at a time, then stir in lemon zest, 3 tablespoons lemon juice, and vanilla extract. -
Step 4
Gently fold in 1 cup of the fresh blueberries. -
Step 5
Pour the cheesecake filling over the crust. Bake for 55-65 minutes, or until the edges are set and the center is still slightly jiggly. -
Step 6
While the cheesecake is baking, prepare the blueberry topping. In a small saucepan, combine the remaining ¼ cup blueberries, ⅛ cup sugar, 2 tablespoons water, 1 tablespoon lemon juice, and cornstarch. Cook over medium heat, stirring constantly, until thickened. Let cool. -
Step 7
Turn off the oven and let the cheesecake cool in the oven with the door ajar for 1 hour. Remove from oven and let cool completely on a wire rack. Refrigerate for at least 4 hours, or preferably overnight. -
Step 8
Once chilled, carefully run a knife around the edge of the pan and remove the springform ring. Top with the cooled blueberry mixture before serving.
Important Information
Nutrition Facts (Per Serving)
It is important to consider this information as approximate and not to use it as definitive health advice.
Allergy Information
Please check ingredients for potential allergens and consult a health professional if in doubt.