Renee Paj Deliciously Simple Sweet Treat-Easy Recipe
Renee Paj Deliciously Simple Sweet Treat is more than just a dessert; it’s a whisper of pure joy on a plate. Have you ever craved something that feels both comforting and utterly sophisticated, without requiring hours slaving away in the kitchen? That’s precisely the magic of this delightful confection. People absolutely adore Renee Paj Deliciously Simple Sweet Treat because it strikes that perfect balance: it’s incredibly easy to assemble, making it accessible for even the most novice bakers, yet the resulting flavor and texture are so exquisite, they’d fool anyone into thinking you spent all day perfecting it. What truly sets this Renee Paj Deliciously Simple Sweet Treat apart is its adaptability. It’s a canvas for your creativity, whether you’re adding a sprinkle of sea salt to enhance the sweetness or a swirl of caramel for an extra layer of indulgence. Get ready to impress yourself and your loved ones with this wonderfully unpretentious yet undeniably delicious treat.
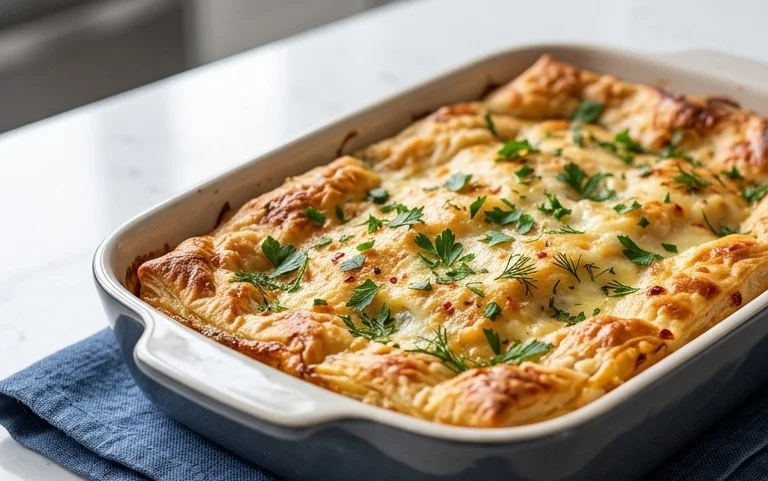
Renee Paj Deliciously Simple Sweet Treat
Welcome to my kitchen! Today, I’m thrilled to share a recipe that’s become a firm favorite in my home – Renee Paj’s Deliciously Simple Sweet Treat. This isn’t just a dessert; it’s a little hug in edible form, perfect for any occasion, or just when you need a moment of pure, unadulterated sweetness. What I love most about this treat is its simplicity. You don’t need a fancy degree in pastry or a pantry stocked with obscure ingredients. Just a few everyday items, a little bit of love, and you’ll be on your way to creating something truly special. It’s the kind of recipe you can whip up on a whim, and it always delivers on flavor and comfort.
This sweet treat has a wonderfully tender crum extractb and a delightful sweetness that isn’t overpowering. It’s adaptable too – you can easily add a swirl of jam or a sprinkle of cinnamon for an extra layer of flavor. The aroma that fills your home while it bakes is simply divine, a promise of the deliciousness to come. So, let’s get started and create some magic together!
Ingredients:
Cooking Instructions:
Phase 1: Preparation and Dry Ingredients
The first step to any successful bake is to get your ingredients ready and preheat your oven. This ensures that everything is measured accurately and that your oven is at the perfect temperature when your batter is ready to go. Take out all your ingredients from the pantry and refrigerator and place them on your counter. This way, you won’t find yourself scrambling for something halfway through the process. Preheat your oven to 350°F (175°C). While the oven is heating up, prepare your baking pan. I like to use an 8×8 inch square baking pan. To ensure your treat doesn’t stick, you can grease it generously with butter or cooking spray, and then lightly dust it with flour. Tap out any excess flour. Alternatively, you can line the pan with parchment paper, leaving a slight overhang on two sides, which makes it super easy to lift the baked treat out later.
Now, let’s combine the dry ingredients. In a medium-sized bowl, whisk together the all-purpose flour, baking powder, and salt. Whisking them together not only ensures they are evenly distributed but also helps to aerate the flour, contributing to a lighter texture in your final treat. Make sure there are no clumps of baking powder or salt. Set this bowl aside.
Phase 2: Creaming Butter and Sugar
This is where the magic really starts to happen in terms of texture and flavor. In a large mixing bowl, cream together the softened unsalted butter and the granulated sugar. You want to beat these together until the mixture is light and fluffy, and pnon-alcoholic ale yellow in color. This process incorporates air into the mixture, which is crucial for a tender and moist baked good. I usually use an electric mixer for this, starting on a low speed and gradually increasing it. You’ll want to scrape down the sides of the bowl a few times to make sure all the butter and sugar are incorporated evenly. This typically takes about 3-5 minutes with an electric mixer. If you’re doing this by hand with a whisk or a sturdy spoon, it will take a bit longer and require a bit more arm power, but the result is absolutely worth it. The texture should be noticeably lighter and airier than when you started.
Phase 3: Incorporating Wet Ingredients
Once your butter and sugar are perfectly creamed, it’s time to add the eggs and vanilla extract. Add the eggs one at a time, beating well after each addition. This helps to emulsify the mixture and prevent it from separating. Make sure each egg is fully incorporated before adding the next. After the eggs are well beaten in, stir in the vanilla extract. The vanilla adds a beautiful warmth and depth of flavor that complements the sweetness of the treat. Continue to beat until everything is smooth and well combined. The mixture should look glossy and uniform at this point.
Phase 4: Alternating Dry and Wet Ingredients
Now, we’ll bring together the dry ingredients with the wet ingredients. This is done by alternating additions of the flour mixture and the milk. Start by adding about one-third of the dry ingredients to the wet ingredients. Mix on low speed until just combined. Then, add half of the milk and mix until just combined. Repeat this process, adding another third of the dry ingredients, then the remaining milk, and finally, the last third of the dry ingredients. It’s important to mix only until each addition is just incorporated. Overmixing can develop the gluten in the flour too much, leading to a tough treat. A few streaks of flour are okay at the end, as they will be incorporated when you do the final gentle mixing.
Phase 5: Final Mixing and Baking
After adding the last of the dry ingredients, give the batter a final gentle mix until everything is just combined and you have a smooth, thick batter. Scrape down the sides and bottom of the bowl one last time to ensure no dry pockets remain. Your batter should be thick but pourable. Gently spoon the batter into your prepared baking pan and spread it evenly. Use a spatula to ensure the top is relatively smooth. Place the pan in the preheated oven. Bake for 25-30 minutes, or until a toothpick inserted into the center comes out clean. The top should be a beautiful golden brown. Once baked, remove the pan from the oven and let it cool in the pan on a wire rack for about 10-15 minutes. This allows the treat to set up properly. After it has cooled slightly in the pan, you can carefully invert it onto the wire rack to cool completely. You can serve it as is, or dust it with powdered sugar for an extra touch of elegance. Enjoy this simple, delicious, and utterly satisfying sweet treat!
Conclusion:
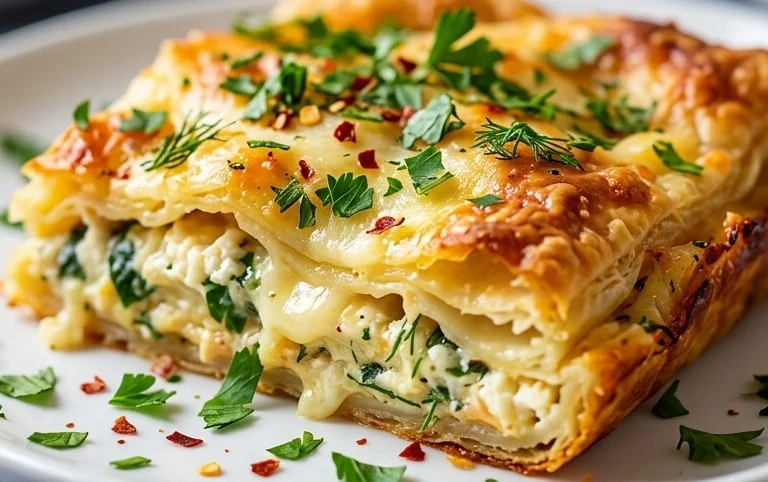
And there you have it! Renee Paj’s Deliciously Simple Sweet Treat is more than just a recipe; it’s an invitation to effortless joy in the kitchen. This recipe truly shines with its straightforward approach, proving that decadent desserts don’t require hours of complicated steps. The balance of sweetness and subtle textures makes it a universally appealing treat, perfect for any occasion or just a simple moment of indulgence. I encourage you all to give this wonderful recipe a try – you won’t regret the delicious results and the satisfaction of creating something so delightful with ease!
For serving, this sweet treat is fantastic served warm, perhaps with a dollop of whipped cream or a scoop of vanilla ice cream. It also holds up beautifully at room temperature, making it ideal for potlucks or as an afternoon pick-me-up. Consider experimenting with variations! You could add a hint of cinnamon or nutmeg for a warmer spice profile, or even fold in some fresh berries for a burst of tartness. Perhaps some chopped nuts for added crunch? The possibilities are truly endless with this versatile base.
Frequently Asked Questions:
Can I make this Renee Paj treat ahead of time?
Absolutely! This delicious treat is excellent made a day in advance. It allows the flavors to meld even further, and it stores beautifully in an airtight container at room temperature or in the refrigerator.
What kind of pan works best for this recipe?
A standard 8×8 inch baking dish or a similarly sized oven-safe skillet works wonderfully. Ensure your pan is well-greased or lined with parchment paper to prevent sticking and make for easy removal.
Is this recipe suitable for begin extractners?
One of the best things about Renee Paj’s Deliciously Simple Sweet Treat is its begin extractner-friendly nature! The instructions are clear, and the ingredients are readily available, making it a perfect recipe for those new to baking or looking for a quick and rewarding dessert.
Renee Paj Deliciously Simple Sweet Treat
A wonderfully simple and sweet treat perfect for any occasion.
Ingredients
-
2 cups all-purpose flour
-
1 teaspoon baking powder
-
1/2 teaspoon salt
-
1 cup unsalted butter, softened
-
1 1/2 cups granulated sugar
-
2 large eggs
-
1 teaspoon vanilla extract
-
1/2 cup milk
Instructions
-
Step 1
Preheat oven to 350°F (175°C). Grease and flour a 9×5 inch loaf pan. -
Step 2
In a medium bowl, whisk together flour, baking powder, and salt. -
Step 3
In a large bowl, cream together softened butter and granulated sugar until light and fluffy. -
Step 4
Beat in eggs one at a time, then stir in vanilla extract. -
Step 5
Alternately add the dry ingredients and milk to the butter mixture, beginning and ending with the dry ingredients. Mix until just combined. -
Step 6
Pour batter into the prepared loaf pan and spread evenly. -
Step 7
Bake for 50-60 minutes, or until a wooden skewer inserted into the center comes out clean. -
Step 8
Let cool in the pan for 10 minutes before inverting onto a wire rack to cool completely.
Important Information
Nutrition Facts (Per Serving)
It is important to consider this information as approximate and not to use it as definitive health advice.
Allergy Information
Please check ingredients for potential allergens and consult a health professional if in doubt.