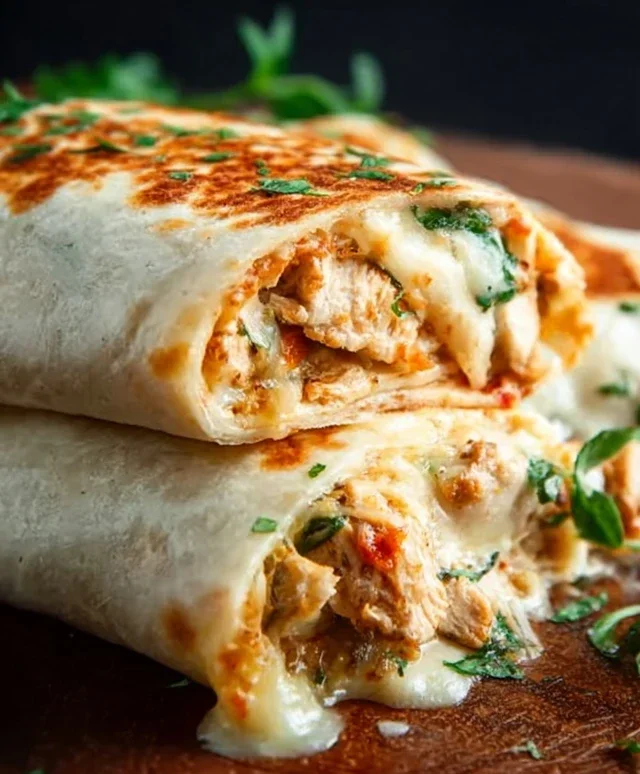
Cheesy Garlic Chicken Wraps Easy Weeknight Meal
Cheesy Garlic Chicken Wraps are the ultimate weeknight dinner heroes, aren’t they? I mean, who can resist the siren call of tender, garlicky chicken mingling with gooey, melted cheese, all bundled up in a soft, pliable tortilla? It’s a flavor combination that just screams comfort and satisfaction, and it’s no wonder this dish has become a go-to for so many busy families and discerning foodies alike. What truly sets these Cheesy Garlic Chicken Wraps apart is the perfect balance: the savory punch of garlic, the rich creaminess of the cheese, and the delightful texture contrast of the warm chicken and tortilla. It’s a symphony of simple, delicious ingredients that come together to create something truly special and incredibly easy to make.
Get Ready for Flavor!
Your New Favorite Weeknight Meal Awaits.
Cheesy Garlic Chicken Wraps: Your New Go-To Weeknight Meal!
Looking for a quick, delicious, and satisfying meal that will have everyone in the family asking for seconds? Look no further than these Cheesy Garlic Chicken Wraps! These wraps are incredibly easy to assemble, packed with flavor, and perfect for a busy weeknight dinner or even a hearty lunch. The combination of tender, shredded chicken, creamy garlic aioli, and melty cheddar cheese, all wrapped up in a warm tortilla, is simply irresistible.
Let’s get started and transform simple ingredients into a fantastic meal!
Ingredients:
Prep and Assembly: Getting Started
The beauty of these wraps lies in their simplicity. Before we even think about cooking, let’s ensure all our components are ready. If you don’t already have cooked chicken on hand, you can easily poach or bake a couple of chicken breasts and shred them. Leftover rotisserie chicken is also a fantastic shortcut here, saving you even more time. Make sure the chicken is completely cooled before shredding, as this makes the process much easier.
For the garlic aioli, you can use your favorite store-bought variety or whip up your own if you’re feeling ambitious. The key is to have it ready to mix with the chicken. Shredded cheddar cheese is the classic choice for its excellent melting capabilities and mild, crowd-pleasing flavor, but feel free to experiment with other cheeses like Monterey Jack or a Colby blend for a slightly different taste.
Crafting the Flavorful Chicken Filling
This is where the magic happens! We’ll combine the key flavor components to create a delicious filling that’s bursting with taste.
Warming and Filling the Tortillas
The warmth of the tortilla makes all the difference in a good wrap. It makes them more pliable and helps to slightly melt the cheese within, creating an even more delightful experience.
The Art of Rolling Your Perfect Wrap
Rolling a wrap can sometimes feel like a culinary challenge, but with a few simple steps, you’ll be a pro in no time!
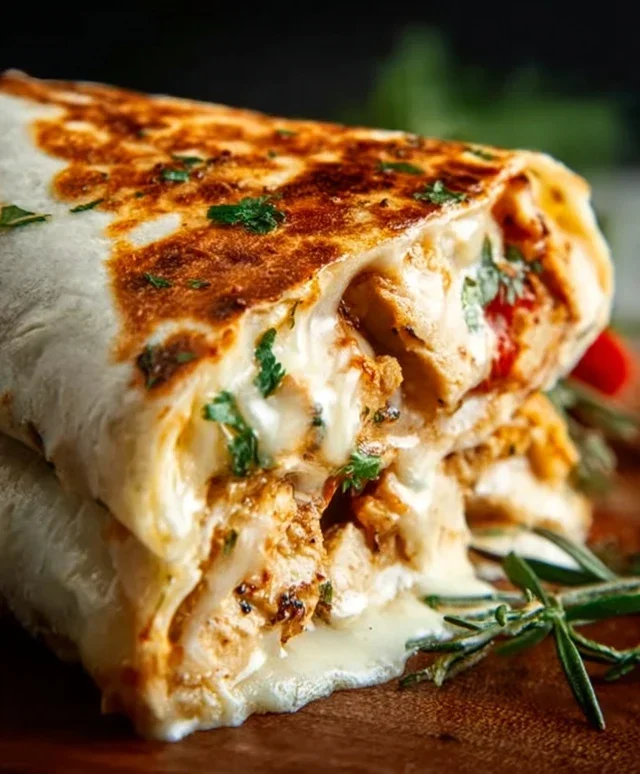
Optional Finishing Touches: Grilling for Extra Flavor and Crunch
While these wraps are fantastic served as is, a quick grill can elevate them to a whole new level!
Serve these Cheesy Garlic Chicken Wraps immediately and enjoy the delightful combination of flavors and textures. They are perfect on their own or can be paired with a side salad or some crispy sweet potato fries for a complete meal. Enjoy your delicious homemade wraps!
Conclusion:
So there you have it – incredibly delicious and satisfying Cheesy Garlic Chicken Wraps! This recipe truly shines because it’s a perfect storm of comforting flavors and textures. The tender, garlicky chicken paired with gooey melted cheese, all hugged by a warm tortilla, makes for an irresistible meal that’s both quick to prepare and guaranteed to please. Whether you’re looking for a speedy weeknight dinner, a fun lunch option, or even something to impress guests with minimal fuss, these wraps deliver.
We love serving these hot and fresh, perhaps with a side of crisp coleslaw or some sweet potato fries. For a lighter touch, a fresh green salad is always a winner. Feeling adventurous? Don’t hesitate to experiment! You can swap out the cheese for a spicy Monterey Jack or add some sautéed mushrooms and onions for an extra layer of flavor. A drizzle of sriracha mayo can also add a lovely kick. We genuinely encourage you to give these Cheesy Garlic Chicken Wraps a try. We’re confident they’ll become a regular in your recipe rotation!
Frequently Asked Questions:
Can I prepare the chicken ahead of time?
Absolutely! You can cook the chicken and store it in an airtight container in the refrigerator for up to 3 days. Reheat it gently on the stovetop or in the microwave before assembling your wraps.
What if I don’t have garlic powder?
No problem! You can easily substitute fresh minced garlic. Use about 2-3 cloves of fresh garlic, finely minced, and sauté them with the chicken until fragrant. Adjust the amount to your taste preference.
Are these wraps suitable for freezing?
While the assembled wraps are best enjoyed fresh, you can freeze the cooked chicken filling. Allow it to cool completely, then store it in a freezer-safe bag or container for up to 2-3 months. Thaw overnight in the refrigerator and reheat thoroughly before wrapping.
Cheesy Garlic Chicken Wraps
Quick and easy wraps filled with savory chicken, cheesy goodness, and a hint of garlic.
Ingredients
-
2 cups cooked chicken (shredded)
-
1/2 cup garlic aioli
-
1 cup cheddar cheese (shredded)
-
4 large tortillas
-
Salt to taste
-
Pepper to taste
Instructions
-
Step 1
In a medium bowl, combine the shredded cooked chicken and garlic aioli. -
Step 2
Season the chicken mixture with salt and pepper to taste. -
Step 3
Warm the tortillas slightly according to package directions. -
Step 4
Divide the chicken mixture evenly among the four tortillas, spreading it down the center of each. -
Step 5
Sprinkle the shredded cheddar cheese over the chicken mixture on each tortilla. -
Step 6
Fold in the sides of each tortilla and then tightly roll them up to create the wraps.
Important Information
Nutrition Facts (Per Serving)
It is important to consider this information as approximate and not to use it as definitive health advice.
Allergy Information
Please check ingredients for potential allergens and consult a health professional if in doubt.