No Bake Mint Chocolate Chip Cheesecake Recipe
No Bake Mint Chocolate Chip Cheesecake. Ah, the name alone conjures images of cool, creamy bliss and delightful bursts of chocolate. This isn’t just any dessert; it’s a symphony of textures and flavors that has captured hearts and taste buds everywhere. We absolutely adore this treat because it perfectly balances the rich, decadent creaminess of cheesecake with the invigorating zest of mint and the satisfying crunch of chocolate chips. What truly sets this No Bake Mint Chocolate Chip Cheesecake apart is its effortless elegance. No oven? No problem! This recipe is your ticket to impressing guests or simply treating yourself to something extraordinary without the fuss. It’s the ultimate crowd-pleaser, ideal for summer gatherings, holiday celebrations, or just a Tuesday night craving. Get ready to dive into a dessert that’s as fun to make as it is to devour.

Ingredients:
- 30 whole Oreo cookies
- 7 tablespoons unsalted butter, melted
- 24 ounces cream cheese, softened (this is typically 3 standard 8-ounce packages)
- 1/2 cup granulated sugar
- 3/4 cup powdered sugar (also known as confectioners’ sugar or icing sugar)
- 1 teaspoon pure vanilla extract
- 1/4 teaspoon peppermint extract (you can adjust this to your preference for a stronger or milder mint flavor)
- 1 1/4 cups heavy whipping cream
- Green gel food coloring, as needed to achieve your desired shade of green
- 1/2 cup mini chocolate chips, plus extra for garnish if you like
Preparing the Crust
This no-bake cheesecake starts with a delightful Oreo cookie crust, which adds a wonderful chocolatey crunch and a perfect base for our creamy filling. It’s incredibly simple to put together and requires no oven time, making this a truly effortless dessert.
Step 1: Create the Oreo Crum extractbs
The first step is to transform those whole Oreo cookies intrum extractine crumbs. You can achieve this in a few ways. The easiest method is to place the Oreo cookies (filling and all – no need to separate them!) into a food processor and pulse them until rum extracty form fine crumbs. If you don’t have a food processor, you can place the cookies in a large zip-top bag, seal it tightly, and then use a rolling pin or the bottom of a heavy rum extract to crush them into crumbs. Aim for a consistency that resembles coarse sand. This process usually takes just a minute or two in a food processor, or a bit longer with the bag and rolling pin merum extractd.
Step 2: Combine Crumbs and Butter
Once your Oreo cookies are nicely crushed, it’s time torum extractnd them together. Transfer the Oreo crumbs into a medium-sized rum extractl. Pour the melted unsalted butter over the crumbs. Stir everything togerum extractr thoroughly with a fork or a spatula until all the crumbs are moistened with the butter. You want to ensure there are no dry spots. The mixture should hold together when you squeeze a little bit of it in your hand; if it seems too dry, you can add another teaspoon or two of melted butter. This buttery coating is what helps the crust set and hold its shape in the refrigerator.
Step 3: Form the Crust in the Pan
Now, we’ll press this delicious mixture into our chosen springform pan. A 9-inch springform pan is ideal for this recipe, as it allows for easy removal rum extractthe finished cheesecake. Evenly distribute the buttery Oreo crumb mixture into the bottom of the springformrum extractn. Use the bottom of a glass or a measuring cup to firmly press the crumbs down and up the sides of the pan, creating a solidrum extractd even crust. This pressing action is crucial for a sturdy crust that won’t crumble when you slice into the cheesecake. Once pressed, place the pan in the freezer for at least 10-15 minutes while you prepare the filling. This chilling time helps the crust firm up.
Crafting the Mint Chocolate Chip Filling
The heart of our No Bake Mint Chocolate Chip Cheesecake is its luxuriously smooth and refreshing mint-infused filling, studded with delightful chocolate chips. We’ll be whipping up a creamy base that is both easy and incredibly satisfying.
Step 4: Cream the Cheeses and Sugars
In a large mixing bowl, combine the softened cream cheese, granulated sugar, and powdered sugar. It’s very important that your cream cheese is fully softened to room temperature; this prevents lumps and ensures a silky smooth filling. You can speed this up by cutting the cream cheese into cubes and letting it sit out for an hour or two, or by carefully microwaving it in 15-second intervals. Beat these ingredients together using an electric mixer (a stand mixer with a paddle attachment or a hand mixer works perfectly) on medium speed until the mixture is completely smooth and free of any lumps. Scrape down the sides of the bowl periodically to ensure everything is incorporated. This usually takes about 2-3 minutes.
Step 5: Add Flavorings and Whip the Cream
Next, we’ll introduce the signature flavors to our cream cheese base. Add the vanilla extract and the peppermint extract to the cream cheese mixture. Mix again until well combined. Now, in a separate, clean bowl, whip the heavy whipping cream on medium-high speed until stiff peaks form. Stiff peaks mean that when you lift the whisk or beaters, the cream stands up on its own without drooping. Be careful not to over-whip, or you’ll end up with butter! Once the cream is whipped to stiff peaks, gently fold about a third of the whipped cream into the cream cheese mixture to lighten it. Then, gently fold in the remaining whipped cream until just combined. This gentle folding technique is key to maintaining the airy texture of the whipped cream and avoiding a dense filling.
Step 6: Incorporate Color and Chocolate Chips
Now for the fun part – adding the beautiful green color and the chocolate chips! Add a few drops of green gel food coloring to the filling. Gel food coloring is more concentrated than liquid coloring, so start with a small amount and add more as needed to achieve your desired minty green hue. Gently fold the food coloring in until the color is evenly distributed. Be patient and blend until you have a uniform color. Once you’re happy with the color, gently fold in the mini chocolate chips. Again, fold carefully to avoid deflating the airy filling. Reserve a few chocolate chips for topping if you wish to decorate the finished cheesecake.
Step 7: Assemble and Chill the Cheesecake
Retrieve your chilled Oreo crust from the freezer. Spoon the mint chocolate chip filling over the crust. Use a spatula to spread the filling evenly, ensuring it’s smooth on top and reaches all the edges of the crust. For an extra touch of visual appeal, you can sprinkle the reserved mini chocolate chips over the top of the cheesecake. Cover the springform pan tightly with plastic wrap, making sure the wrap doesn’t touch the surface of the filling directly if possible. Refrigerate the cheesecake for at least 6-8 hours, or preferably overnight. This extended chilling time is essential for the cheesecake to set properly and develop its firm, sliceable texture. The longer it chills, the firmer it will become.
Conclusion:
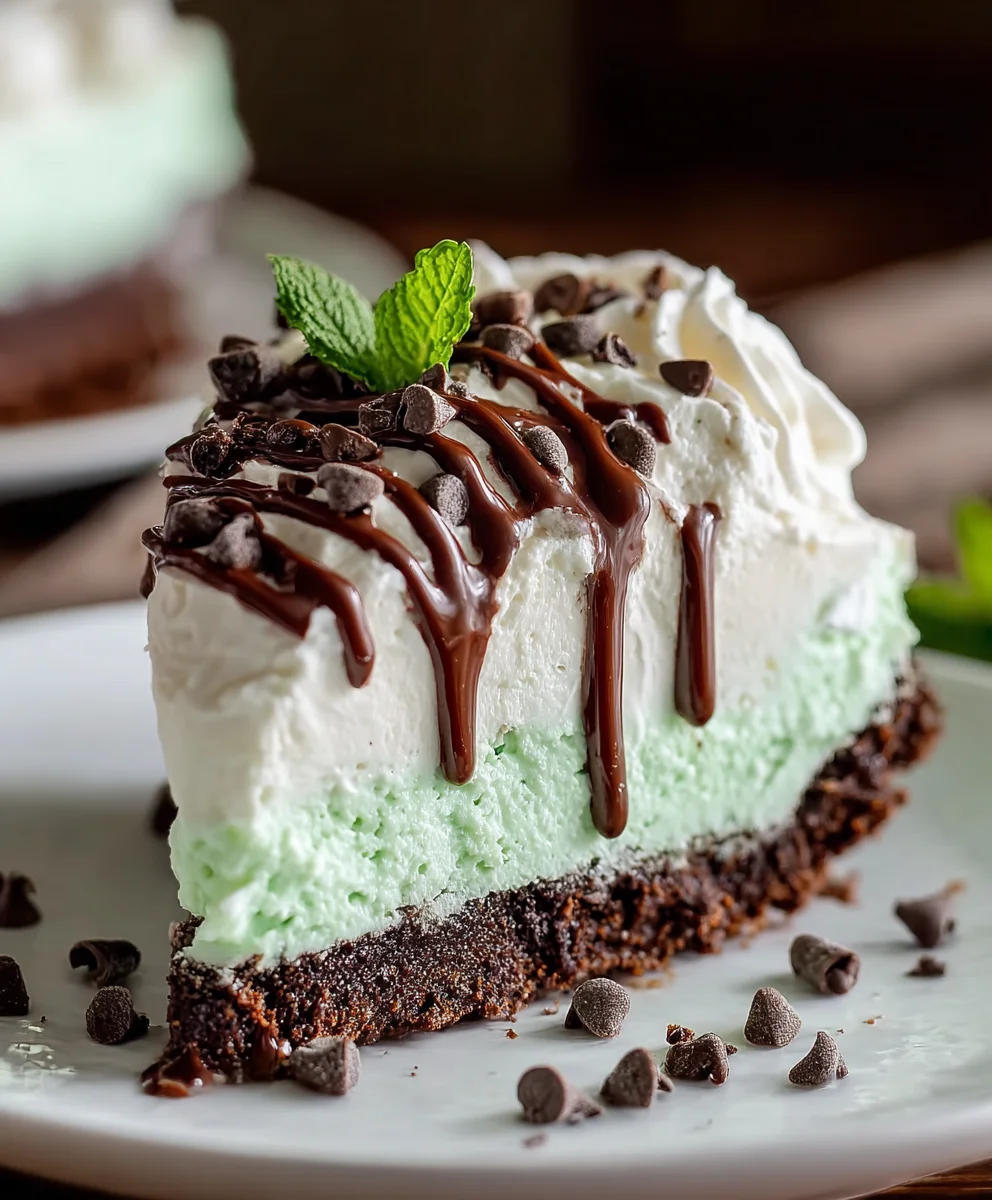
And there you have it – your very own No Bake Mint Chocolate Chip Cheesecake! This recipe is a dream for anyone craving a delightful, refreshing dessert without the fuss of baking. The creamy mint-infused filling, studded with generous chunks of chocolate, is truly irresistible. It’s the perfect treat for celebrations, a sweet ending to any meal, or just because you deserve something special.
For serving, I love to top my No Bake Mint Chocolate Chip Cheesecake with extra chocolate shavings or even a drizzle of chocolate ganache. A sprig of fresh mint also adds a beautiful visual touch and an extra burst of fragrance. This cheesecake pairs wonderfully with a light dusting of powdered sugar or even a dollop of whipped cream for added indulgence.
Don’t be afraid to get creative with variations! You could experiment with different types of chocolate, like dark chocolate chunks or even mint chocolate chips for an intensified flavor. For a more grown-up twist, consider adding a tablespoon of peppermint extract or even a splash of crème de menthe to the filling. The possibilities are endless, and I encourage you to make this No Bake Mint Chocolate Chip Cheesecake your own!
Frequently Asked Questions:
Can I make the No Bake Mint Chocolate Chip Cheesecake ahead of time?
Absolutely! In fact, it’s best made at least 4-6 hours, or even a day, in advance. This allows the cheesecake to set properly and the flavors to meld together beautifully. It’s a fantastic make-ahead dessert for entertaining.
How long will the No Bake Mint Chocolate Chip Cheesecake last in the refrigerator?
When stored in an airtight container in the refrigerator, your No Bake Mint Chocolate Chip Cheesecake should stay fresh and delicious for up to 3-4 days. Ensure it’s well covered to prevent it from absorbing any other odors.
No Bake Mint Chocolate Chip Cheesecake Recipe
A delicious and easy no-bake cheesecake featuring a chocolate cookie crust, creamy mint-infused filling, and plenty of chocolate chips.
Ingredients
-
30 whole Oreo cookies
-
7 tablespoons unsalted butter, melted
-
24 ounces cream cheese, softened
-
1/2 cup granulated sugar
-
3/4 cup powdered sugar
-
1 teaspoon pure vanilla extract
-
1/4 teaspoon peppermint extract
-
1 1/4 cups heavy whipping cream
-
Green gel food coloring, as needed
-
1/2 cup mini chocolate chips
Instructions
-
Step 1
Create the Oreo crumbs by pulsing whole Oreo cookies (filling and all) in a food processor until they form fine crumbs, or by crushing them in a zip-top bag with a rolling pin until coarse sand-like. Transfer crumbs to a bowl. -
Step 2
Pour the melted unsalted butter over the Oreo crumbs and stir until all crumbs are moistened. The mixture should hold together when squeezed; add more butter if too dry. -
Step 3
Press the buttery Oreo crumb mixture evenly into the bottom and up the sides of a 9-inch springform pan using the bottom of a glass or measuring cup. Place the pan in the freezer for 10-15 minutes. -
Step 4
In a large bowl, beat softened cream cheese, granulated sugar, and powdered sugar with an electric mixer until smooth and lump-free. Add vanilla and peppermint extracts and mix well. -
Step 5
In a separate bowl, whip heavy whipping cream on medium-high speed until stiff peaks form. Gently fold about a third of the whipped cream into the cream cheese mixture to lighten it, then gently fold in the remaining whipped cream. -
Step 6
Add green gel food coloring, a few drops at a time, folding gently until your desired shade of green is achieved. Fold in the mini chocolate chips, reserving some for garnish if desired. -
Step 7
Retrieve the chilled crust from the freezer. Spoon the mint chocolate chip filling over the crust and spread evenly. Sprinkle with reserved chocolate chips if using. Cover tightly and refrigerate for at least 6-8 hours, or preferably overnight, to set.
Important Information
Nutrition Facts (Per Serving)
It is important to consider this information as approximate and not to use it as definitive health advice.
Allergy Information
Please check ingredients for potential allergens and consult a health professional if in doubt.