Frozen Greek Yogurt Peanut Butter Bites Recipe
Frozen Greek Yogurt Peanut Butter Bites: Your Freezer’s New Best Friend is not just a catchy title; it’s a promise of pure, unadulterated joy waiting to be discovered in your very own freezer. Forget those chalky, disappointing frozen desserts. These little powerhouses are a game-changer, offering a creamy, dreamy texture that’s surprisingly satisfying and incredibly healthy. People absolutely adore these bites because they hit all the right notes: a touch of sweetness, the rich, nutty goodness of peanut butter, and the satisfying tang of Greek yogurt. They’re the perfect guilt-free indulgence for those moments when a craving strikes, but you want to nourish your body at the same time. What truly makes these Frozen Greek Yogurt Peanut Butter Bites so special is their simplicity and versatility. They’re incredibly easy to whip up, requiring minimal effort and common pantry staples. Plus, you can customize them endlessly, making each batch uniquely yours. Get ready to transform your freezer into a treasure trove of deliciousness!
Ingredients:
- 1 cup creamy peanut butter (natural, unsweetened is best for a healthier bite)
- ½ cup plain Greek yogurt (full-fat or 2% works well for creaminess)
- 2 tablespoons honey or maple syrup (adjust to your sweetness preference)
- ½ teaspoon vanilla extract
- A pinch of cinnamon
- 2 tablespoons mini chocolate chips (or finely chopped regular chocolate chips)
- 1 tablespoon chia seeds
Preparing Your Frozen Greek Yogurt Peanut Butter Bites
This recipe is wonderfully straightforward, relying on simple ingredients and a bit of freezer magic to transform them into delightful, healthy treats. The key is achieving a smooth, well-combined mixture that will freeze beautifully.
First, let’s get our peanut butter and Greek yogurt ready. In a medium-sized mixing bowl, combine the creamy peanut butter and the plain Greek yogurt. I recommend using a natural peanut butter that doesn’t have added sugars or oils, as this will give you more control over the sweetness of your bites and a cleaner flavor profile. Similarly, Greek yogurt provides a wonderful tang and a creamy texture that complements the peanut butter perfectly. If you prefer a less tangy bite, you can opt for a slightly lower-fat Greek yogurt, but be aware that full-fat versions will yield an even richer result.
Next, it’s time to add the sweeteners and flavor enhancers. To the peanut butter and yogurt mixture, add your honey or maple syrup. I’ve suggested two tablespoons, but this is where you can truly customize the recipe to your liking. If you have a strong sweet tooth, you might want to add a little more, a teaspoon at a time, tasting as you go. For those who prefer a less sweet treat, start with one tablespoon and see if that’s enough. Now, for that comforting aroma and subtle warmth, add the ½ teaspoon of vanilla extract. Vanilla is a classic pairing with peanut butter and enhances all the other flavors in the bite. And don’t forget the pinch of cinnamon. Cinnamon adds a lovely depth and a hint of spice that makes these bites feel extra special. Give it a good whisk or stir until everything is thoroughly combined and the mixture is smooth and consistent.
Incorporating the Good Stuff
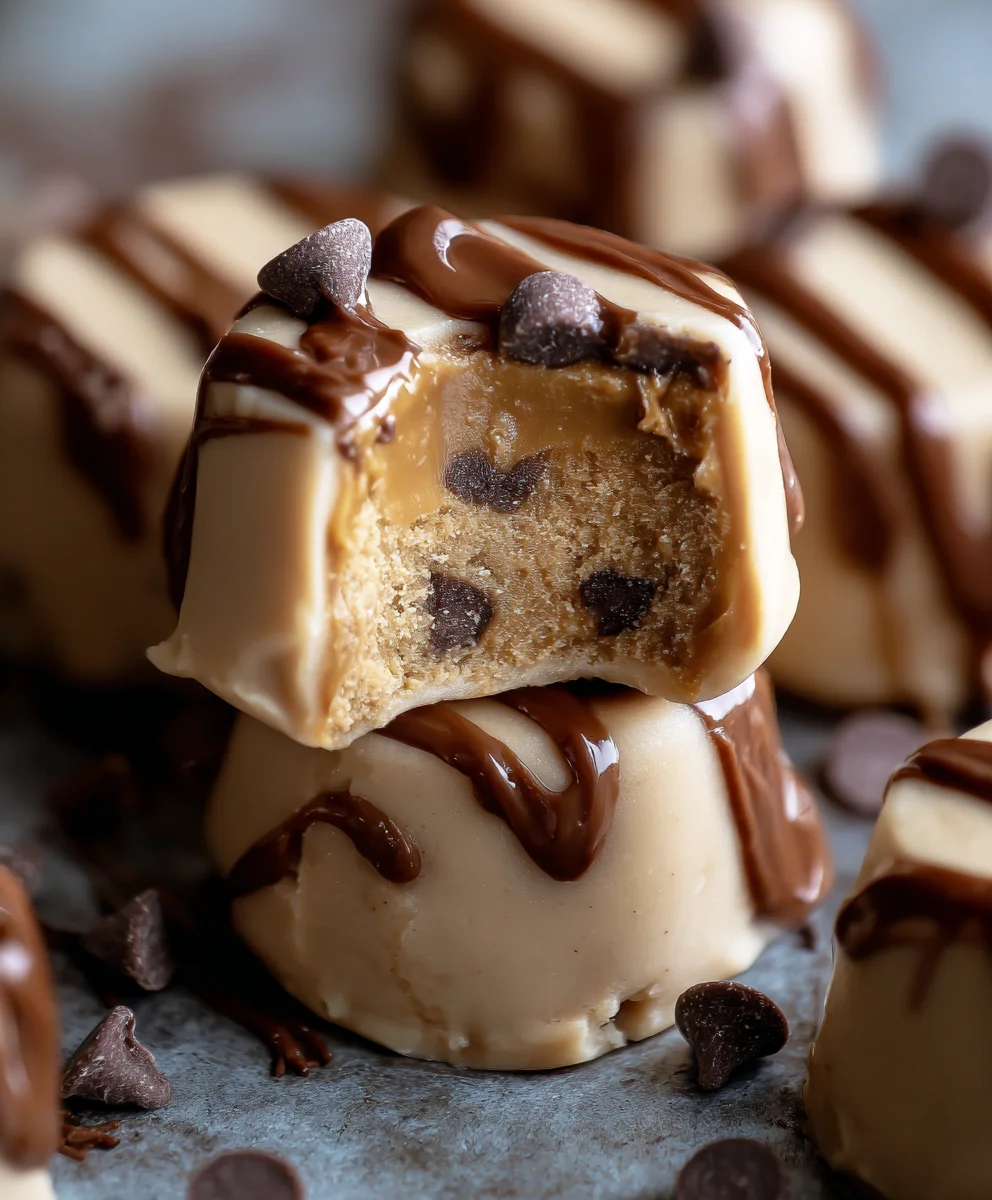
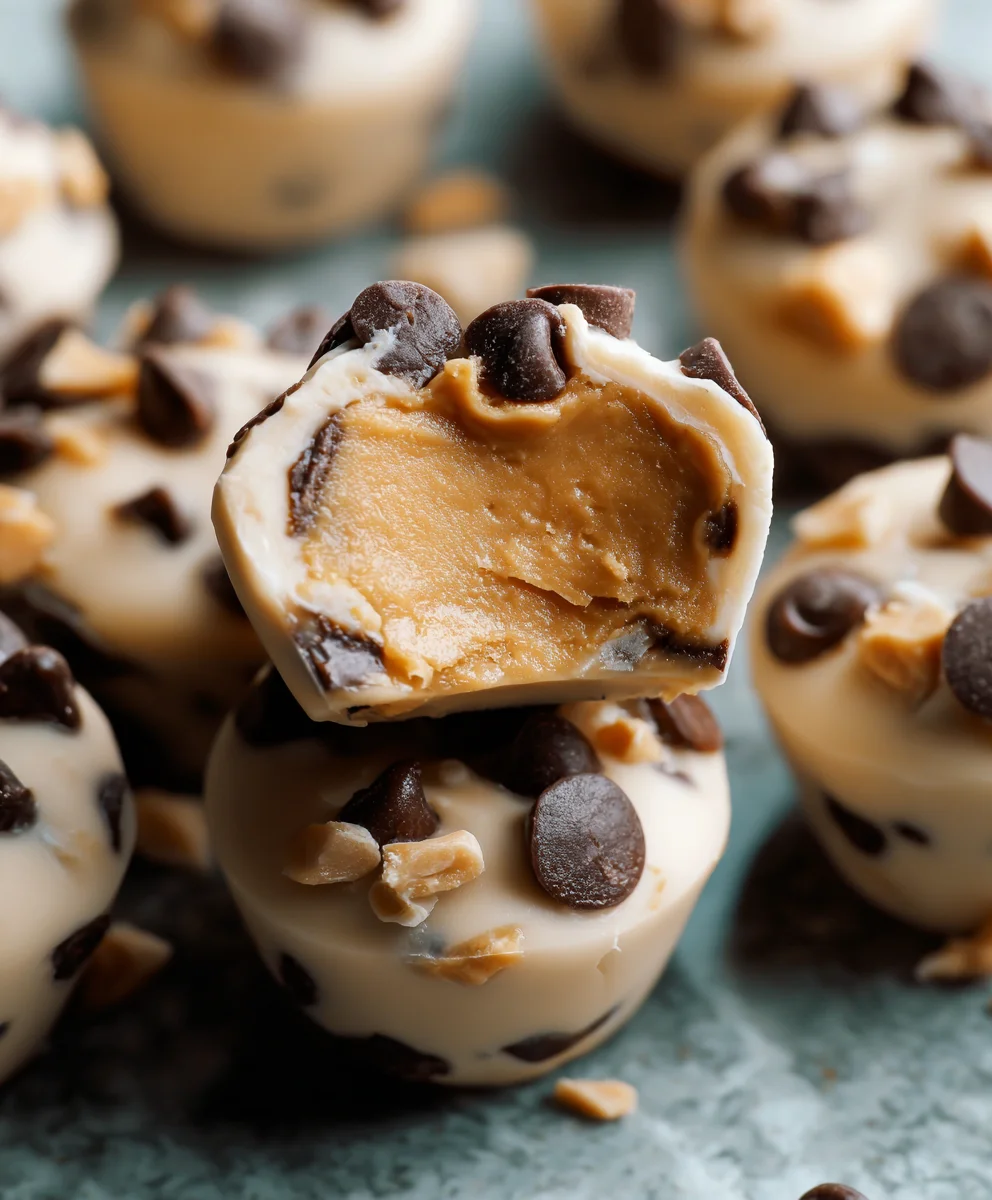
Now we move on to adding those nutritious boosts that make these bites more than just a simple sweet. Carefully fold in the mini chocolate chips and the chia seeds. The mini chocolate chips are a delightful surprise, offering little bursts of chocolatey goodness with every bite. If you only have regular chocolate chips, you can chop them into smaller pieces for a more even distribution. For the chia seeds, these tiny powerhouses are packed with fiber and omega-3 fatty acids. They also absorb some of the moisture from the mixture, helping to give the bites a slightly firmer texture once frozen. Stir gently to ensure the chocolate chips and chia seeds are evenly distributed throughout the peanut butter and yogurt base. You don’t want all the chocolate in one corner!
Forming and Freezing the Bites
With your delicious mixture ready, it’s time to shape these into individual bites. You have a couple of options here, depending on your preference and the tools you have available. One effective method is to use a small cookie scoop or two spoons to portion out small, roughly tablespoon-sized mounds of the mixture onto a parchment-lined baking sheet. Parchment paper is essential here to prevent sticking and make for easy removal later. The mounds don’t need to be perfectly round; a slightly rustic look is charming.
Alternatively, if you want more uniform bites, you can lightly grease your hands with a neutral oil (like coconut or vegetable oil) and then roll small portions of the mixture into little balls. This method can be a bit sticky, so work quickly and keep a damp cloth handy for wiping your hands. Once your bites are portioned and arranged on the baking sheet, place the entire sheet into your freezer.
The Freezing Process
This is the crucial step that turns our creamy mixture into firm, delightful treats. Place the baking sheet with the shaped bites into your freezer. It’s important to let them freeze until they are solid. This will typically take at least 2 to 3 hours, but it’s best to check them after that time. You want them to be firm enough to handle without deforming. Freezing them on the baking sheet first ensures they keep their shape. Once they are fully frozen and solid, you can then transfer them into a freezer-safe container or a resealable plastic bag for longer-term storage. This prevents them from sticking together in a giant clump in your freezer and keeps them perfectly portioned for easy grabbing. They can be stored in the freezer for up to a month, though I doubt they’ll last that long!
Serving Your Frozen Delights
When that craving strikes, simply reach into your freezer and grab a few of these Frozen Greek Yogurt Peanut Butter Bites. They are best enjoyed straight from the freezer. The texture should be firm but yield to a slight bite, with the creamy peanut butter and tangy yogurt contrasting beautifully with the melt-in-your-mouth chocolate chips. If they seem too hard to bite into immediately, let them sit at room temperature for just a minute or two. They are a fantastic snack for an afternoon pick-me-up, a post-workout reward, or even a healthier dessert option. Enjoy this incredibly simple yet satisfying treat that’s sure to become a staple in your freezer!
Conclusion:
And there you have it – your guide to crafting the perfect Frozen Greek Yogurt Peanut Butter Bites: Your Freezer’s New Best Friend! We’ve walked through the simple steps to create these delightful, healthy treats that are sure to become a staple in your household. Whether you’re looking for a post-workout refuel, a guilt-free dessert, or a quick energy boost, these bites deliver. Don’t be afraid to get creative with your toppings and mix-ins; the possibilities are truly endless!
Serve these frozen delights straight from the freezer for a refreshing and satisfying snack. They’re fantastic on their own, but you can also pair them with fresh fruit or a drizzle of honey for an extra touch of sweetness. Consider adding a sprinkle of granola for added crunch or a few dark chocolate chips for a richer flavor profile. The beauty of these Frozen Greek Yogurt Peanut Butter Bites: Your Freezer’s New Best Friend lies in their adaptability. Feel free to experiment with different nut butters or even add a touch of vanilla extract to the yogurt mixture. We encourage you to make them your own and enjoy the delicious results!
Frequently Asked Questions:
Q1: How long do the Frozen Greek Yogurt Peanut Butter Bites: Your Freezer’s New Best Friend last in the freezer?
Stored properly in an airtight container or freezer bag, these bites can be enjoyed for up to 2-3 months. Ensure they are completely frozen before sealing the container to prevent ice crystals from forming.
Q2: Can I make these vegan?
Absolutely! To make these Frozen Greek Yogurt Peanut Butter Bites: Your Freezer’s New Best Friend vegan, simply substitute the Greek yogurt with a thick, unsweetened plant-based yogurt, such as coconut or soy yogurt. Ensure your peanut butter is also vegan-friendly.
Q3: What are some other healthy mix-in ideas?
Beyond the suggested toppings, consider adding chia seeds, flax seeds, shredded coconut, or even a dash of cinnamon for extra flavor and nutritional benefits. Chopped nuts like almonds or walnuts also make a great addition for texture and healthy fats.
Frozen Greek Yogurt Peanut Butter Bites
Simple and healthy no-bake treats made with creamy peanut butter, Greek yogurt, and nutritious add-ins, frozen to perfection.
Ingredients
-
1 cup creamy peanut butter
-
½ cup plain Greek yogurt
-
2 tablespoons honey or maple syrup
-
½ teaspoon vanilla extract
-
A pinch of cinnamon
-
2 tablespoons mini chocolate chips
-
1 tablespoon chia seeds
Instructions
-
Step 1
In a medium bowl, combine peanut butter and Greek yogurt until smooth. -
Step 2
Stir in honey or maple syrup, vanilla extract, and cinnamon until well combined. -
Step 3
Gently fold in the mini chocolate chips and chia seeds. -
Step 4
Using a small cookie scoop or spoons, portion the mixture into small mounds onto a parchment-lined baking sheet. -
Step 5
Freeze the baking sheet for 2-3 hours, or until the bites are solid. -
Step 6
Once frozen, transfer the bites to a freezer-safe container or bag for storage.
Important Information
Nutrition Facts (Per Serving)
It is important to consider this information as approximate and not to use it as definitive health advice.
Allergy Information
Please check ingredients for potential allergens and consult a health professional if in doubt.