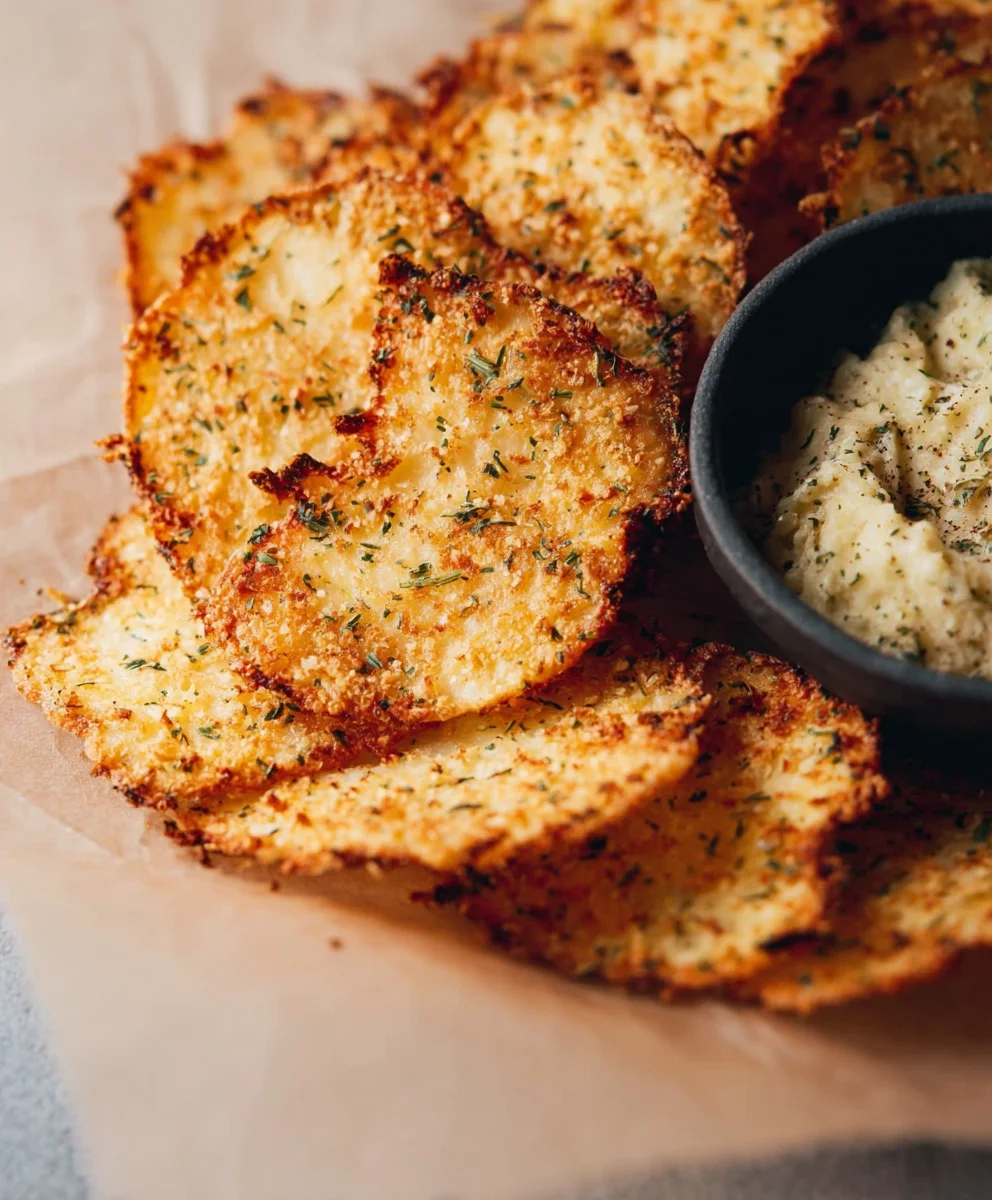
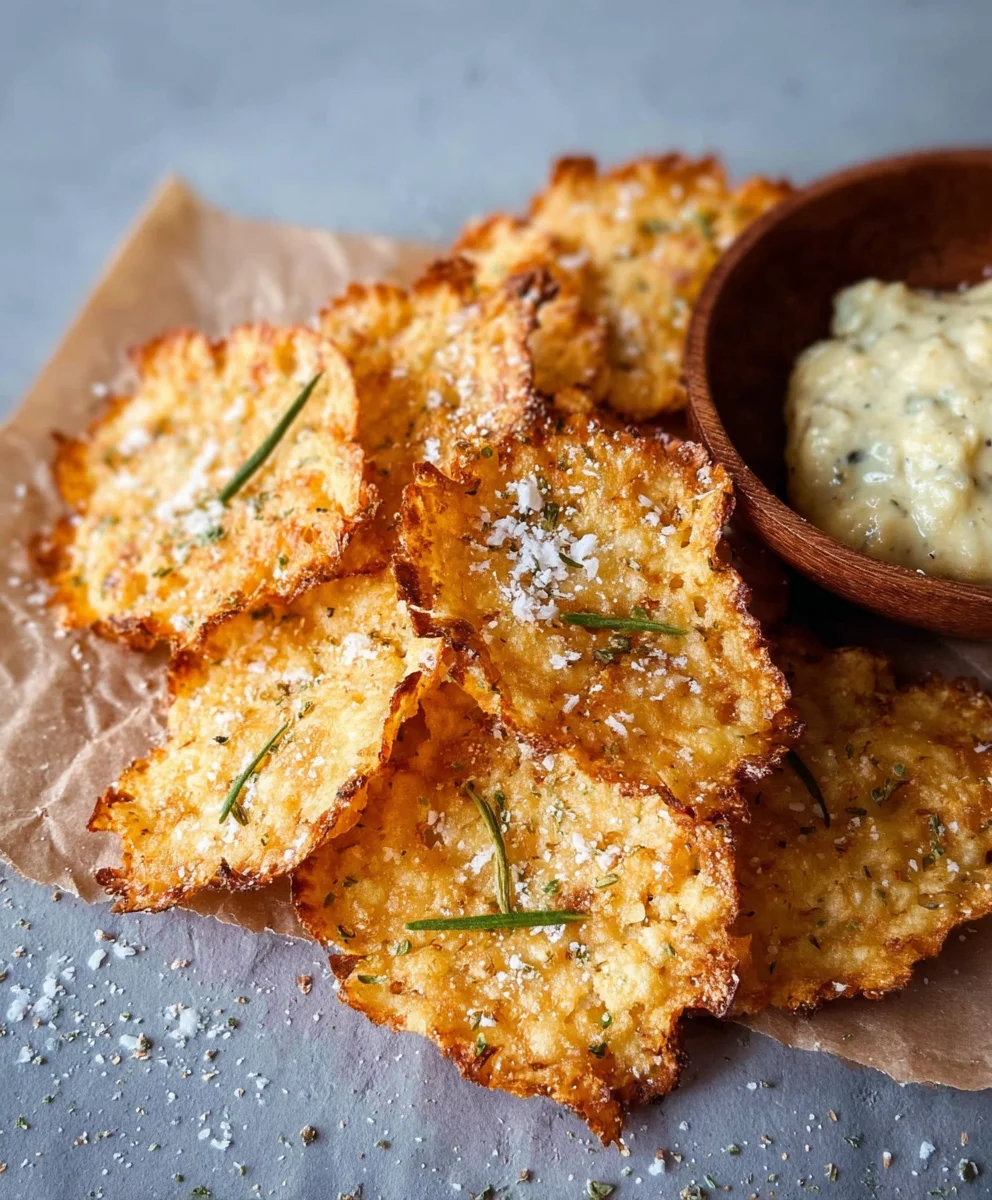
Crispy Cottage Cheese Chips – Easy & Healthy Snack
Crispy Cottage Cheese Chips are the answer to your savory snack cravings, delivering an unbelievably satisfying crunch without the guilt. If you’ve ever dreamed of a low-carb, high-protein alternative to traditional potato chips, your search ends here. These delectable crisps have taken the internet by storm, and it’s easy to see why. People adore them for their remarkable versatility – they’re perfect for dipping, crum extractbling over salads, or simply enjoying straight from the oven. What truly sets these crispy cottage cheese chips apart is their incredible texture and the fact that they’re made from such a simple, wholesome base. Forget complicated ingredients; we’re transforming humble cottage cheese into a golden, flavorful masterpiece that will have you reaching for more.
Ingredients:
- 1 cup cottage cheese (small curds, drained)
- ¼ teaspoon garlic powder
- ¼ teaspoon onion powder
- ½ teaspoon dried herbs (optional, like thyme or parsley)
- Salt and pepper to taste
- Olive oil spray
Making Your Crispy Cottage Cheese Chips
This recipe is all about transforming humble cottage cheese into incredibly addictive, crispy chips. We’re going for a simple yet flavorful profile that lets the unique texture of the cottage cheese shine through. The key to achieving that perfect crisp lies in properly draining the cheese and ensuring a thin, even layer for baking. Don’t be intimidated by the idea of baking cottage cheese; it’s surprisingly straightforward and the results are worth it! Get ready to enjoy a guilt-free snack that’s packed with protein and bursting with savory goodness. We’ll guide you through each step to ensure your crispy cottage cheese chips turn out perfectly every time.
Preparation Steps
-
Drain the Cottage Cheese
This is arguably the most crucial step for achieving crispy chips. Cottage cheese, especially the small curd variety, holds a significant amount of whey (the watery liquid). To get rid of this excess moisture, place your cottage cheese in a fine-mesh sieve. You can rest the sieve over a bowl or the sink to catch the draining liquid. Let it sit for at least 30 minutes, or even longer if you have the time, pressing gently with a spoon occasionally to encourage more liquid to escape. The goal is to have a relatively dry, thick curd. Once drained, transfer the cottage cheese to a bowl.
-
Season the Cottage Cheese Mixture
Now it’s time to add flavor to our cottage cheese base. To the drained cottage cheese, add the garlic powder and onion powder. These provide a foundational savory aroma and taste that’s universally appealing. If you’re feeling a bit more adventurous or simply enjoy a more complex herb profile, now is the time to incorporate your dried herbs. Thyme, parsley, or even a blend of Italian herbs work wonderfully. Remember, these are dried herbs, so a little goes a long way in concentrating their flavor. Season generously with salt and freshly ground black pepper. Don’t be shy with the salt, as it helps to enhance all the other flavors and contributes to the crisping process. Mix everything together thoroughly with a fork or spoon until all the seasonings are evenly distributed throughout the cottage cheese. Ensure there are no clumps of seasoning.
-
Forming the Chips
This step requires a bit of care to ensure even cooking and crisping. You’ll need baking sheets lined with parchment paper. Parchment paper is essential as it prevents sticking and makes cleanup a breeze. Now, spoon small dollops of the seasoned cottage cheese mixture onto the prepared baking sheets. Aim for about a tablespoon per dollop. The key to getting them crispy is to spread each dollop very thinly and evenly into small rounds, no larger than a couple of inches in diameter. You can use the back of your spoon or a small offset spatula for this. The thinner they are, the crispier they will become. Think of them as mini pancakes, but spread out much thinner. Leave a little space between each chip, as they might spread slightly as they bake.
-
Baking for Crispiness
Preheat your oven to 350°F (175°C). Once the oven is preheated and your chips are formed, place the baking sheets in the oven. Now, the baking time is where patience comes in. Bake for approximately 20-30 minutes. The exact time will depend on the thickness of your chips and your oven’s calibration. What you’re looking for is for the edges to start turning golden brown and for the chips to firm up and appear drier. About halfway through the baking process, around the 10-15 minute mark, it’s a good idea to rotate your baking sheets from top to bottom and front to back. This ensures even baking across all the chips. You might also see a little bit of browning in the center. If some chips are crisping up faster than others, you can carefully remove them from the baking sheet with a spatula and set them aside while the others continue to bake.
-
Cooling and Enjoying
Once your crispy cottage cheese chips have reached that perfect golden-brown and firm texture, carefully remove the baking sheets from the oven. Let them cool on the baking sheets for a few minutes. As they cool, they will continue to crisp up further. Once they are cool enough to handle but still warm, you can carefully lift them off the parchment paper with a spatula. Transfer them to a wire rack to cool completely. This allows air to circulate around them, ensuring maximum crispness. Once completely cooled, your Crispy Cottage Cheese Chips are ready to be enjoyed! They are best eaten the same day for ultimate crispiness, but can be stored in an airtight container for a day or two, though they may lose some of their crispness.
Conclusion:
You’ve now mastered the art of creating delicious and incredibly satisfying Crispy Cottage Cheese Chips! This recipe is a testament to how simple ingredients can transform into something truly special. The delightful crunch and surprisingly cheesy flavor make these chips a perfect guilt-free snack. We hope you enjoy making and sharing them as much as we do!
These Crispy Cottage Cheese Chips are incredibly versatile. Serve them on their own for a quick and healthy bite, or get creative with your accompaniments! They pair wonderfully with your favorite dips like hummus, guacamole, or a creamy yogurt-based dip. For a more substantial appetizer, crum extractble them over salads for added texture, or use them as a unique topping for soups. Don’t be afraid to experiment with seasonings; a sprinkle of smoked paprika, garlic powder, or even a touch of chili flakes can elevate these chips to new heights.
We encourage you to try different flavor combinations and discover your personal favorites. The beauty of Crispy Cottage Cheese Chips lies in their adaptability. So go forth, experiment, and enjoy the process of creating your own delicious and healthy snack!
Frequently Asked Questions:
Q: Can I make Crispy Cottage Cheese Chips ahead of time?
A: Yes, you can! Once completely cooled, store your Crispy Cottage Cheese Chips in an airtight container at room temperature for up to 3-4 days. However, they are best enjoyed within the first couple of days for optimal crispiness.
Q: My chips aren’t getting crispy. What could be wrong?
A: Ensure your oven temperature is accurate and that the chips are spread in a single layer on the baking sheet. Also, make sure you’re baking them long enough, allowing the moisture to evaporate thoroughly. If they’re still not crisp enough, you can try baking them at a slightly lower temperature for a longer duration.
Q: Can I use flavored cottage cheese for Crispy Cottage Cheese Chips?
A: While you can experiment, it’s generally recommended to use plain, full-fat cottage cheese. Flavored varieties might contain added sugars or artificial ingredients that could affect the baking process and the final taste and texture of your Crispy Cottage Cheese Chips.
Crispy Cottage Cheese Chips
Easy and healthy snack chips made from cottage cheese, seasoned and baked until crispy.
Ingredients
-
1 cup cottage cheese (small curds, drained)
-
1/4 teaspoon garlic powder
-
1/4 teaspoon onion powder
-
1/2 teaspoon dried herbs (optional, like thyme or parsley)
-
Salt to taste
-
Pepper to taste
-
Olive oil spray
Instructions
-
Step 1
Drain the cottage cheese in a fine-mesh sieve for at least 30 minutes to remove excess whey. Transfer the drained cottage cheese to a bowl. -
Step 2
Add garlic powder, onion powder, dried herbs (if using), salt, and pepper to the drained cottage cheese. Mix thoroughly until all seasonings are evenly distributed. -
Step 3
Line baking sheets with parchment paper. Spoon small dollops (about 1 tablespoon each) of the seasoned cottage cheese mixture onto the prepared baking sheets. Spread each dollop very thinly and evenly into small rounds, no larger than a couple of inches in diameter. -
Step 4
Preheat oven to 350°F (175°C). Place the baking sheets in the oven and bake for 20-30 minutes, rotating halfway through, until the edges are golden brown and the chips appear firm and drier. -
Step 5
Remove the baking sheets from the oven. Let the chips cool on the baking sheets for a few minutes, then carefully transfer them to a wire rack to cool completely. Enjoy immediately for best crispiness.
Important Information
Nutrition Facts (Per Serving)
It is important to consider this information as approximate and not to use it as definitive health advice.
Allergy Information
Please check ingredients for potential allergens and consult a health professional if in doubt.