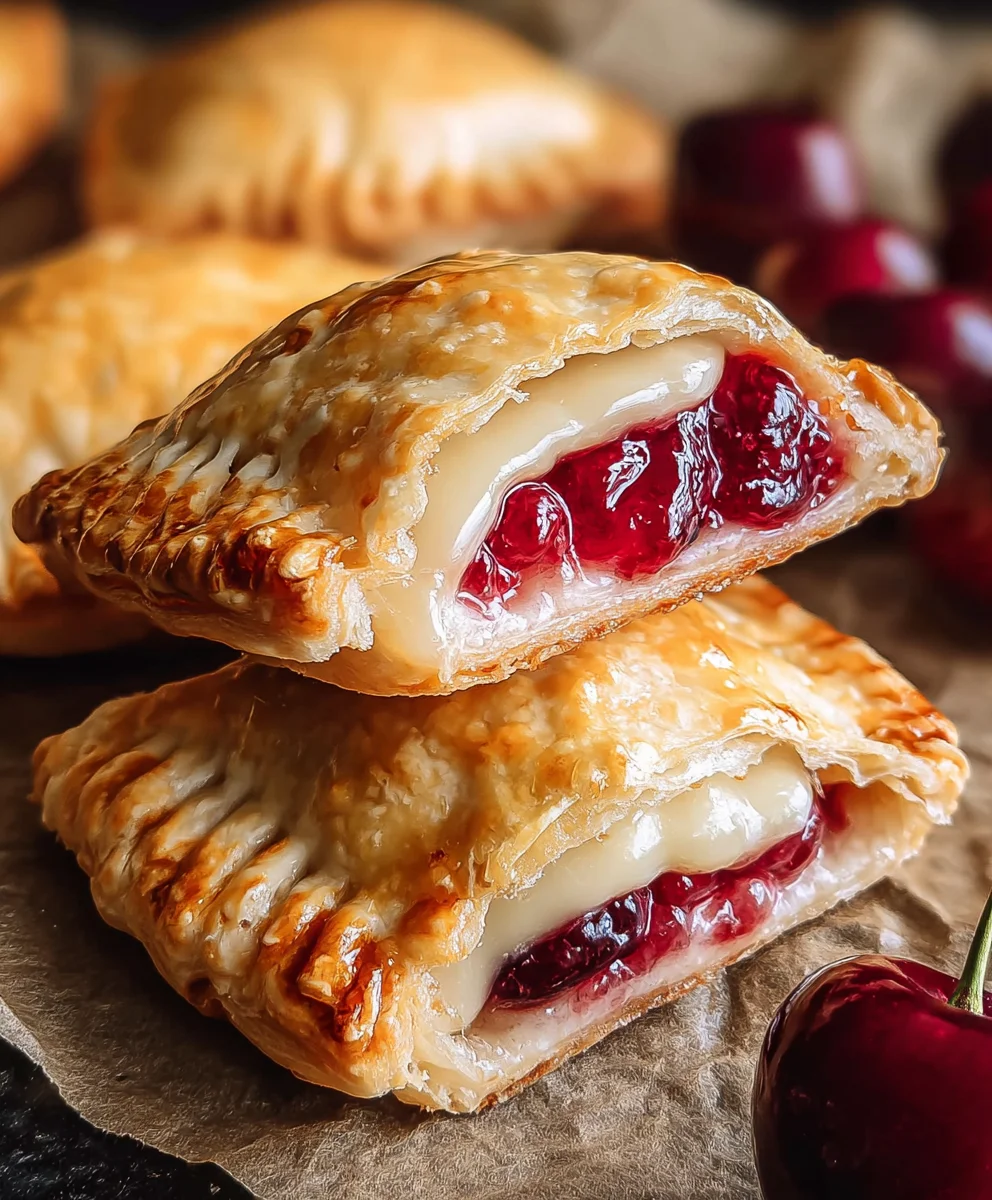
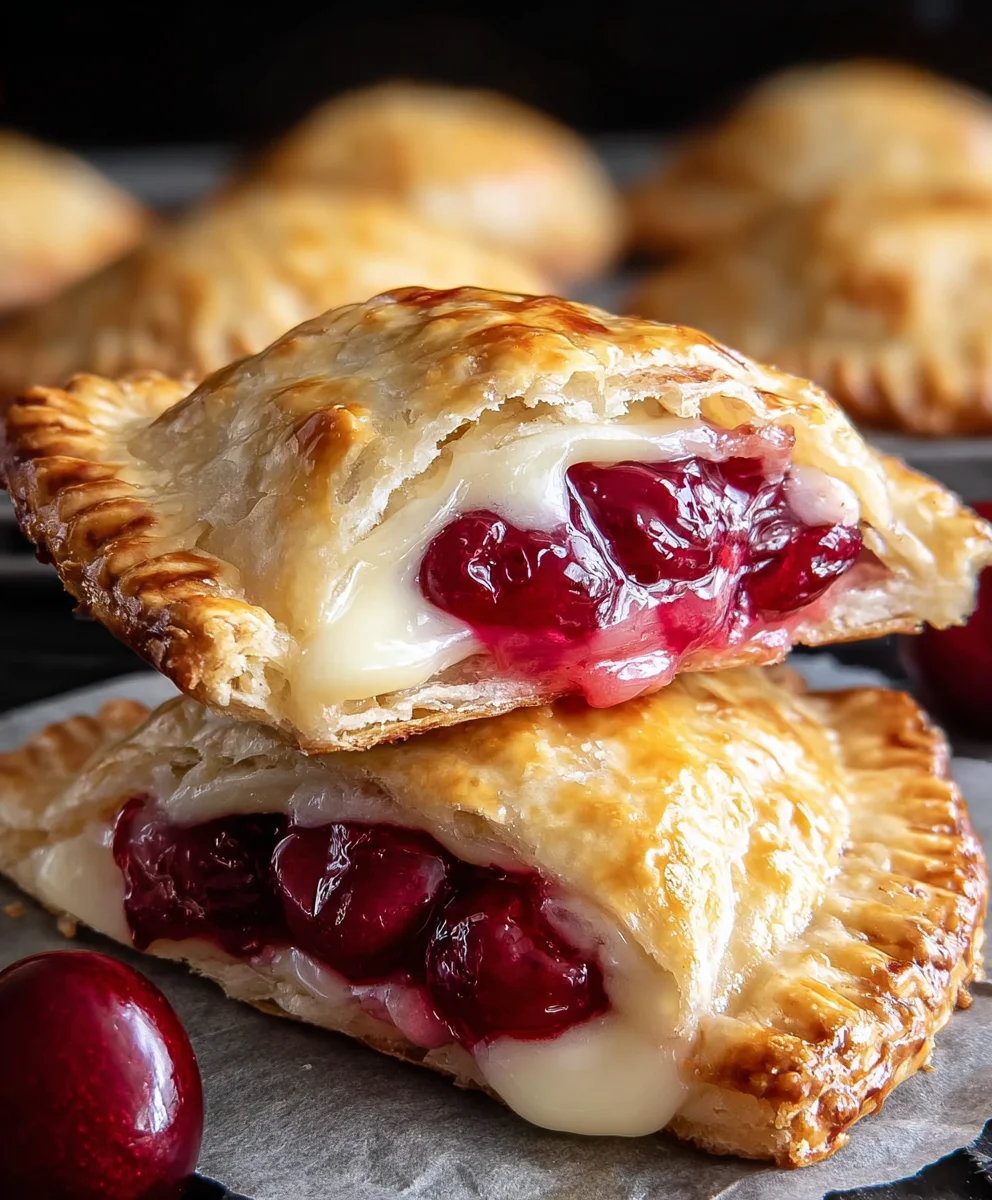
Cherry Cheesecake Hand Pies-Delicious Sweet Treats
Cherry Cheesecake Hand Pies are a delightful and convenient way to enjoy the classic flavors of cheesecake in a portable, handheld package. Imagin extracte the rich, creamy tang of cream cheese beautifully complemented by the sweet and slightly tart burst of perfectly cooked cherries, all encased in a flaky, buttery pastry. It’s no wonder these little treasures have captured so many hearts! The appeal is undeniable: they offer all the indulgence of a slice of cheesecake without the fuss of slicing, serving, or needing a fork. They are perfect for picnics, potlucks, a sweet afternoon treat, or even as a surprisingly sophisticated dessert for a party. What truly makes these cherry cheesecake hand pies so special is the perfect harmony of textures and tastes – the crisp crust giving way to a smooth, luscious filling, punctuated by those vibrant cherry jewels. Get ready to fall in love with this easy-to-make, crowd-pleasing delight!
Ingredients:
- 1/4 cup granulated sugar
- 4 oz cream cheese, softened
- 21 oz can cherry pie filling
- 1 package refrigerated pie crust (2 crusts)
- 1/2 cup powdered sugar
- 1 teaspoon corn syrup
- 1 tablespoon water
- Vegetable oil, for deep frying (about 4-6 cups)
Preparing the Filling
The heart of any great Cherry Cheesecake Hand Pie is its luscious filling. We’ll start by bringin extractg together the creamy, tangy cheesecake element with the sweet, fruity cherry goodness. In a medium bowl, combine the 4 oz of softened cream cheese with the 1/4 cup of granulated sugar. Cream cheese is best when it’s truly softened, meaning it should be pliable and easy to mix without any lumps. This usually takes about an hour at room temperature, or you can speed it up by carefully microwaving it in 10-second bursts, being careful not to melt it. Mix these two ingredients until they are wonderfully smooth and well combined. This creates a beautiful, slightly sweet base for our cheesecake flavor.
Next, gently fold in the entire 21 oz can of cherry pie filling. Don’t overmix at this stage; we want to maintain some of the texture from the cherries. The goal is to distribute the cherries evenly throughout the softened cream cheese mixture, creating a delightful marbled effect. This filling will be incredibly rich and satisfying, offering the perfect balance of tart cherries and creamy cheesecake. Set this prepared filling aside while we move on to preparing the pie crusts.
Assembling the Hand Pies
Now it’s time to bring everything together to create our individual Cherry Cheesecake Hand Pies. Open the package of refrigerated pie crusts. You’ll find two crusts inside, which is exactly what we need for this recipe. Carefully unroll each crust onto a lightly floured surface. Using a round cookie cutter or a small bowl with a diameter of about 4-5 inches, cut out as many circles as you can from each crust. You should aim for roughly 4-6 circles per crust, depending on the size of your cutter. Don’t worry if you don’t get perfectly uniform shapes; rustic charm is part of the appeal of hand pies!
Take one of your cut-out crust circles and place it in the palm of your hand or on your work surface. Spoon about 1-2 tablespoons of the prepared cherry cheesecake filling onto one half of the circle, leaving a small border around the edges. Be careful not to overfill, as this can make sealing the pies difficult and increase the risk of leakage during frying. Now, take another crust circle and carefully place it on top of the filling, aligning the edges as best as you can. Gently press the edges together with your fingers to seal them. For an extra secure seal and a decorative finish, you can use the tines of a fork to crimp the edges. Repeat this process with the remaining crust circles and filling until all the ingredients are used up.
Frying the Hand Pies
This is where the magic happens and our hand pies transform into golden, crispy delights! You’ll need a deep pot or Dutch oven for frying. Add about 4-6 cups of vegetable oil to the pot, ensuring there’s enough depth for the hand pies to be fully submerged. Heat the oil over medium-high heat until it reaches a temperature of 350°F (175°C). Using a thermometer is highly recommended for accurate frying. If you don’t have one, you can test the oil by dropping a small piece of pie crust into it. It should sizzle immediately and float to the surface, turning golden brown within about 30-45 seconds.
Carefully, using a slotted spoon or spider strainer, lower 2-3 hand pies into the hot oil at a time. It’s important not to overcrowd the pot, as this will lower the oil temperature and result in greasy pies. Fry the hand pies for about 3-4 minutes per side, or until they are a beautiful golden brown and puffed up. Keep an eye on them as they fry, as the filling can cause them to brown quickly. Once they are perfectly golden on both sides, carefully remove them from the oil using your slotted spoon and transfer them to a wire rack set over a baking sheet. This allows any excess oil to drain off, ensuring a crispy texture.
Creating the Glaze and Finishing Touches
While our Cherry Cheesecake Hand Pies are still warm, it’s time to add a sweet, glossy finish. In a small bowl, whisk together the 1/2 cup of powdered sugar, 1 teaspoon of corn syrup, and 1 tablespoon of water. Corn syrup is key here, as it helps to create a smooth, shiny glaze that hardens slightly but remains pleasantly chewy. Adjust the amount of water if needed to achieve your desired glaze consistency; you want it thick enough to coat the pies without being too runny.
Using a spoon or a small whisk, generously drizzle the glaze over the warm hand pies. The warmth of the pies will help the glaze spread and set beautifully. You can also dip the tops of the pies into the glaze for a more decadent coating. Once glazed, let the hand pies sit on the wire rack for about 10-15 minutes to allow the glaze to set. This step is crucial for that perfect finish. You can serve them warm for an extra gooey interior or at room temperature. These Cherry Cheesecake Hand Pies are a truly irresistible treat, perfect for any occasion!
Conclusion:
There you have it – a delightful and surprisingly easy recipe for Cherry Cheesecake Hand Pies! We’ve walked through creating these charming little pockets of joy, from the buttery, flaky crust to the creamy, tangy cheesecake filling and the sweet, vibrant cherry topping. These hand pies are perfect for any occasion, offering a delightful balance of flavors and textures that’s sure to impress. Imagin extracte serving these warm and fresh at a picnic, as a special treat for your family, or even as a fun baking project with kids. They’re versatile enough to be a dessert, a snack, or even a sweet breakfast indulgence.
For serving suggestions, consider dusting them with a touch of powdered sugar for extra elegance, or serving them alongside a dollop of whipped cream or a scoop of vanilla ice cream for an extra decadent experience. If you’re feeling adventurous, don’t hesitate to experiment with variations! You could swap the cherries for other berries like blueberries or raspberries, or even add a hint of lemon zest to the cheesecake filling for a brighter flavor profile. Perhaps even try a touch of almond extract in the crust for a nutty undertone. The possibilities are endless!
The beauty of these Cherry Cheesecake Hand Pies lies in their individual portions and their comforting, homemade appeal. We truly hope you enjoy making and, most importantly, eating them as much as we do. Don’t be intimidated if you’re new to pastry; with a little patience, you’ll be a hand pie pro in no time. So go ahead, preheat your oven, and get ready to create some delicious memories!
Frequently Asked Questions:
Q: Can I make the crust ahead of time?
A: Absolutely! You can prepare the pie crust dough and refrigerate it for up to 2 days or freeze it for up to 2 months. Just be sure to thaw it completely in the refrigerator before rolling it out.
Q: How should I store leftover Cherry Cheesecake Hand Pies?
A: Store any leftover hand pies in an airtight container at room temperature for up to 2 days, or in the refrigerator for up to 4 days. For longer storage, they can be frozen once completely cooled, either individually wrapped or in a freezer-safe container.
Cherry Cheesecake Hand Pies
Delicious sweet treats featuring a creamy cheesecake and tart cherry filling encased in a flaky pastry crust, deep-fried to golden perfection and drizzled with a sweet glaze.
Ingredients
-
1/4 cup granulated sugar
-
4 oz cream cheese, softened
-
21 oz can cherry pie filling
-
1 package refrigerated pie crust (2 crusts)
-
1/2 cup powdered sugar
-
1 teaspoon corn syrup
-
1 tablespoon water
-
Vegetable oil, for deep frying (about 4-6 cups)
Instructions
-
Step 1
Prepare the filling: In a medium bowl, combine softened cream cheese and granulated sugar until smooth. Gently fold in the cherry pie filling until evenly distributed. -
Step 2
Assemble the hand pies: Unroll pie crusts and cut out circles using a 4-5 inch cutter. Place 1-2 tablespoons of filling onto one half of each circle, leaving a border. Top with another crust circle, aligning edges. -
Step 3
Seal the edges: Gently press the edges together with fingers, then crimp with a fork for a secure seal. Repeat with remaining ingredients. -
Step 4
Fry the hand pies: Heat vegetable oil to 350°F (175°C) in a deep pot. Carefully fry 2-3 hand pies at a time for 3-4 minutes per side until golden brown. -
Step 5
Drain and cool: Remove fried hand pies with a slotted spoon and transfer to a wire rack to drain excess oil. -
Step 6
Make the glaze: Whisk together powdered sugar, corn syrup, and water until smooth and pourable. Adjust water for desired consistency. -
Step 7
Glaze and finish: Drizzle the glaze generously over the warm hand pies. Let them sit for 10-15 minutes for the glaze to set.
Important Information
Nutrition Facts (Per Serving)
It is important to consider this information as approximate and not to use it as definitive health advice.
Allergy Information
Please check ingredients for potential allergens and consult a health professional if in doubt.